Managing Users
This page explains how to add/create users individually, upload Bulk Users, explains in detail each tab of the user profile, and explains how to Add/Create User Profiles in Bulk.
5.1 Add/Create Users Individually
Note
Admin or Manager privileges (role) are required to add users.
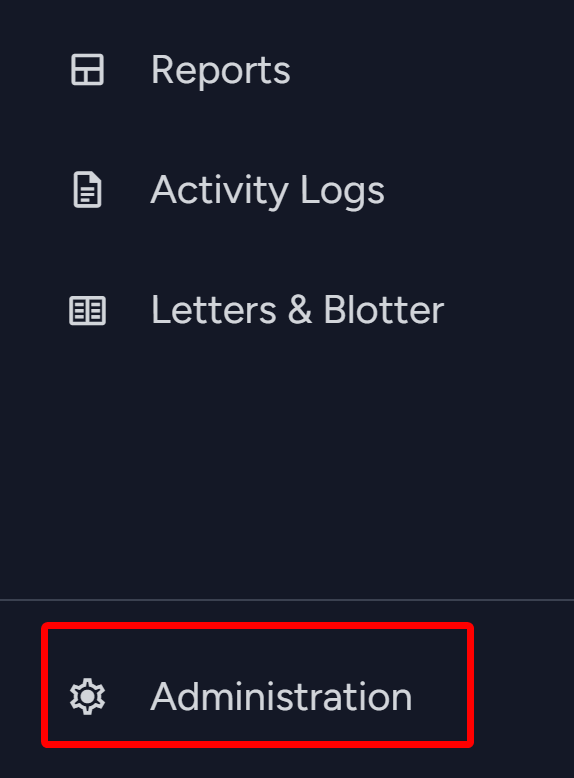
- From the side navigation menu, navigate to Administration > Users as shown below.
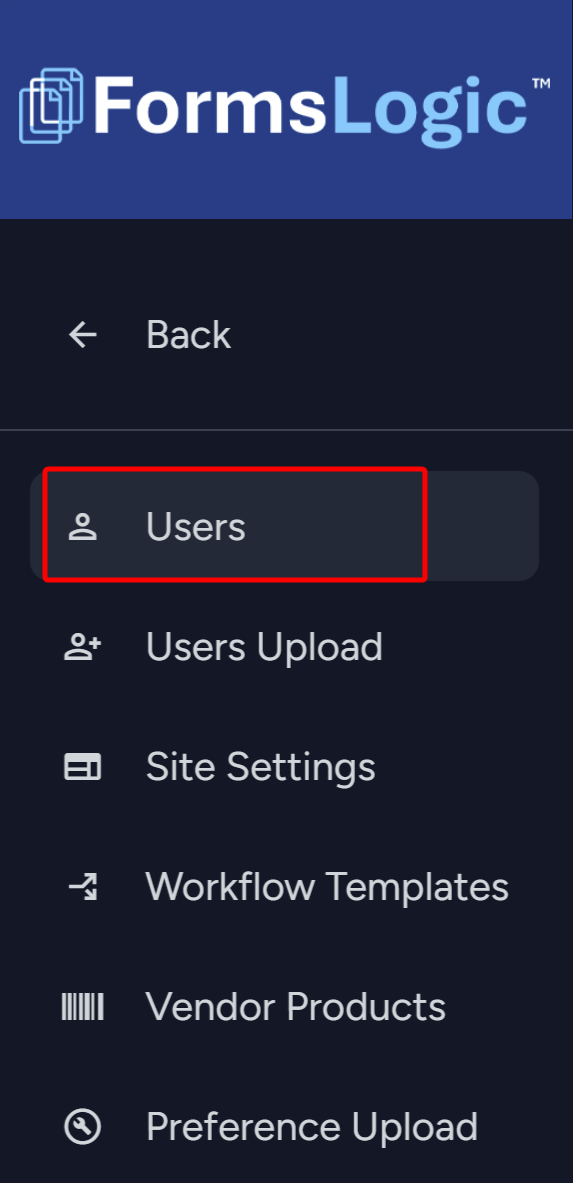
- The system will navigate to the Users page. To create a new user, click the New User button.

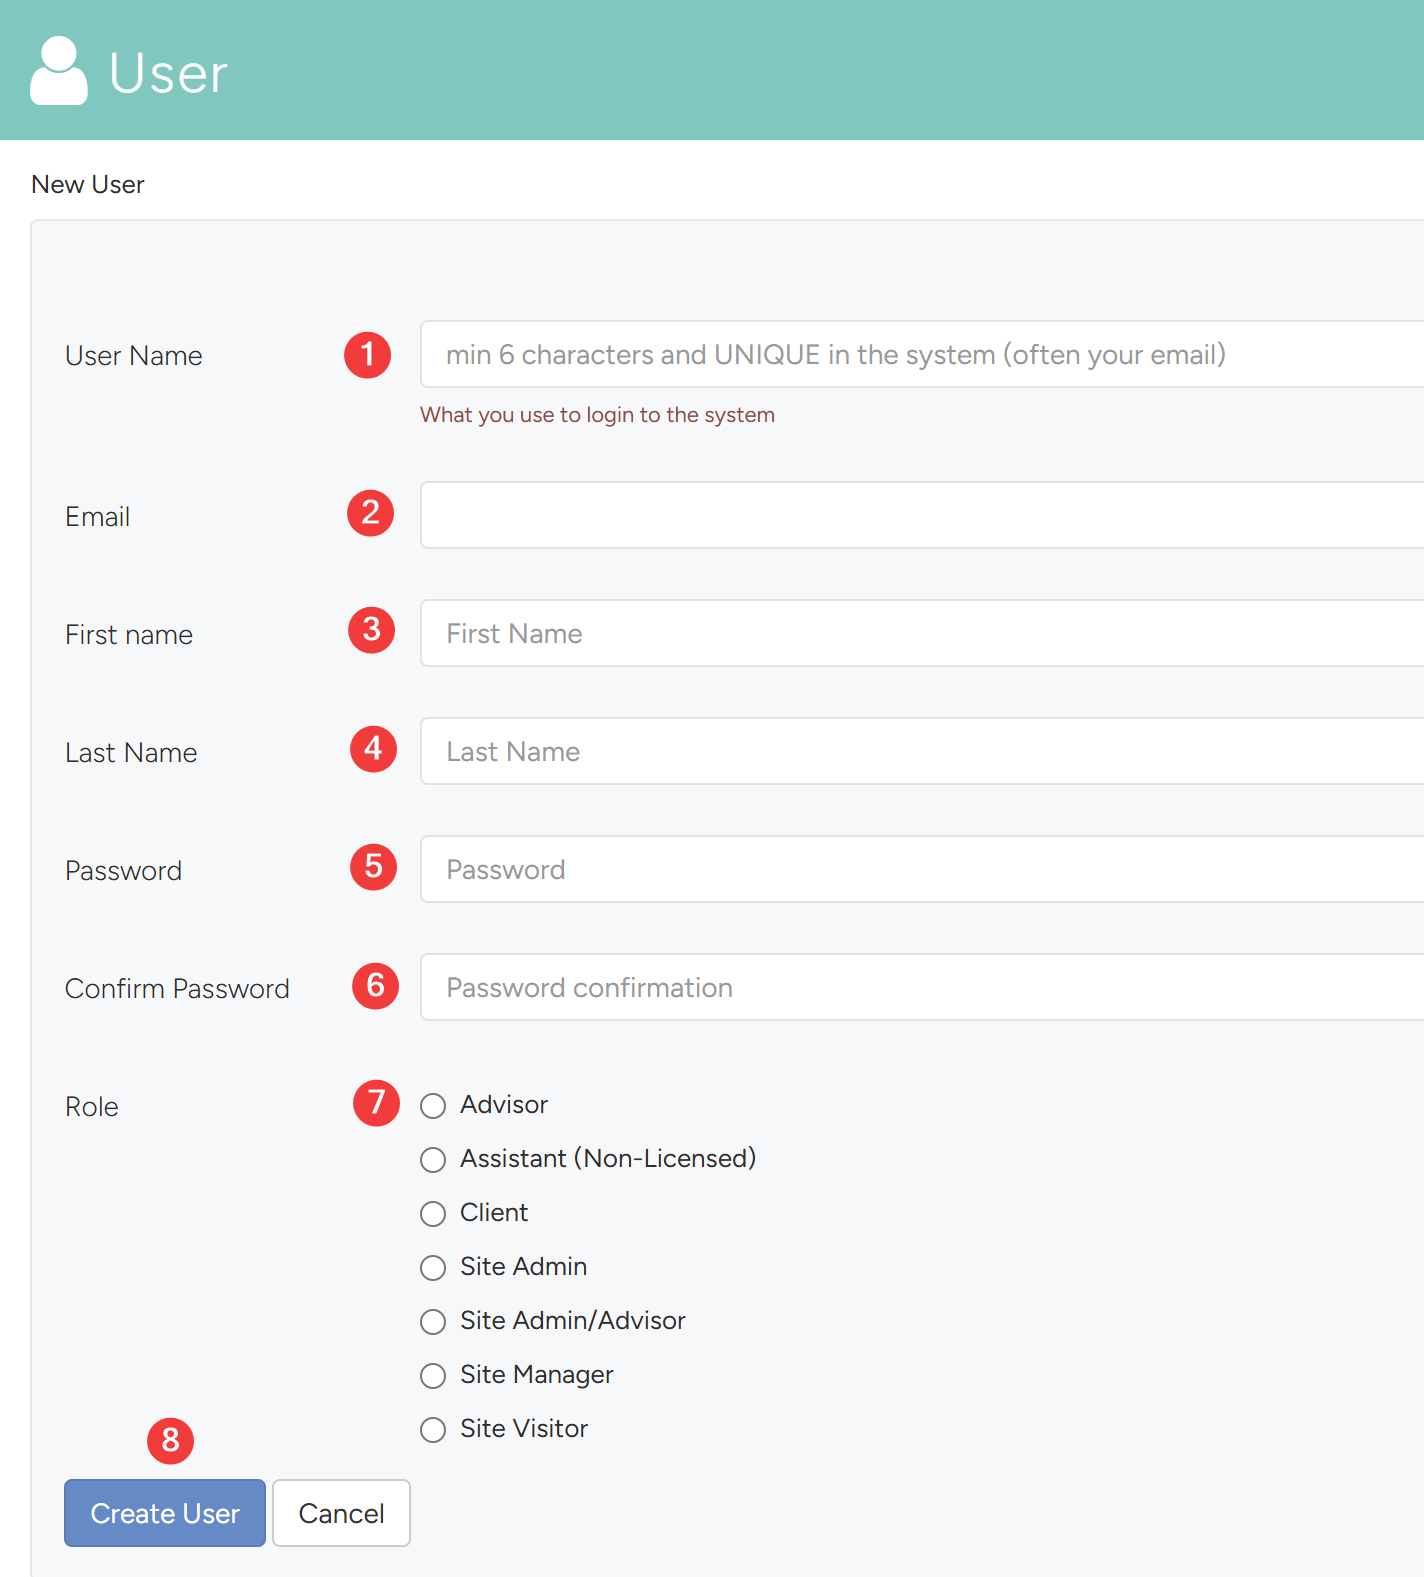
- The system will navigate to this page. Here you will do the following:
- User Name: Enter appropriate user name in this field.
- Email: User’s email. The email must be unique.
- First Name: Enter User’s First name.
- Last Name: Enter User’s Last name.
- Password: Enter User’s password.
- Confirm Password: Retype the User’s password.
- Role: Select the appropriate User Role.
- Once all data is filled, click the Create User button to save the record.
5.2 Bulk User Upload
- Forms Logic has the option to bulk upload users into the system. To get started, contact the Forms Logic support team. They will send the User Upload Excel Template and perform the upload once the file is complete.
- Fill out the User Upload Excel Template with your user data.
- Send the completed file back to the support team, who will perform the bulk upload.
Note
Just provide us the data in the User Upload Excel Template and we will do the rest!
5.2.1 Instructions for the User Upload Excel Template
- The User Upload Excel Template will look like this:

- When filling out the template, keep the following in mind:
- Required fields are marked in Red and include:
- Email, First Name, Last Name, Business Unit, Role, SS#, and DOB.
- All other fields are optional, but the more information provided, the better.
- Column order must remain as-is. Non-required fields may be left blank.
- Do not use dashes when entering SS#.
- DOB format must be mm/dd/yyyy.
- Include rep codes, mailing addresses, and branch names where available.
- Indicate supervisor relationships — who oversees which reps’ business across multiple levels if available
- Indicate rep assistant relationships — which reps is each assistant assigned to if available.
- Refer to the Role Definitions tab in the excel to understand how to assign user roles
- Required fields are marked in Red and include:
5.3 Edit Users / Add Optional Data
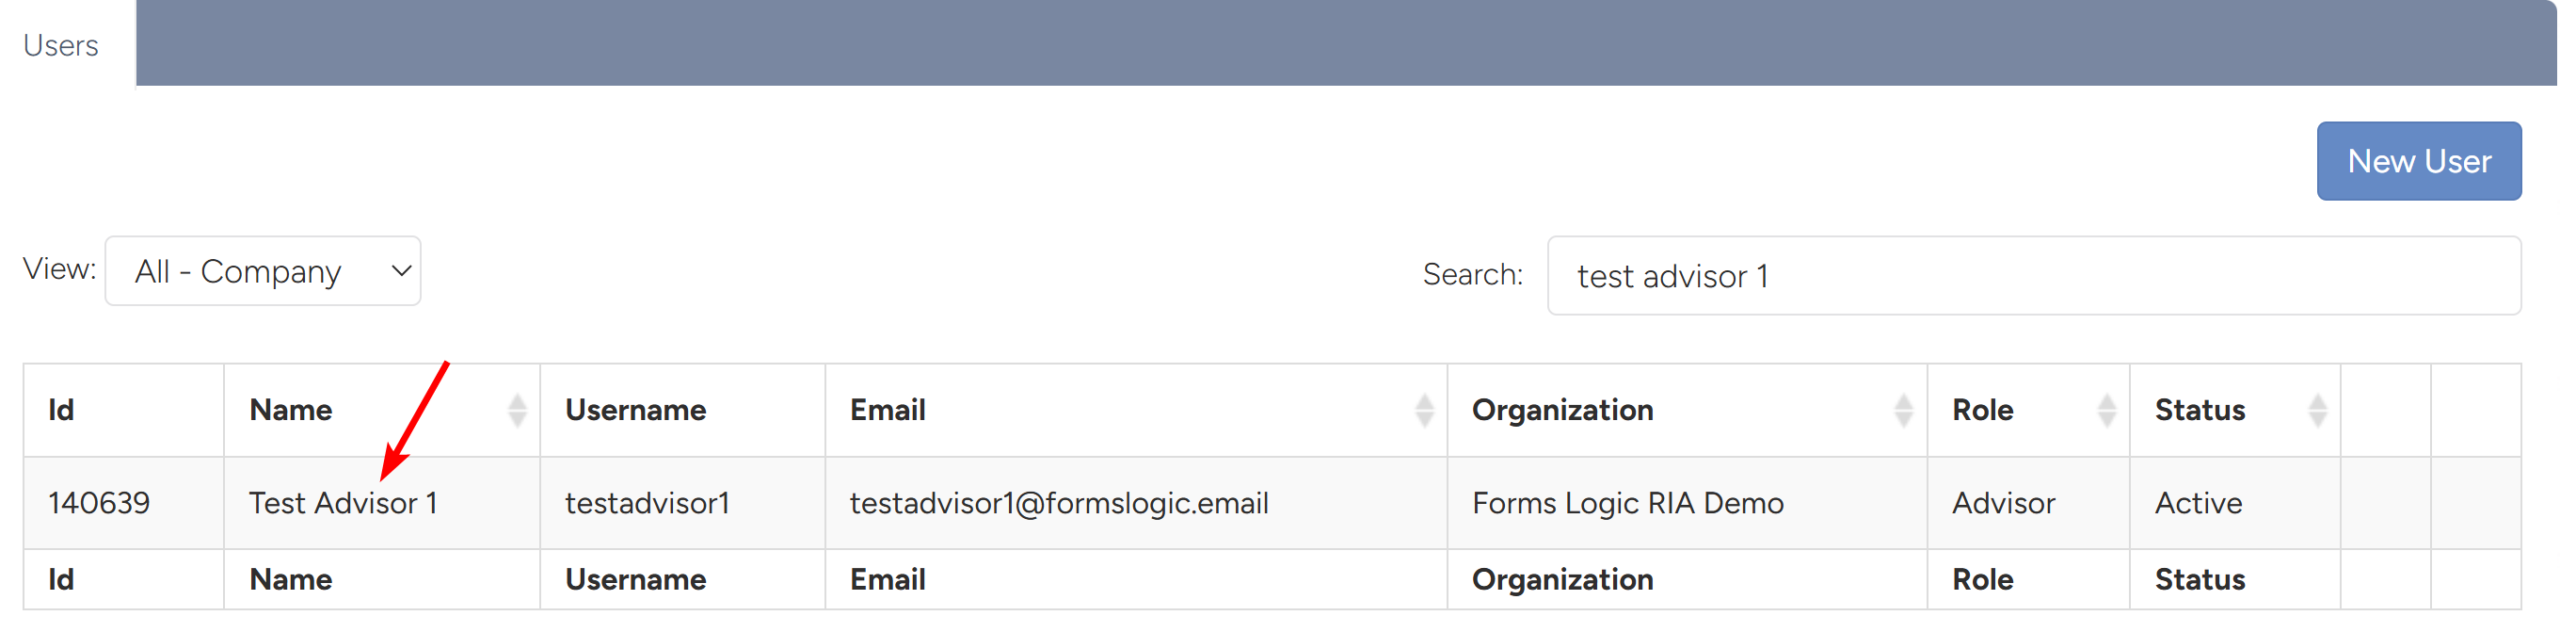
- To open the profile of the user you have just created, navigate to the user list and click on the user’s name.
5.3.1 General Tab
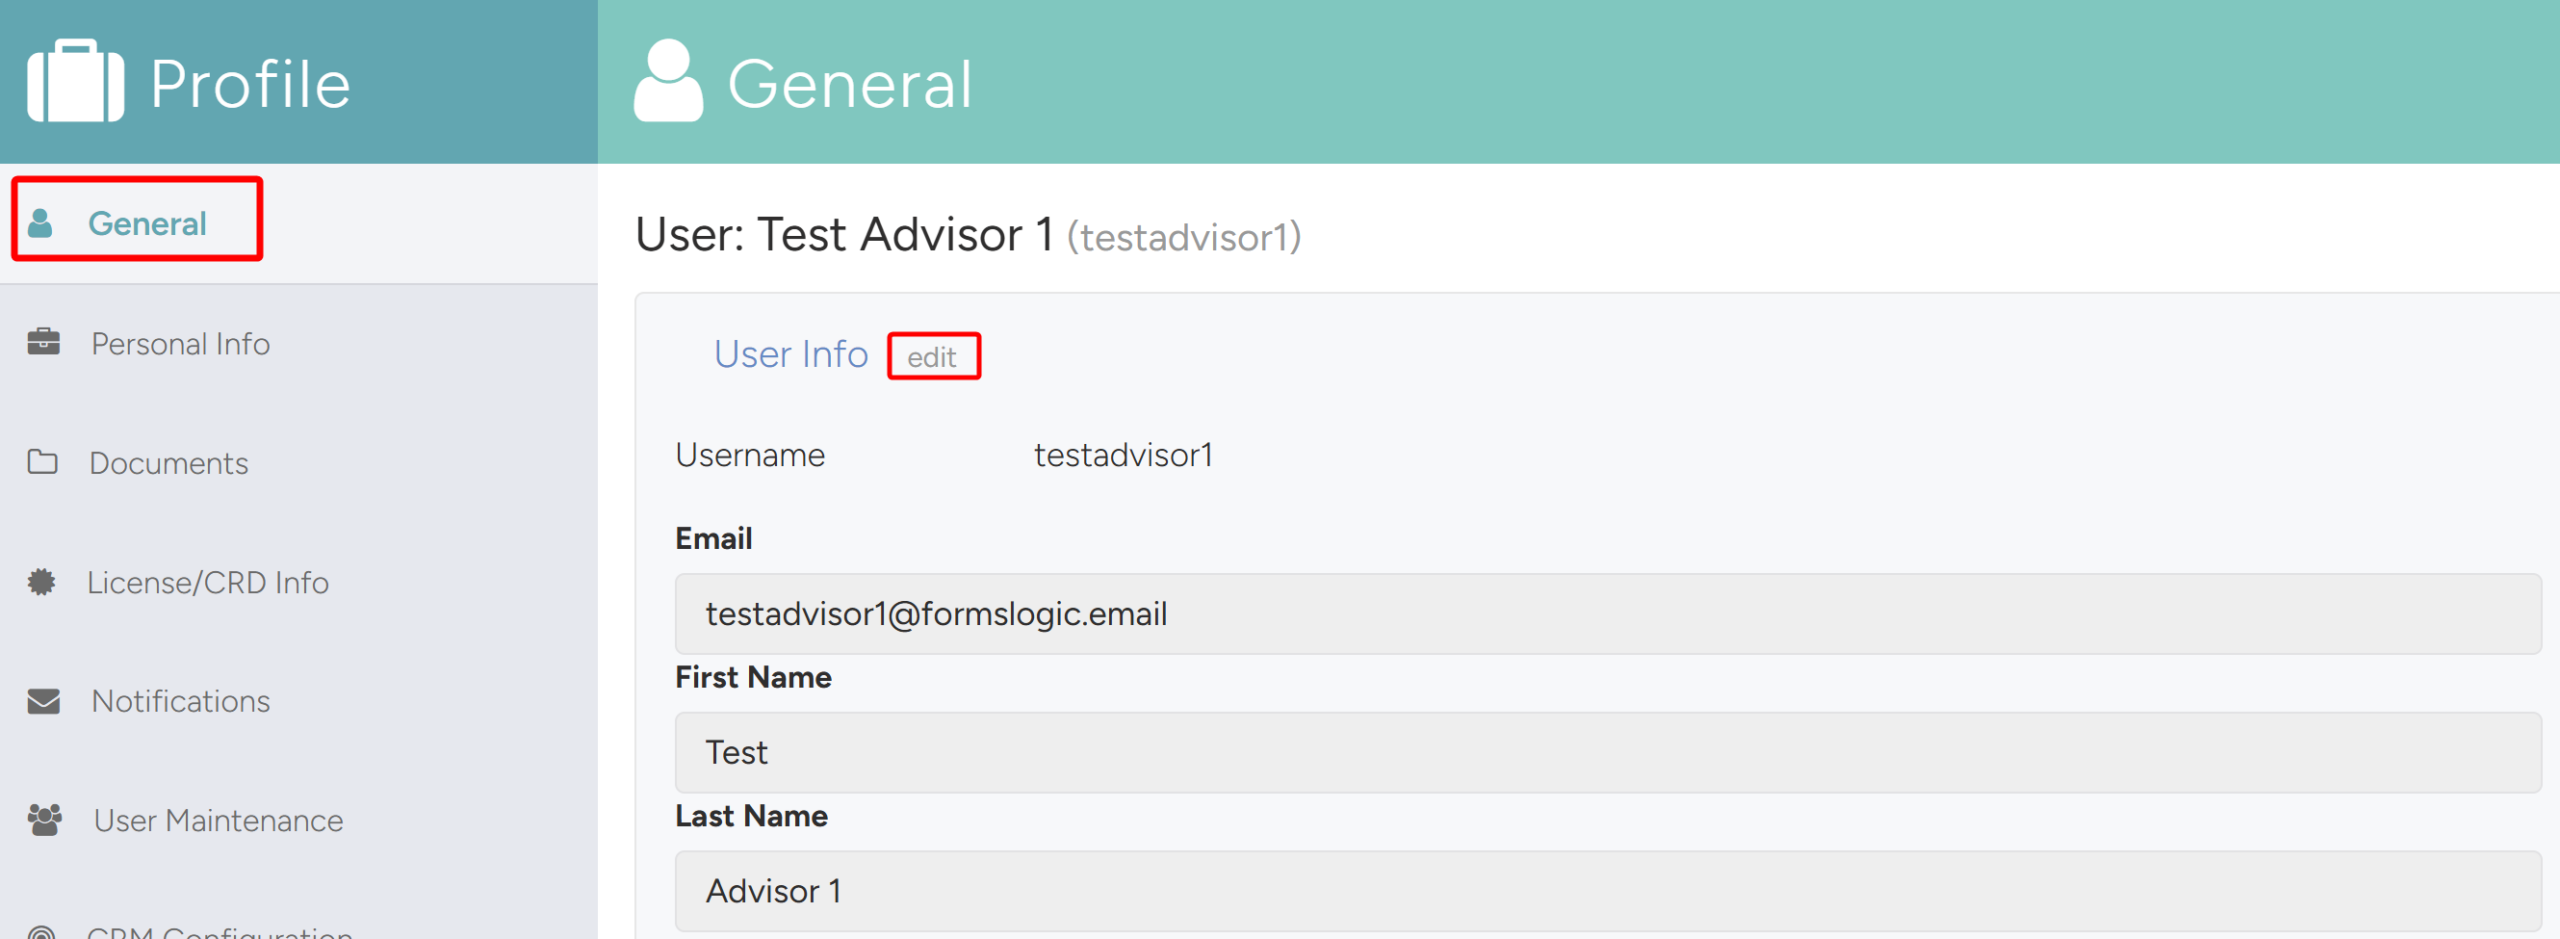
- The user’s profile will open. In the General Tab, click the edit button next to the section items to start editing the user profile as shown in the screen below.
5.3.1.1 Can View My Work/Can Edit My Profile
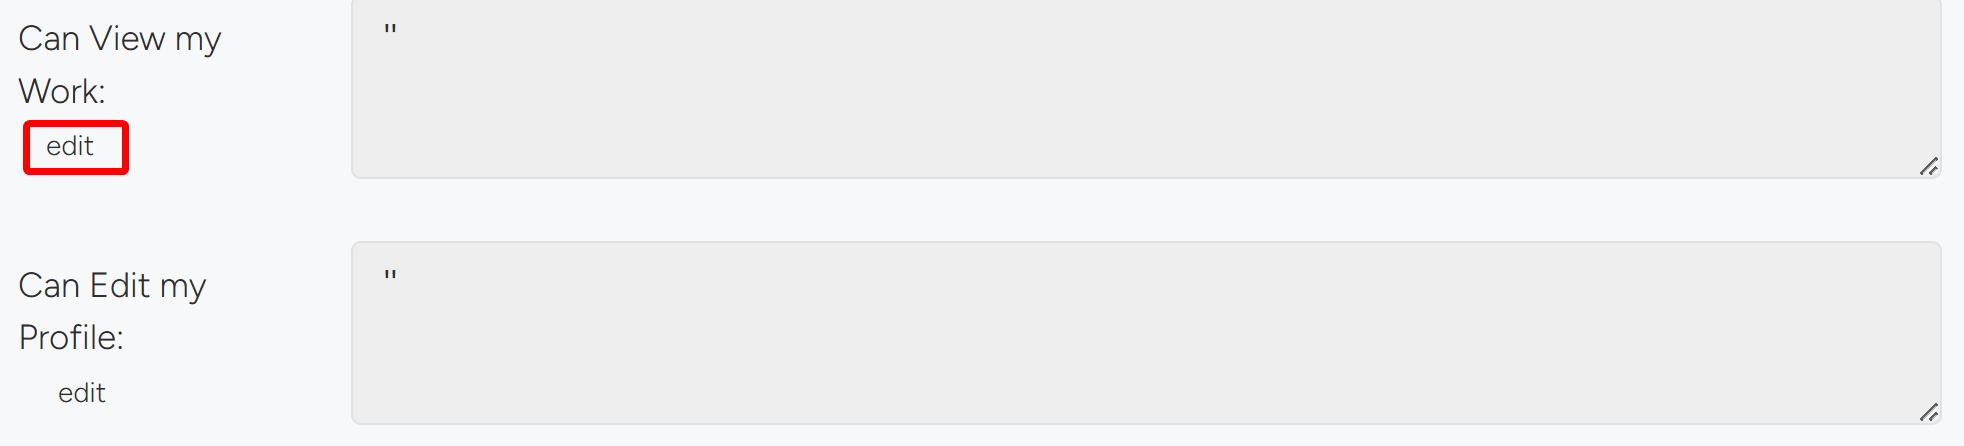
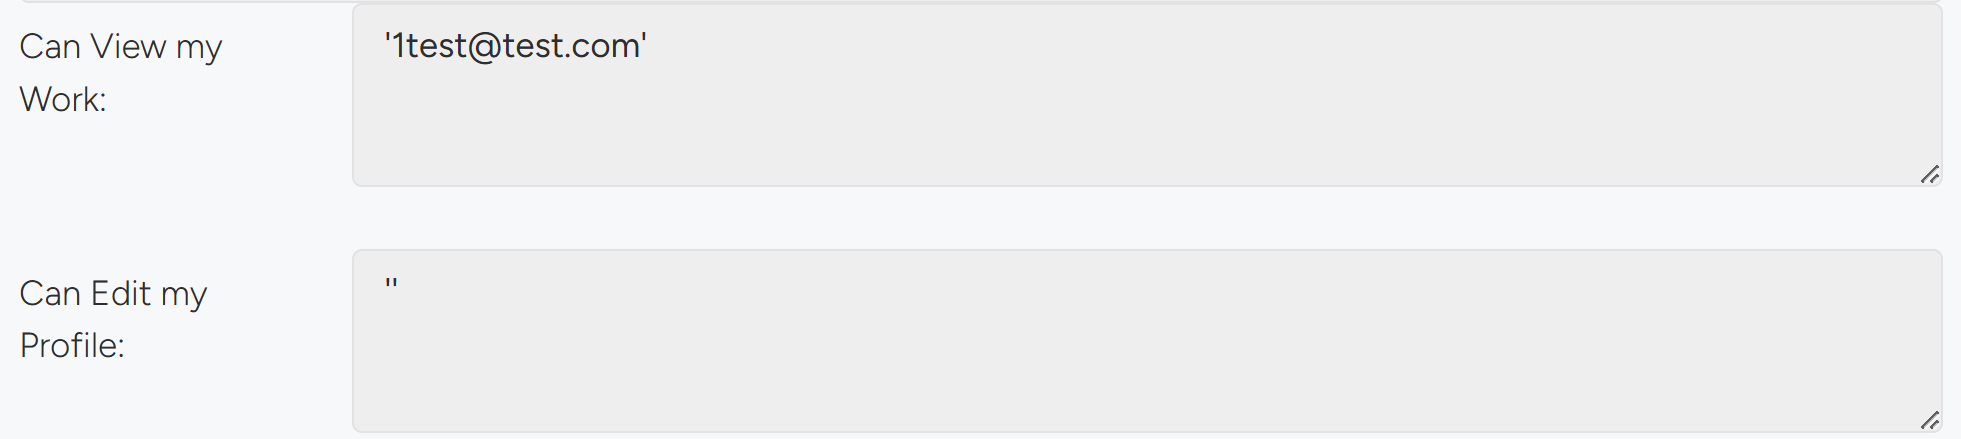
- In the General Tab, The “Can view my work” allows Advisors or Admins to assign users to work on this specific user’s workflows. The “Can Edit my Profile” allows Advisors or Admins to assign users that can view/edit this specific user’s profile.
- For both of these, use the following process to select users. Click the edit button under the one you want to add users to.
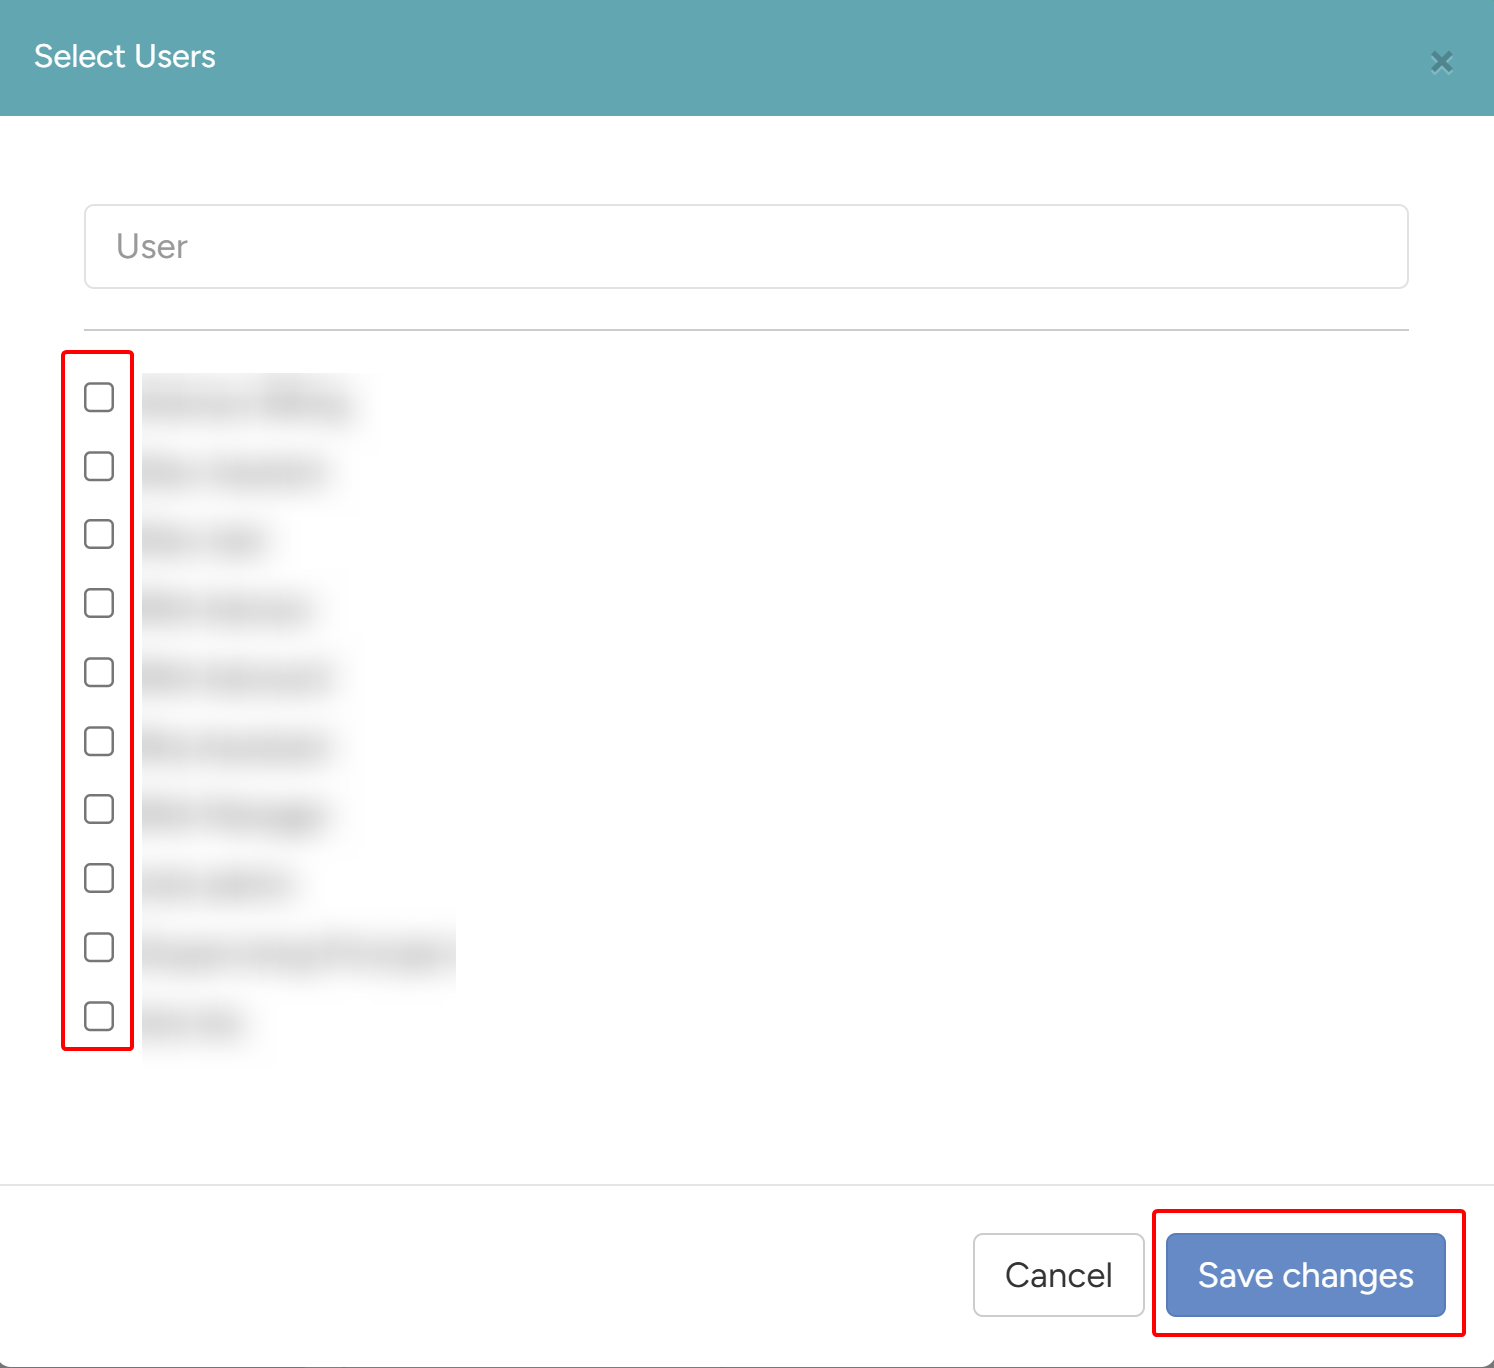
- The Select Users popup will open. Select the User(s) and click the Save Changes button.
- The selected user will now show in the list.
Note
To save other changes that have been made in the General Tab, click the Save button at the bottom
5.3.1.2 User Roles
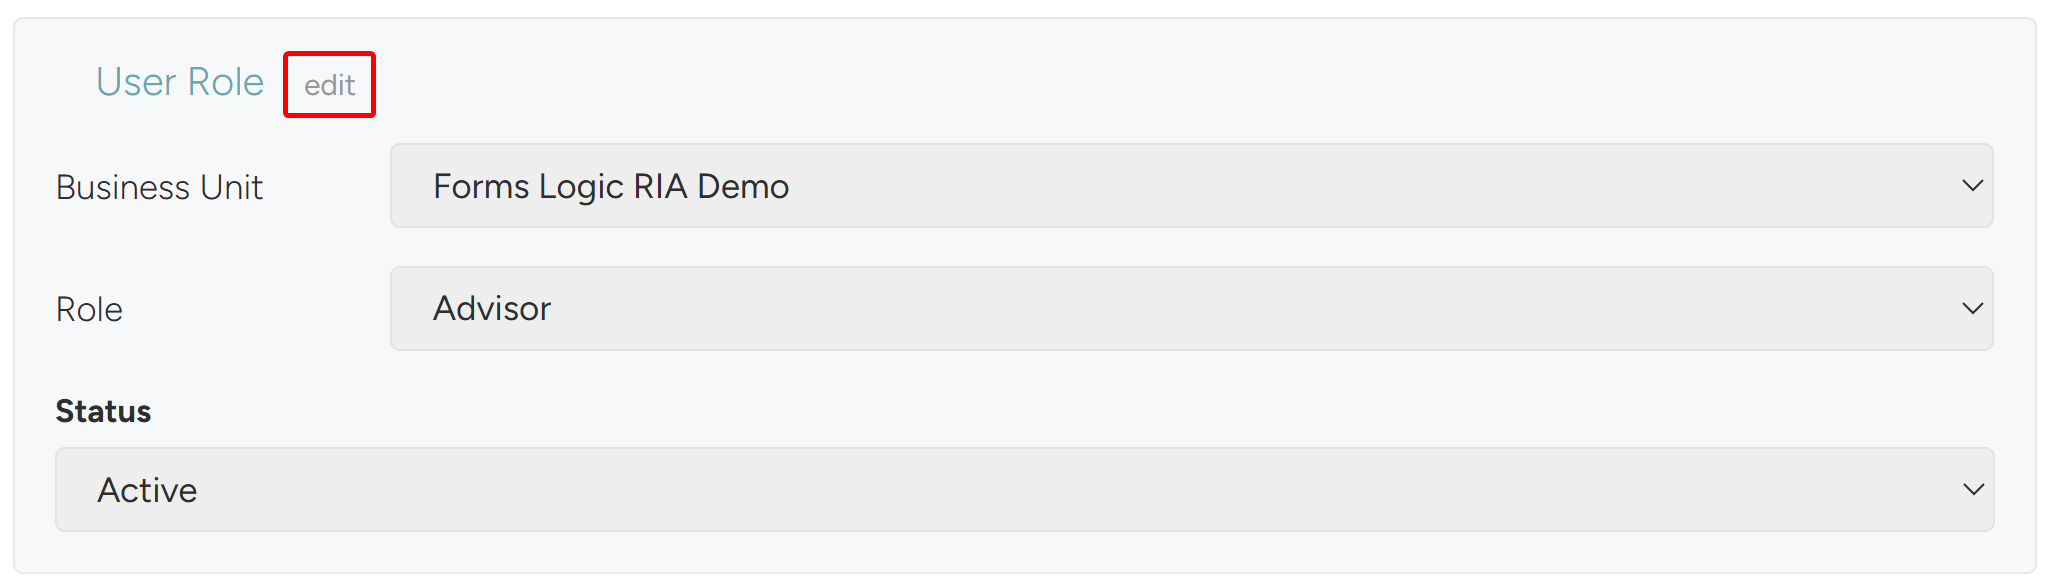
- In the General Tab, the “User Role” section is where a role can be assigned to the user or also edited. Click edit to be able to update the User Role.
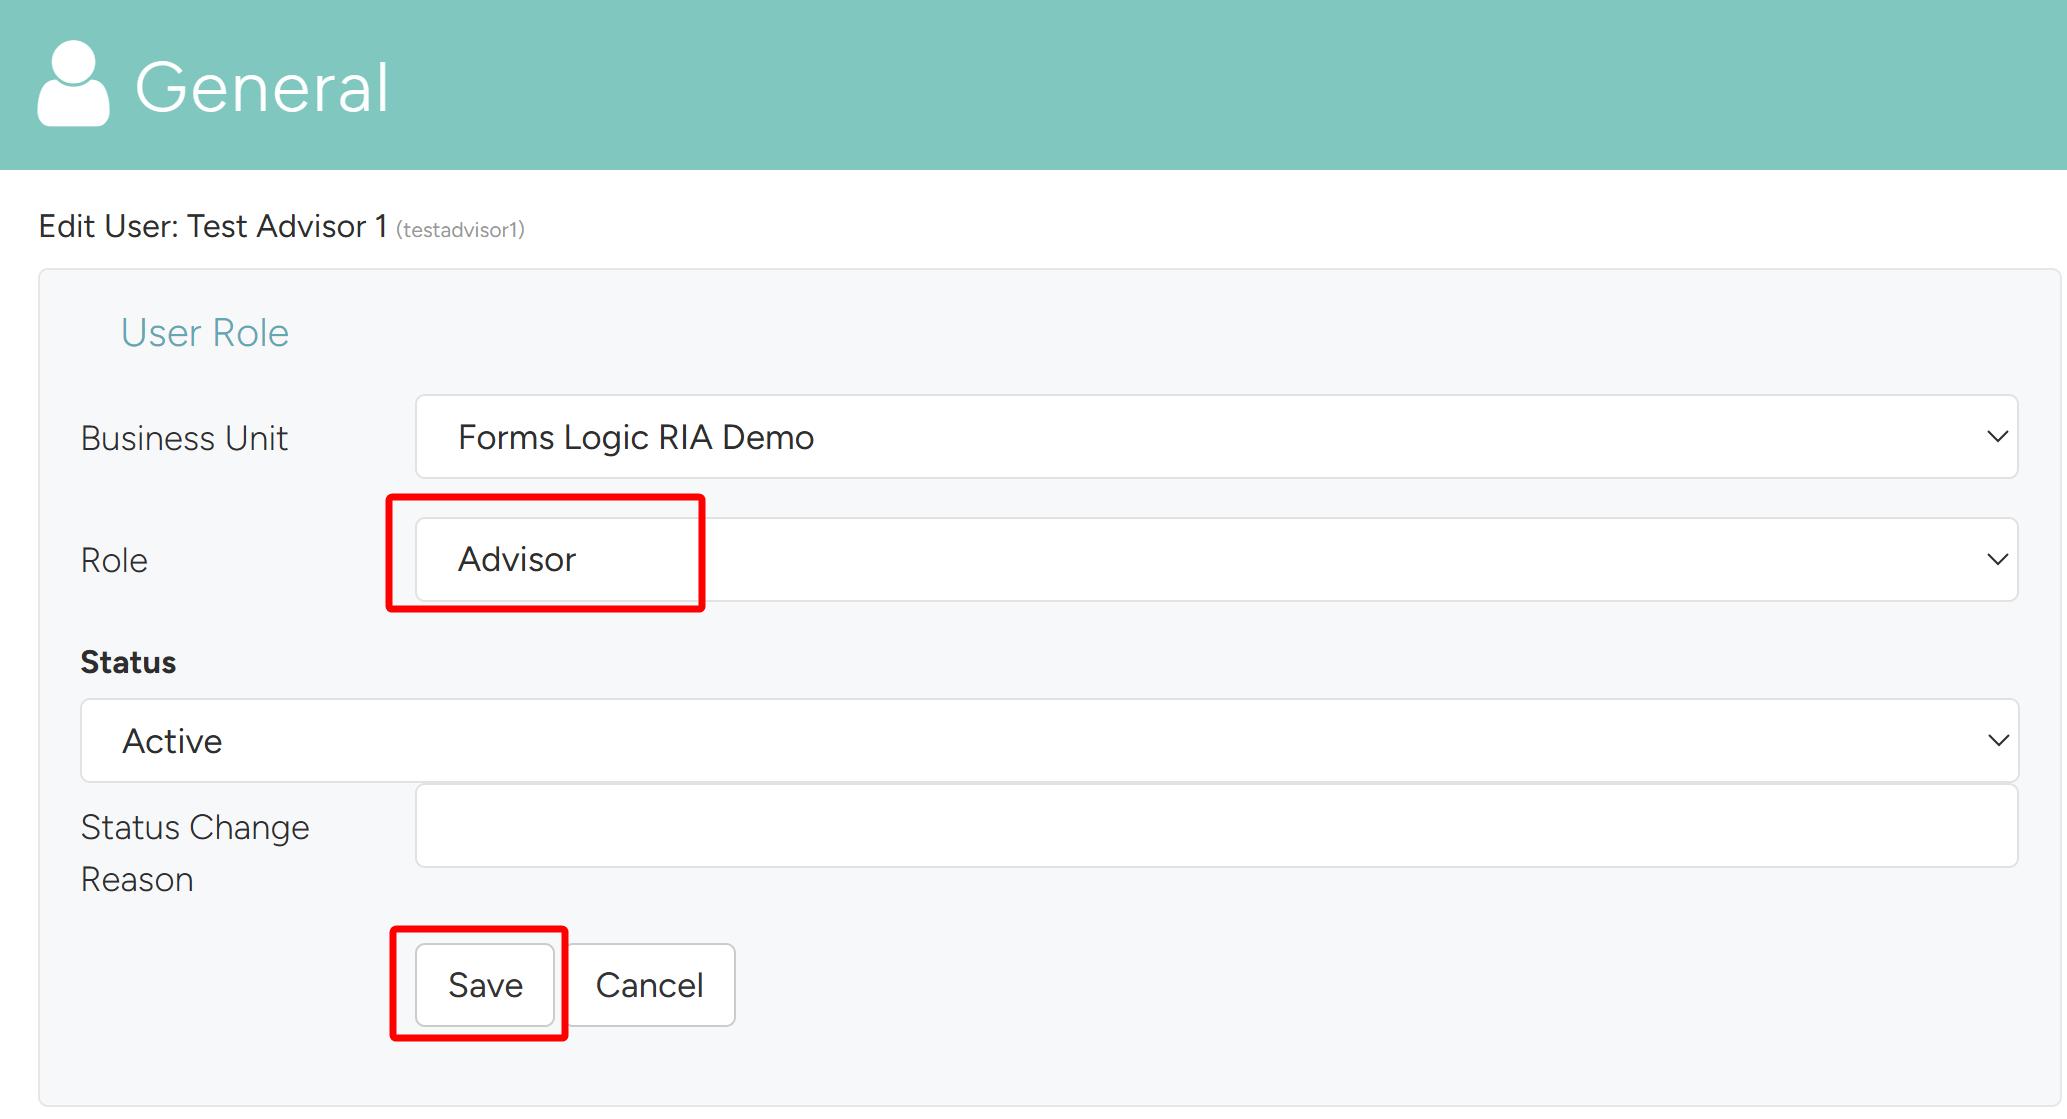
- Here you can edit the Business Unit, Role, Status, and write a reason. Select a role from the dropdown to assign it to the user and click Save.
5.3.1.3 Reset Password
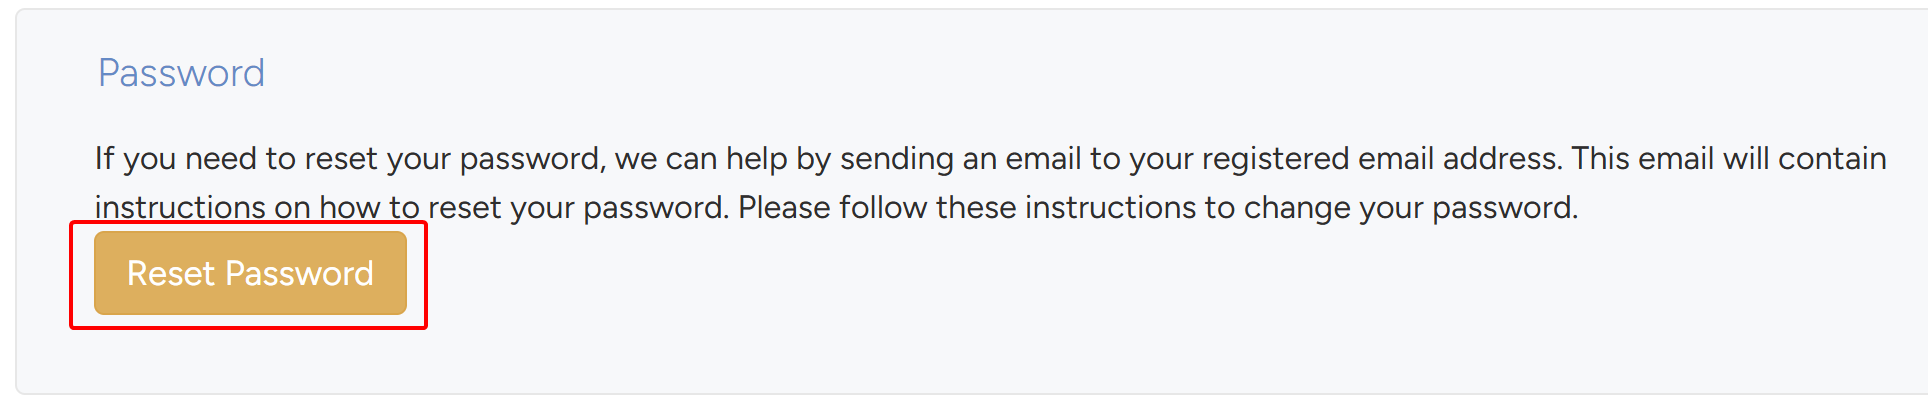
- In the General Tab, Advisors or Admins can reset a user’s password from the Password section.
5.3.2 Personal Info Tab
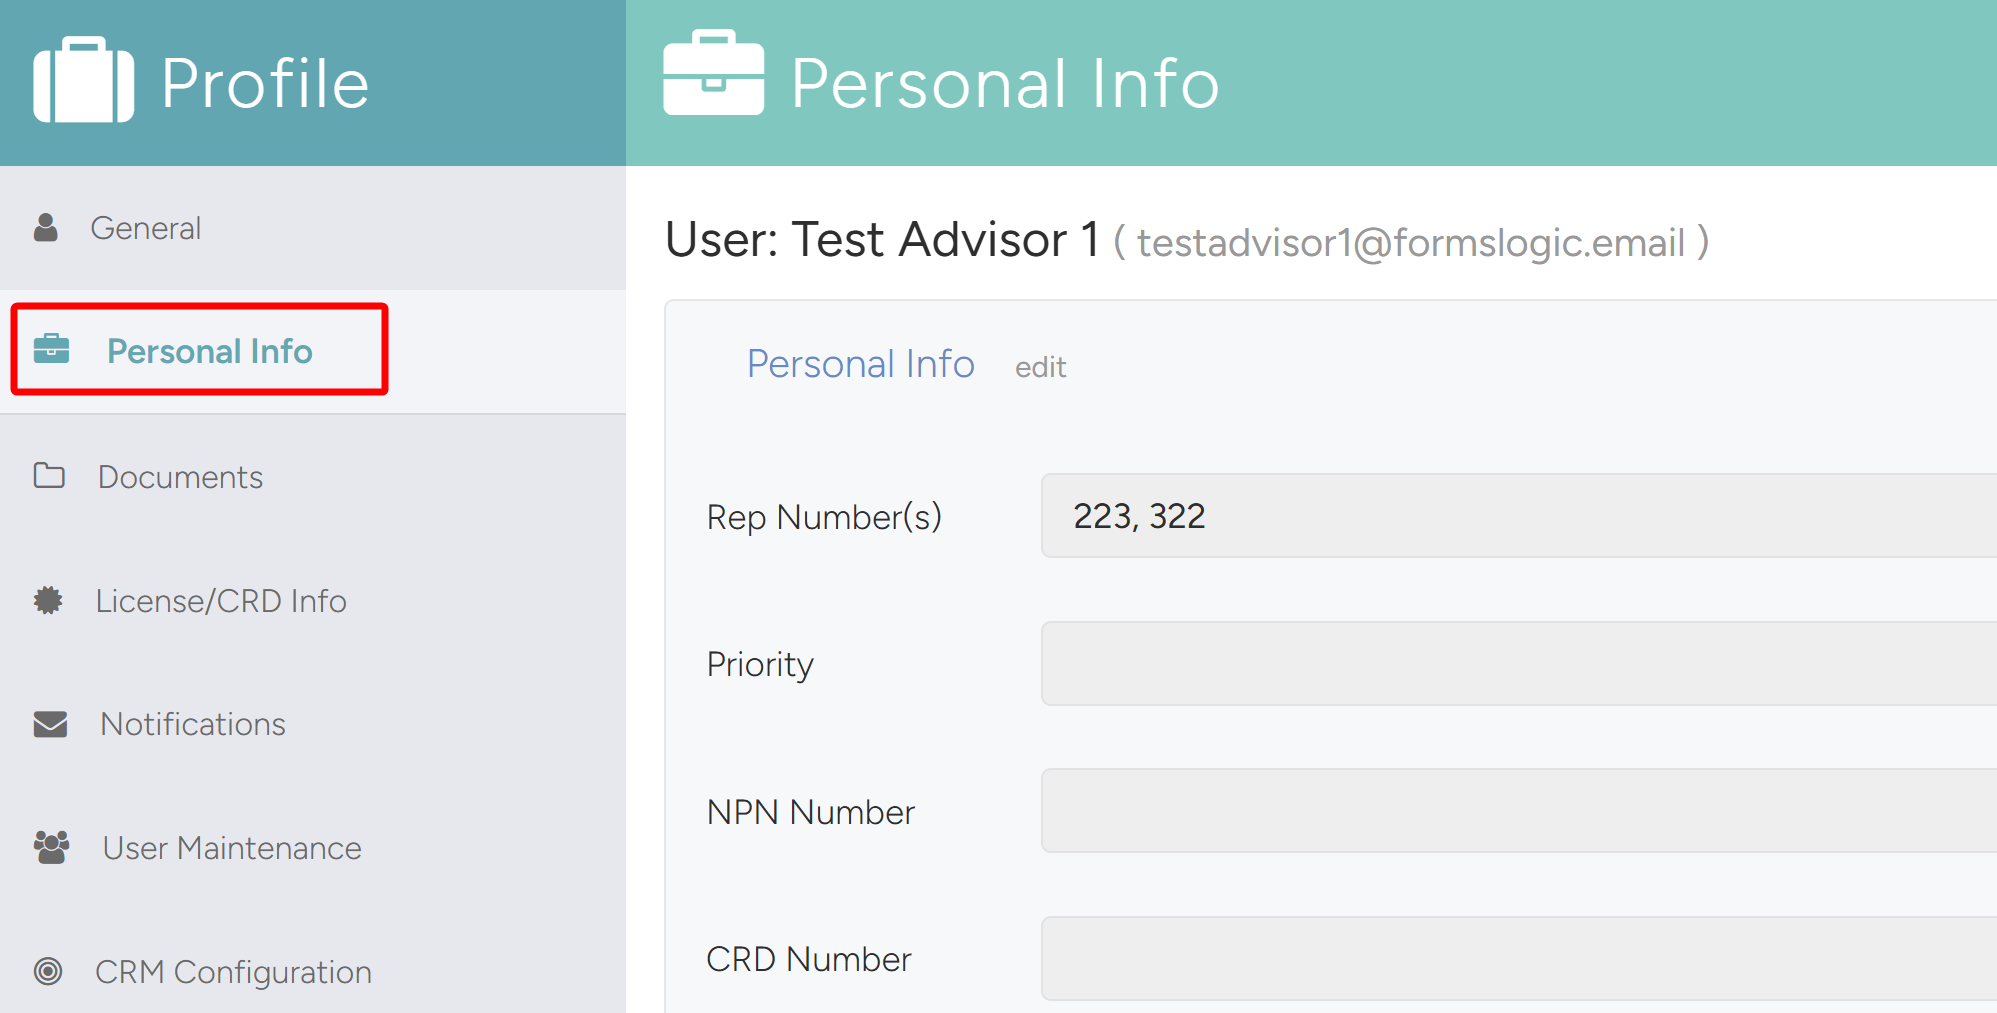
- Personal Info Tab allows you to see and edit the personal information of the user.
5.3.2.1 Add or Update Rep Number
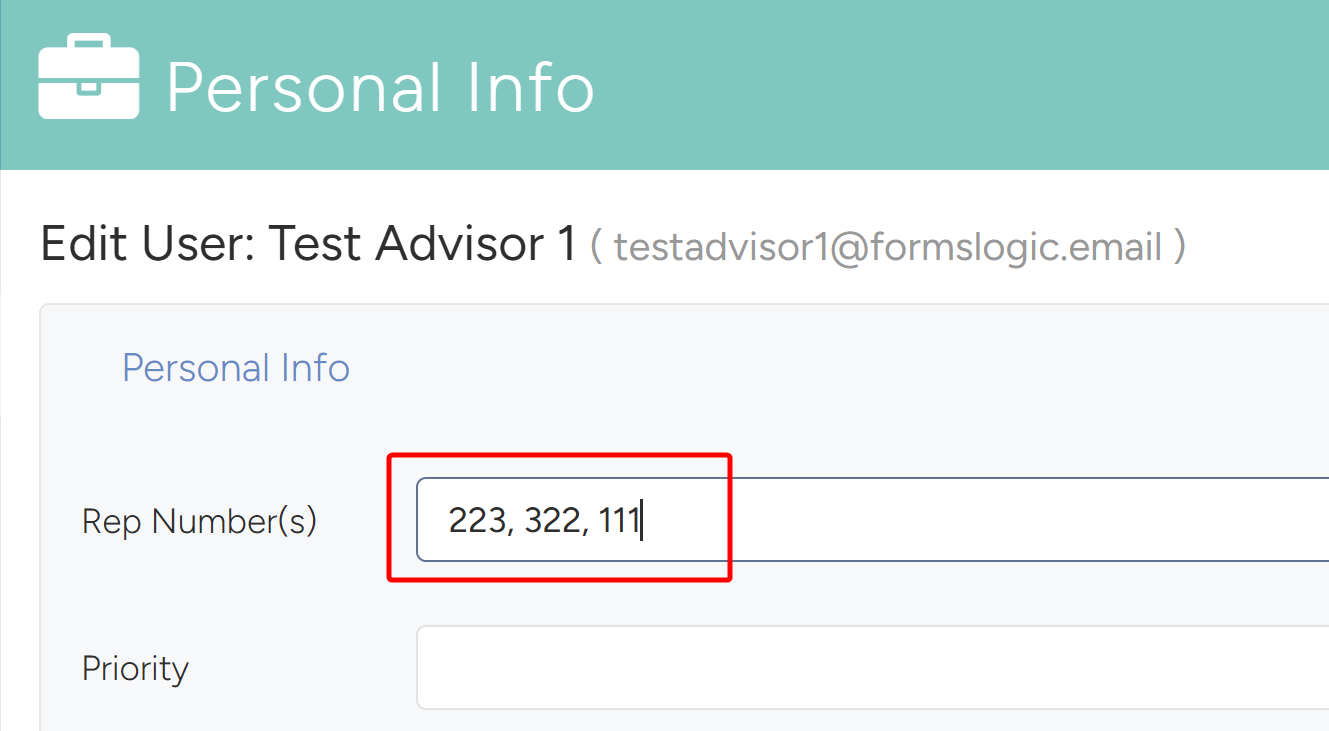
- To add or update a Rep Number in the profile, follow the steps below.
- Click Edit next to Personal Info.
- Add or remove a Rep Number in the Rep Number(s) field, and click the Save button at the bottom of the page.
Note
If the user has more than one Rep Number, they will be presented with a dropdown to select from when creating a workflow.
5.3.3 Documents Tab
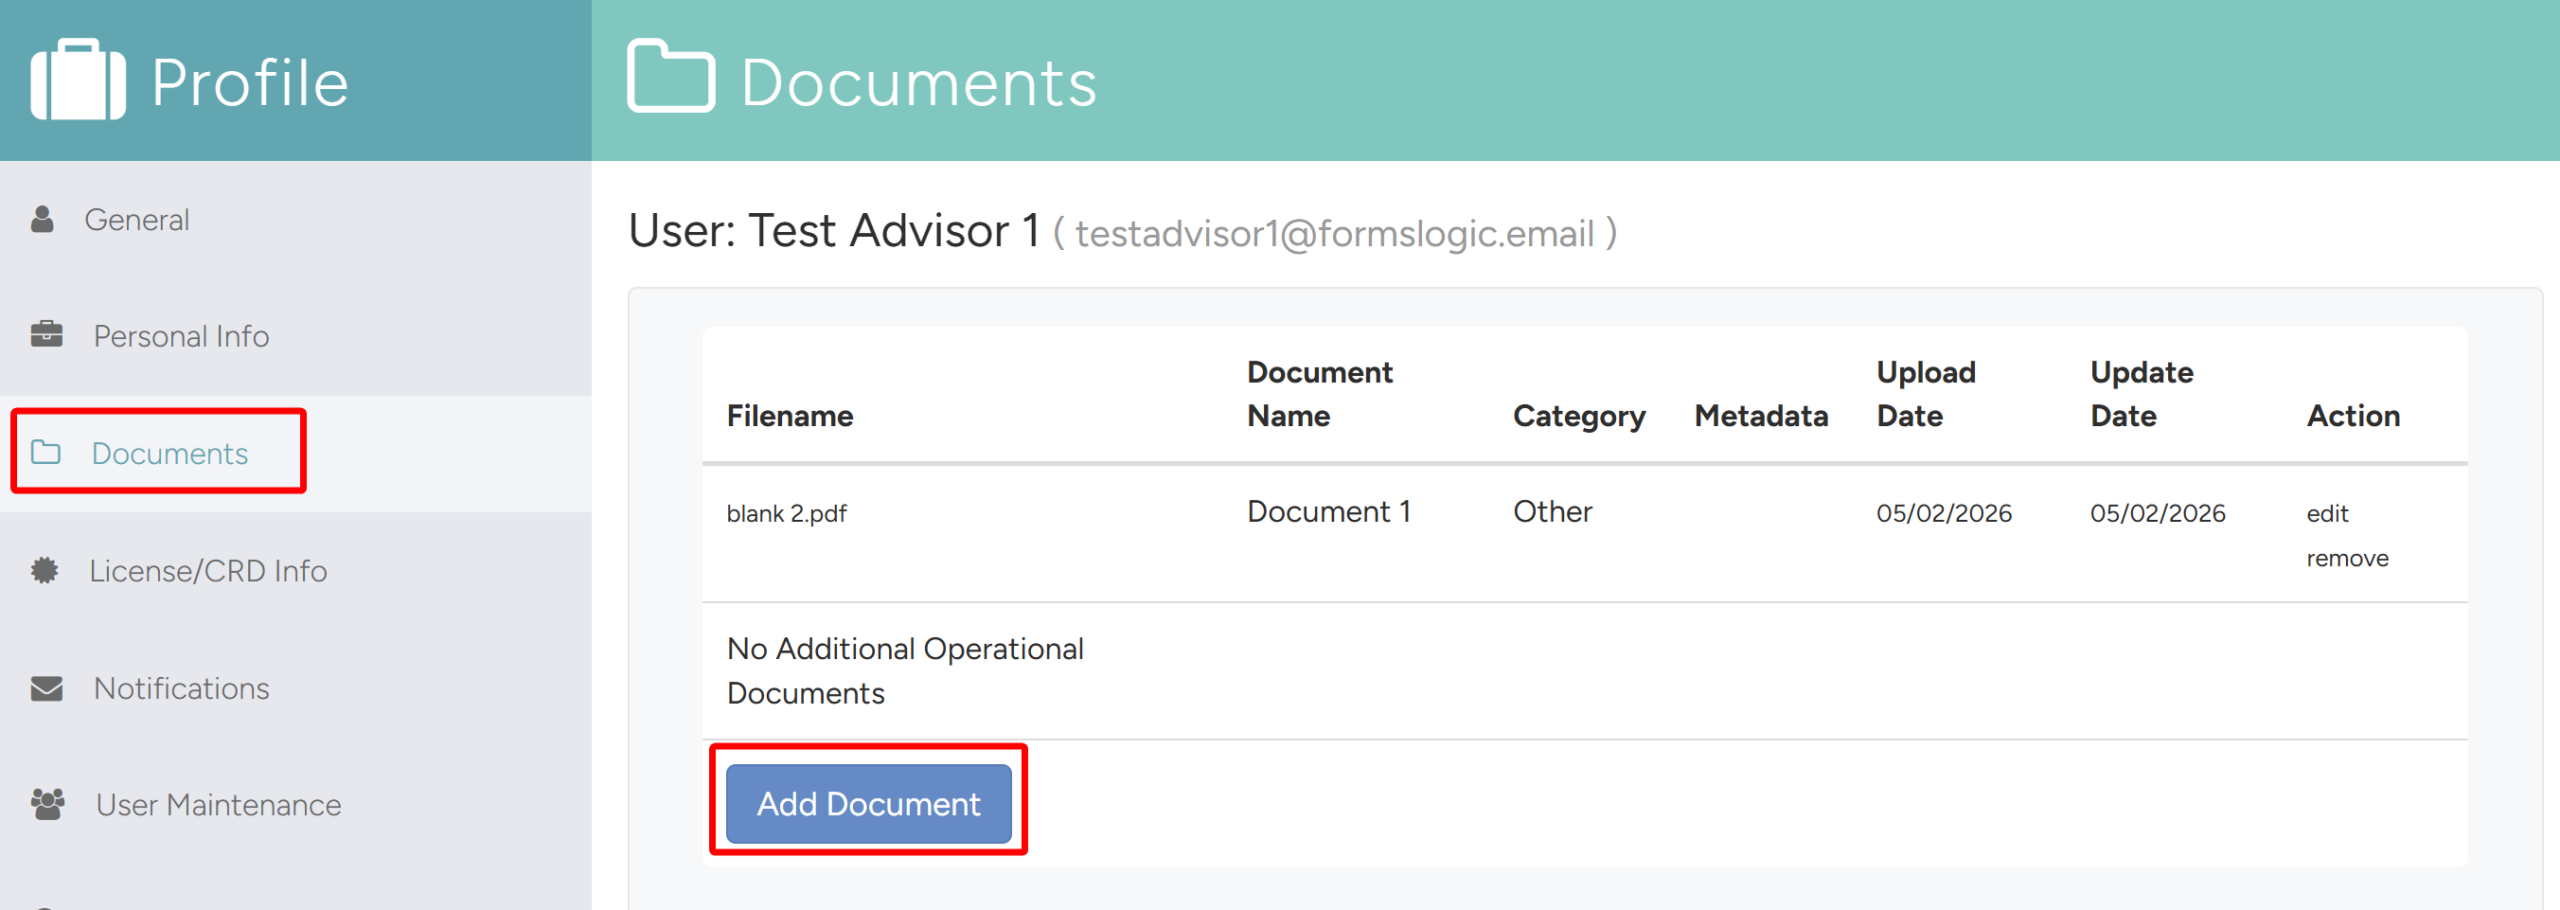
- The Documents Tab is the user’s e-Vault. Each user has their own e-Vault so they can securely share and store documents.
- To add documents to the e-Vault, click the Add Document button.
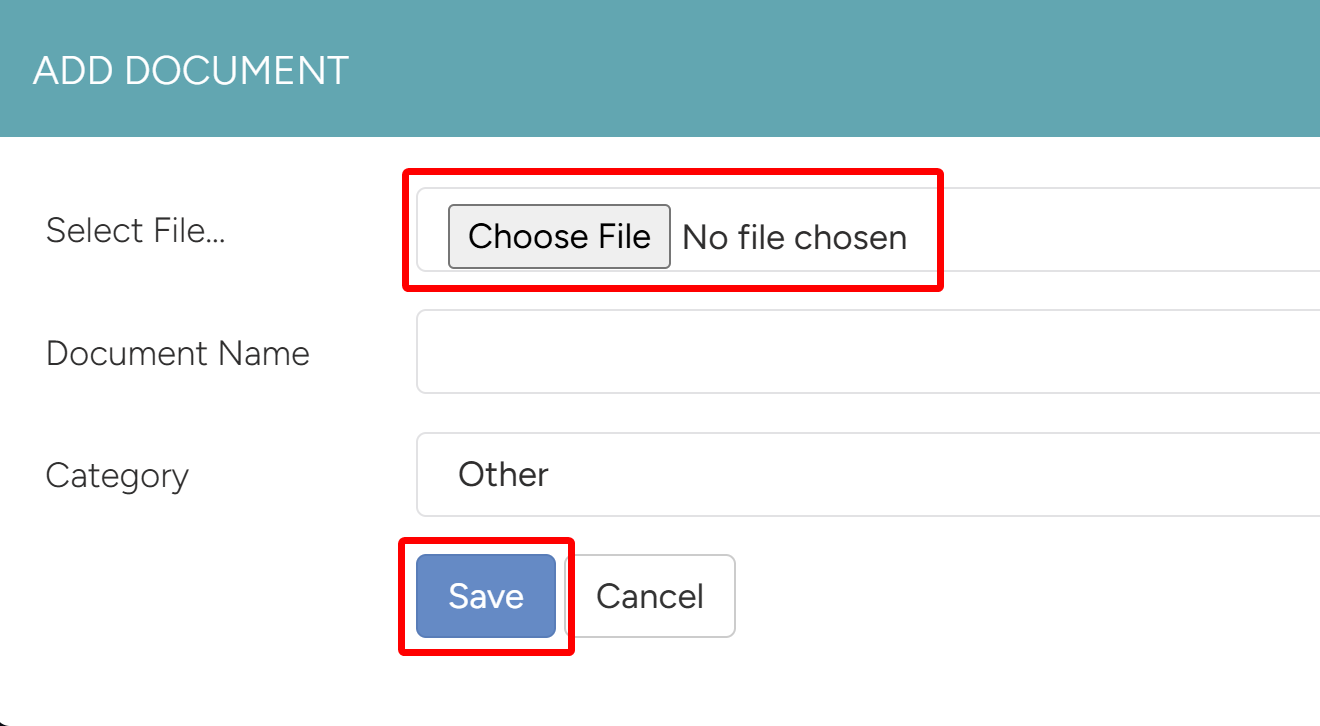
- The Add Document panel will open, where you can choose the file, name the document, choose the category, and click Save to securely save the document in the eVault.
- The document will now be in the list, which can be edited/removed in the Action tab.
Note
Any downloadable reports will automatically save in the “additional operational documents section“.
5.3.4 License / CRD Info
- The License / CRD Info Tab is where the user’s licenses are found.
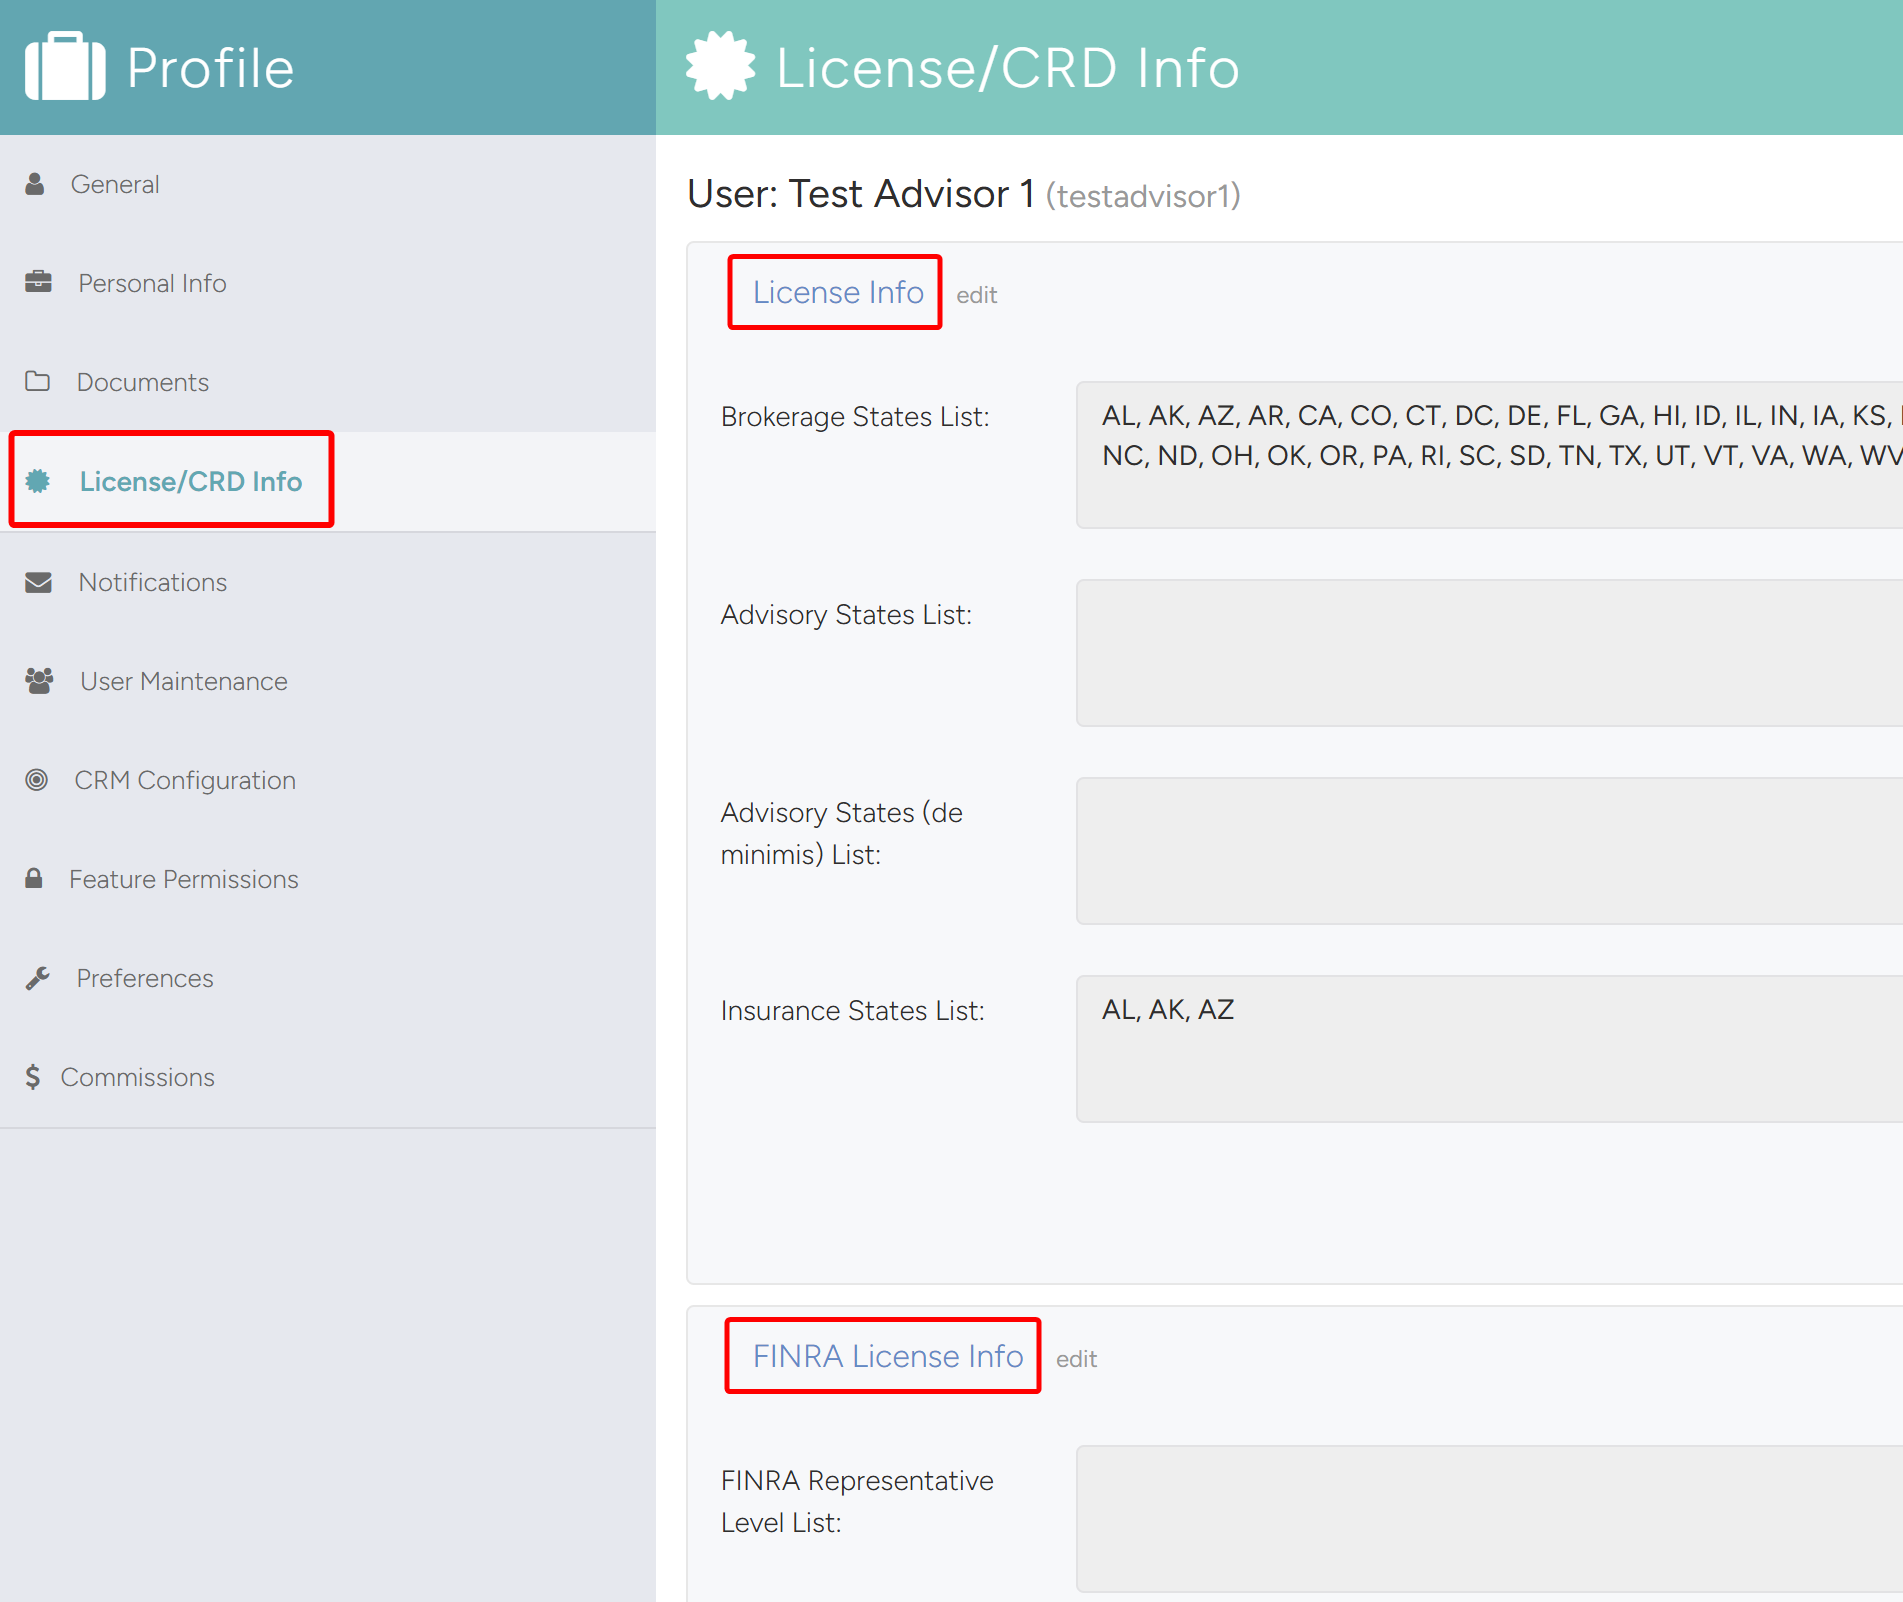
- To edit/update the State License Information, click edit to the right of License Info (or also FINRA License Info for FINRA):
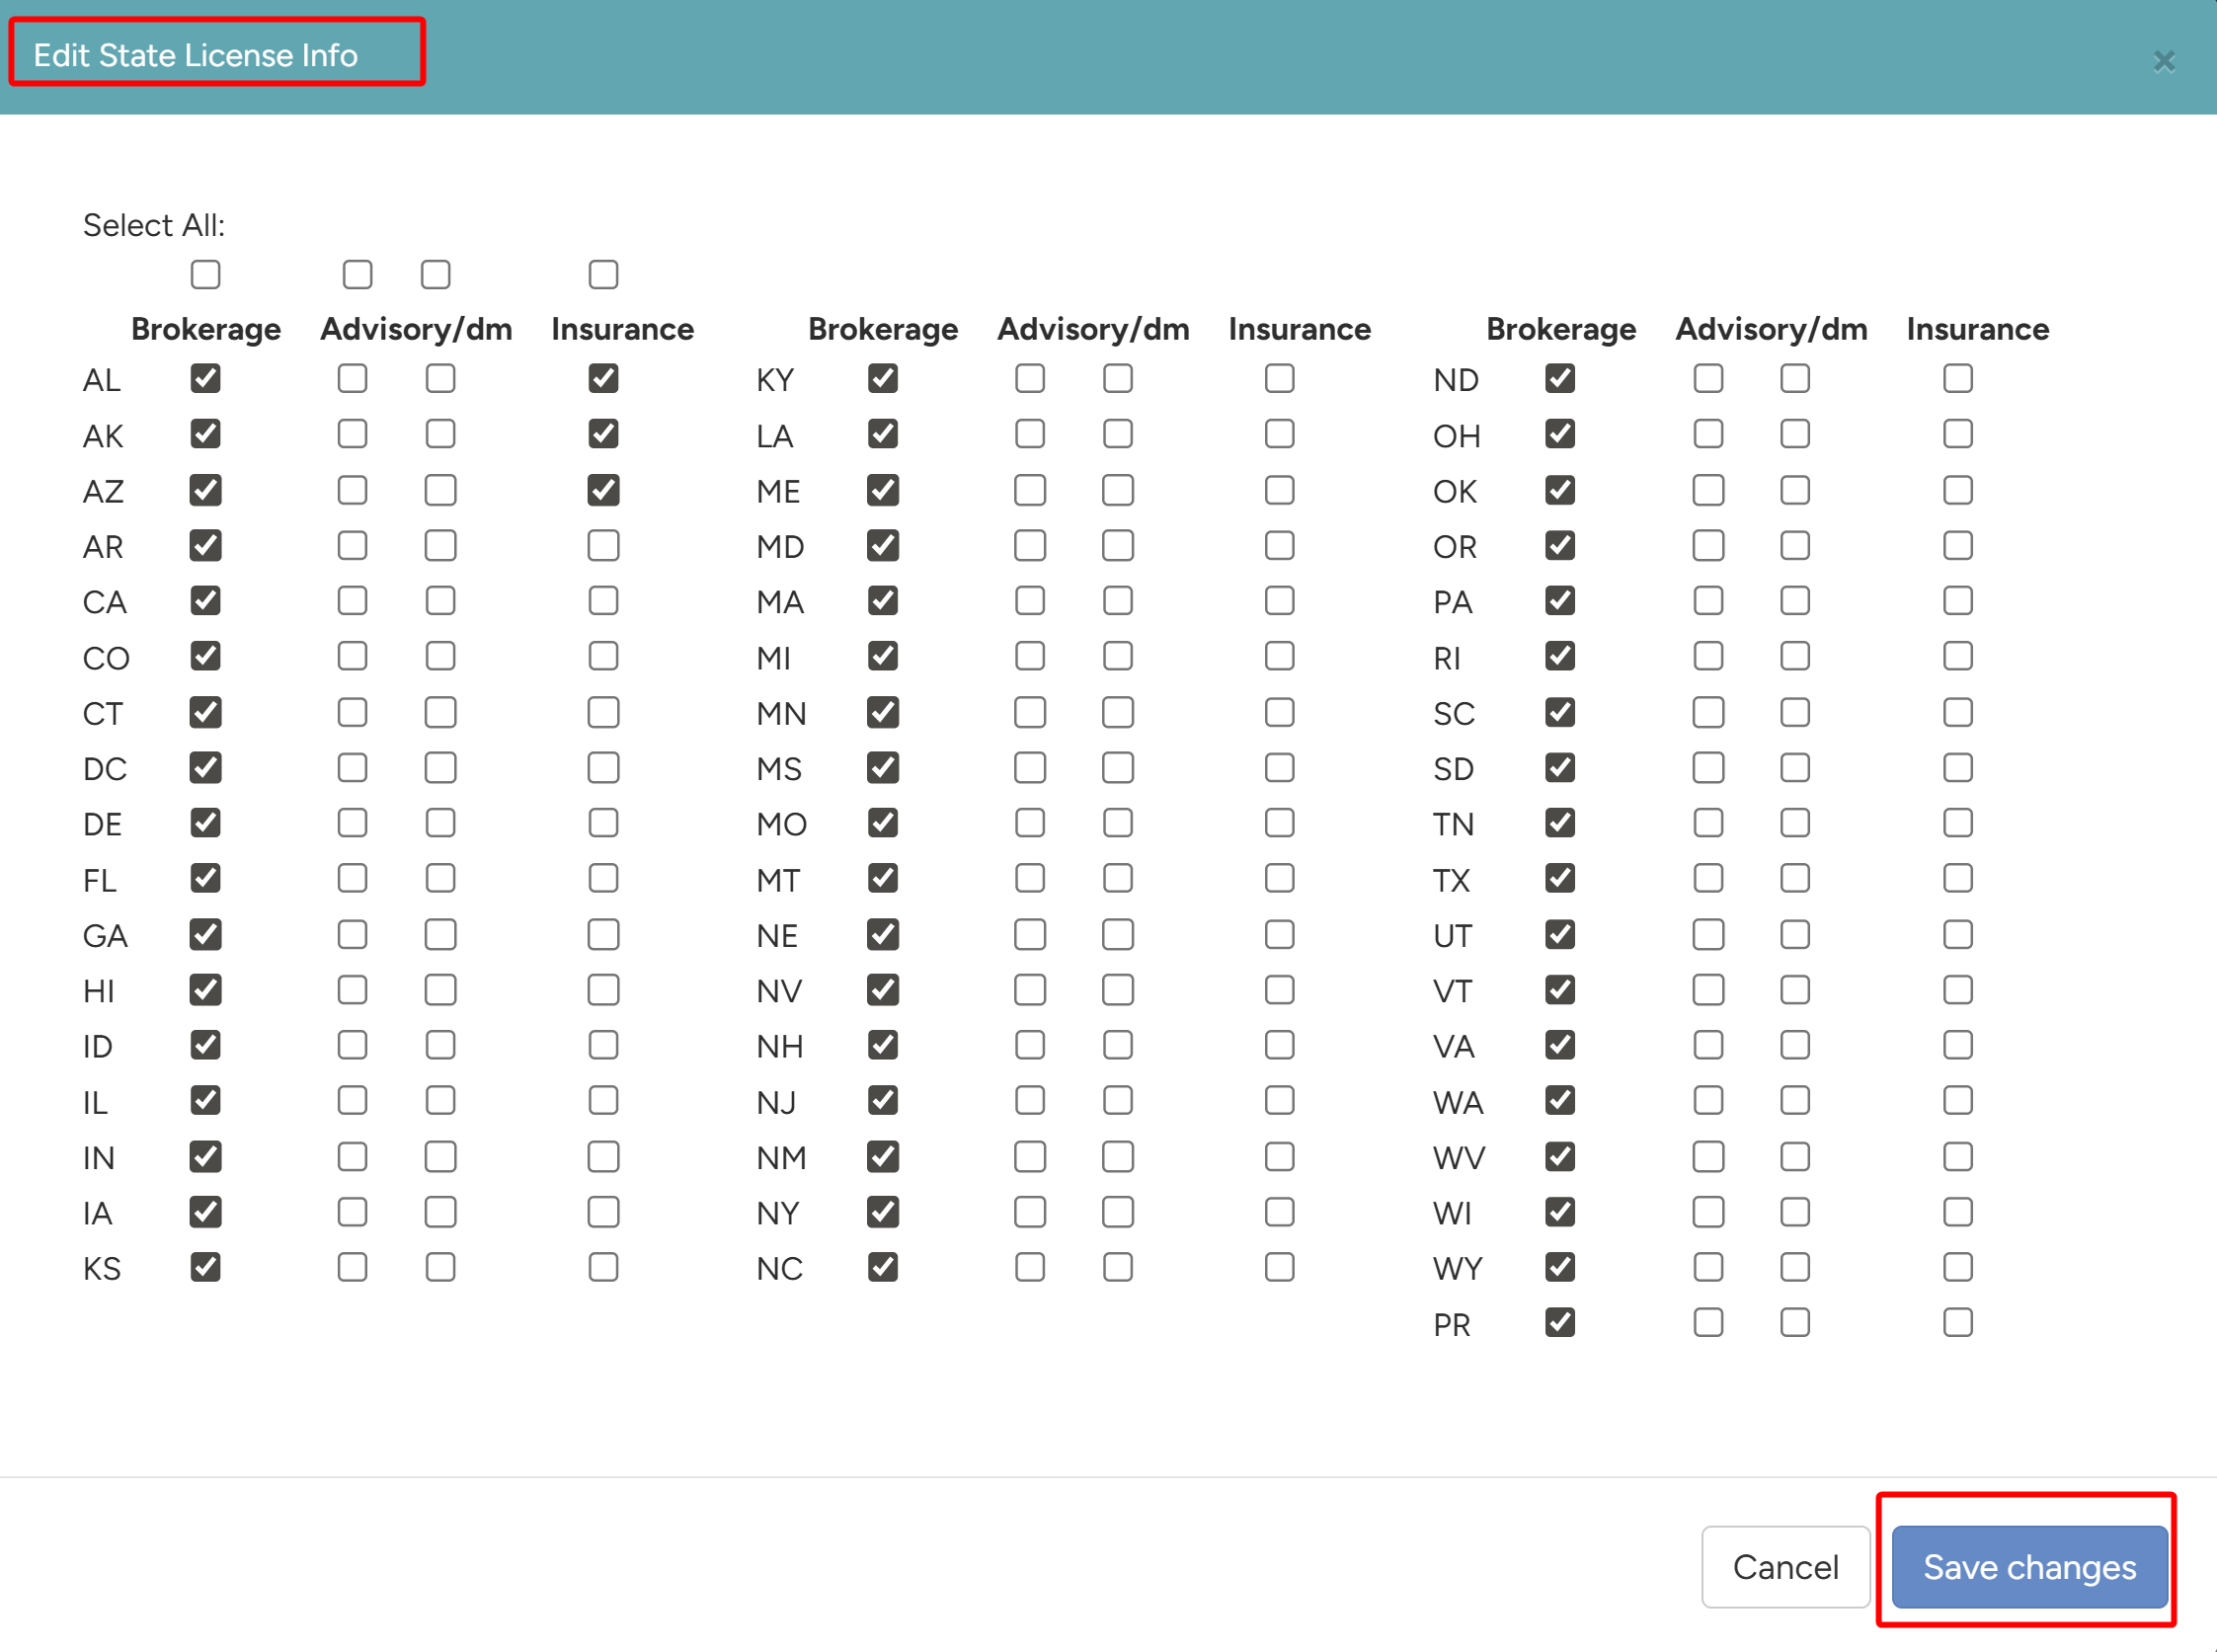
- In the panel that opens select or unselect the states as needed and click Save Changes.
Note
- Admin/Manager roles can View and Edit the licenses for the advisor.
- Advisors can only view what licenses they have.
5.3.5 Notifications
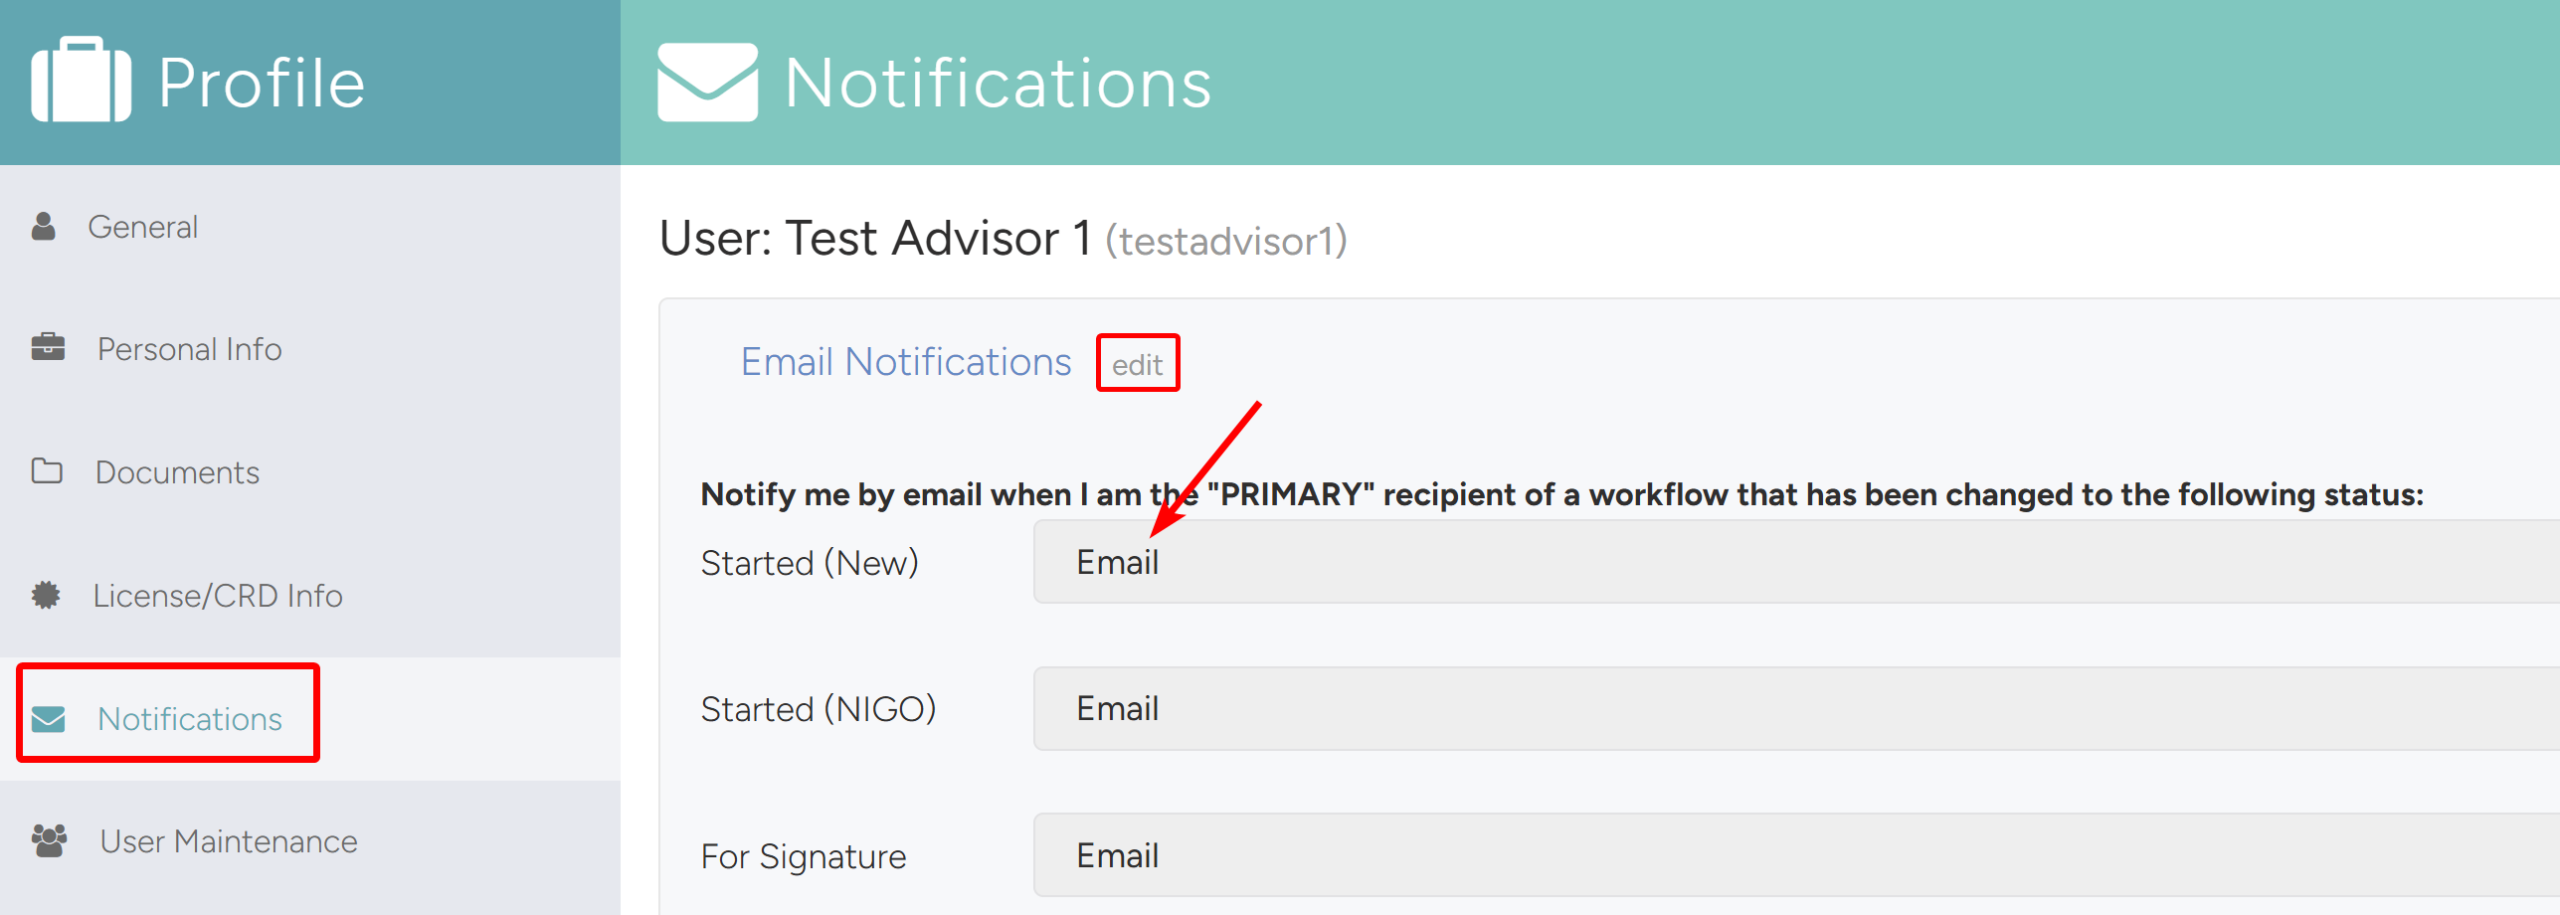
- The Notifications Tab is where the notification settings can be changed. As the workflow moves through the different Tasks (i.e. For Signature, Signed, Back Office Review, etc.), email Notifications are sent informing you of a status update or if you need to take action.
- To edit/update the notifications, click edit. Find the status needing to be edited and choose from the dropdown either Email or None. Once the changes have been made click Save.
5.3.6 User Maintenance
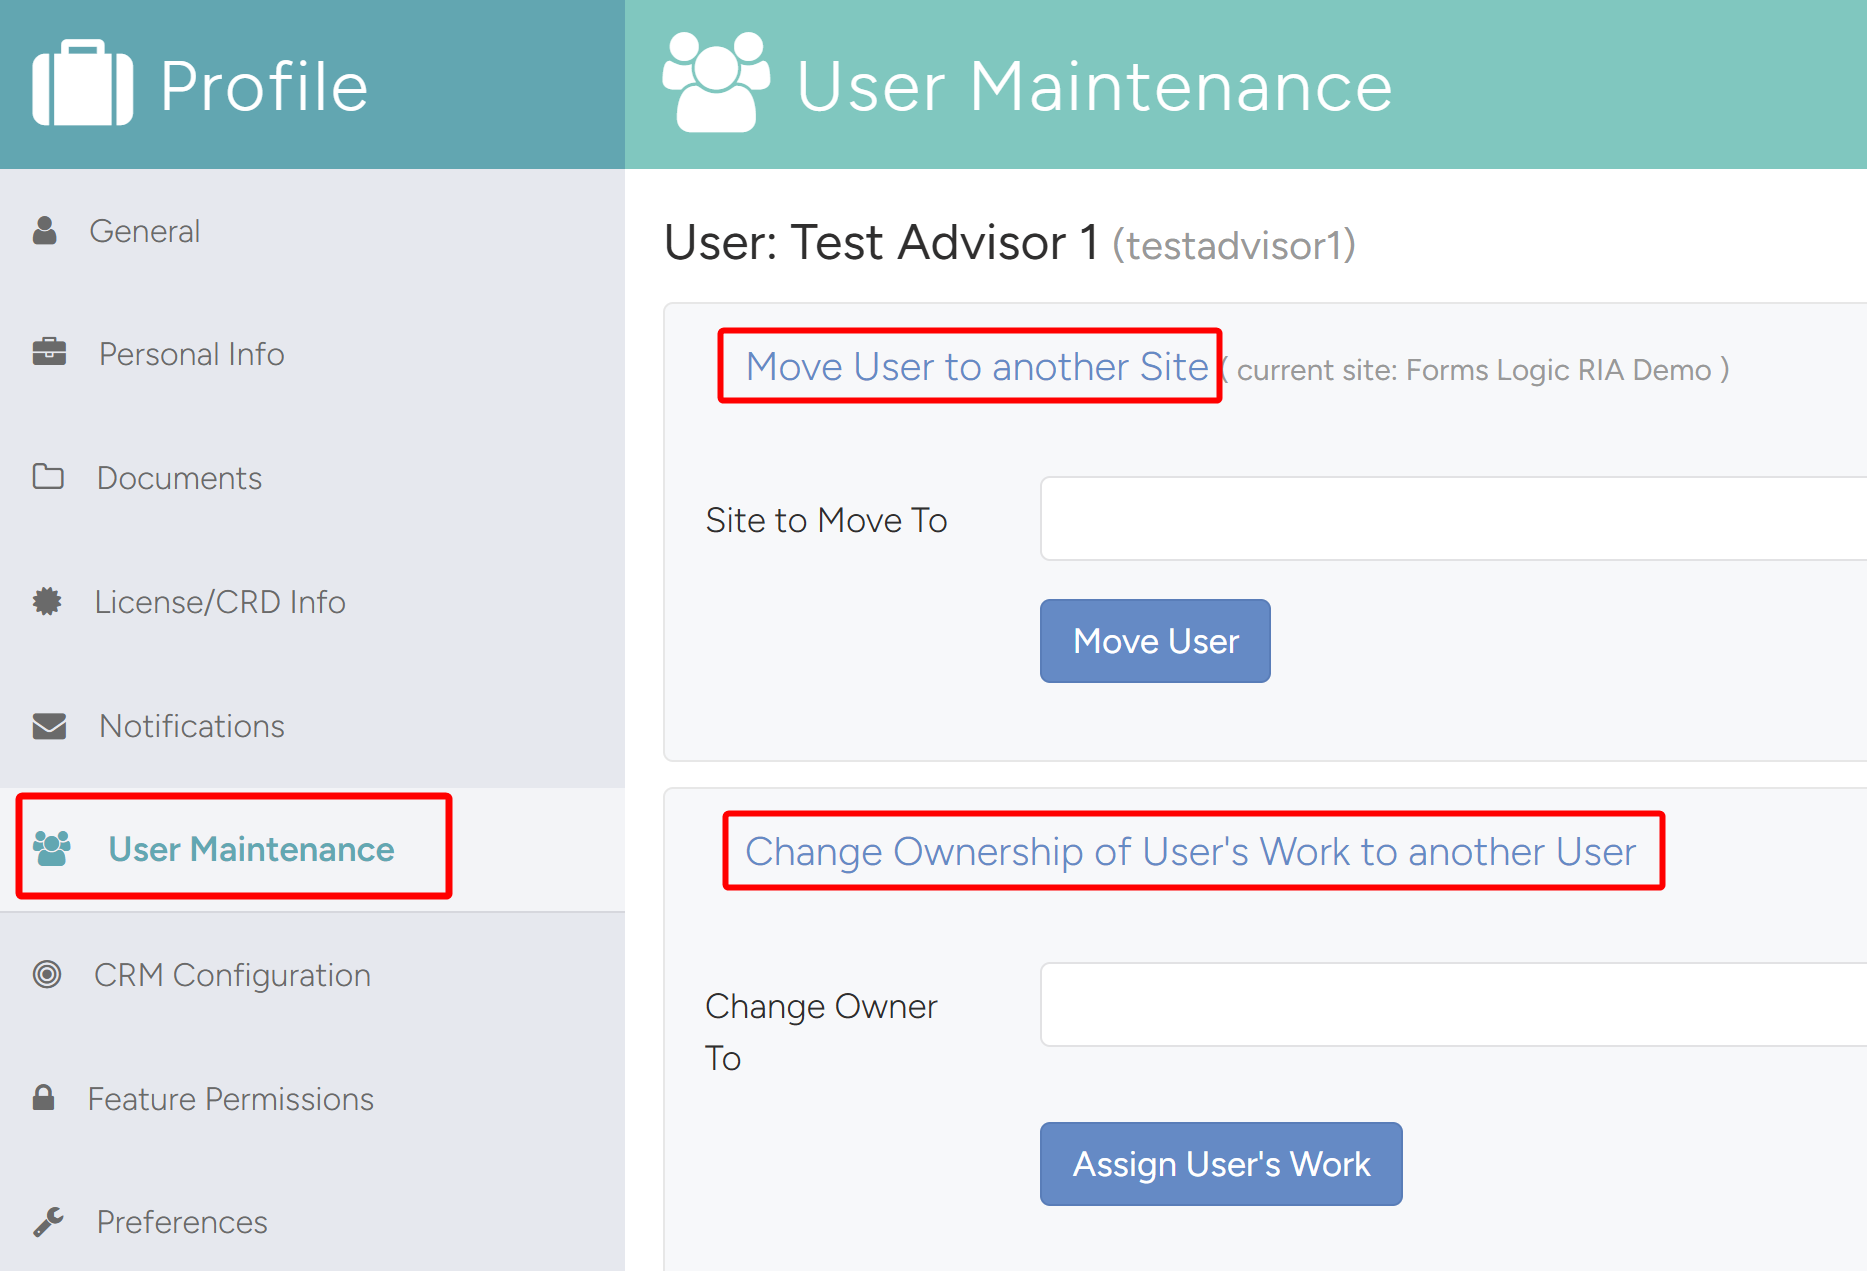
- The User Maintenance Tab allows Admin/Managers to move a user to another site or move a user’s work to another user.
- Move User to another site: This reassigns the user to another supervisor or layer as defined in your Company Structure.
- Change Ownership of User’s Work to another User: The designated new user will now see the active workflows for that current user in the workflow list. This is especially used when temporary coverage is needed.
5.3.7 CRM Configuration
- The CRM Configuration Tab controls the connectivity with the CRM software.
- Select the CRM and click Save.
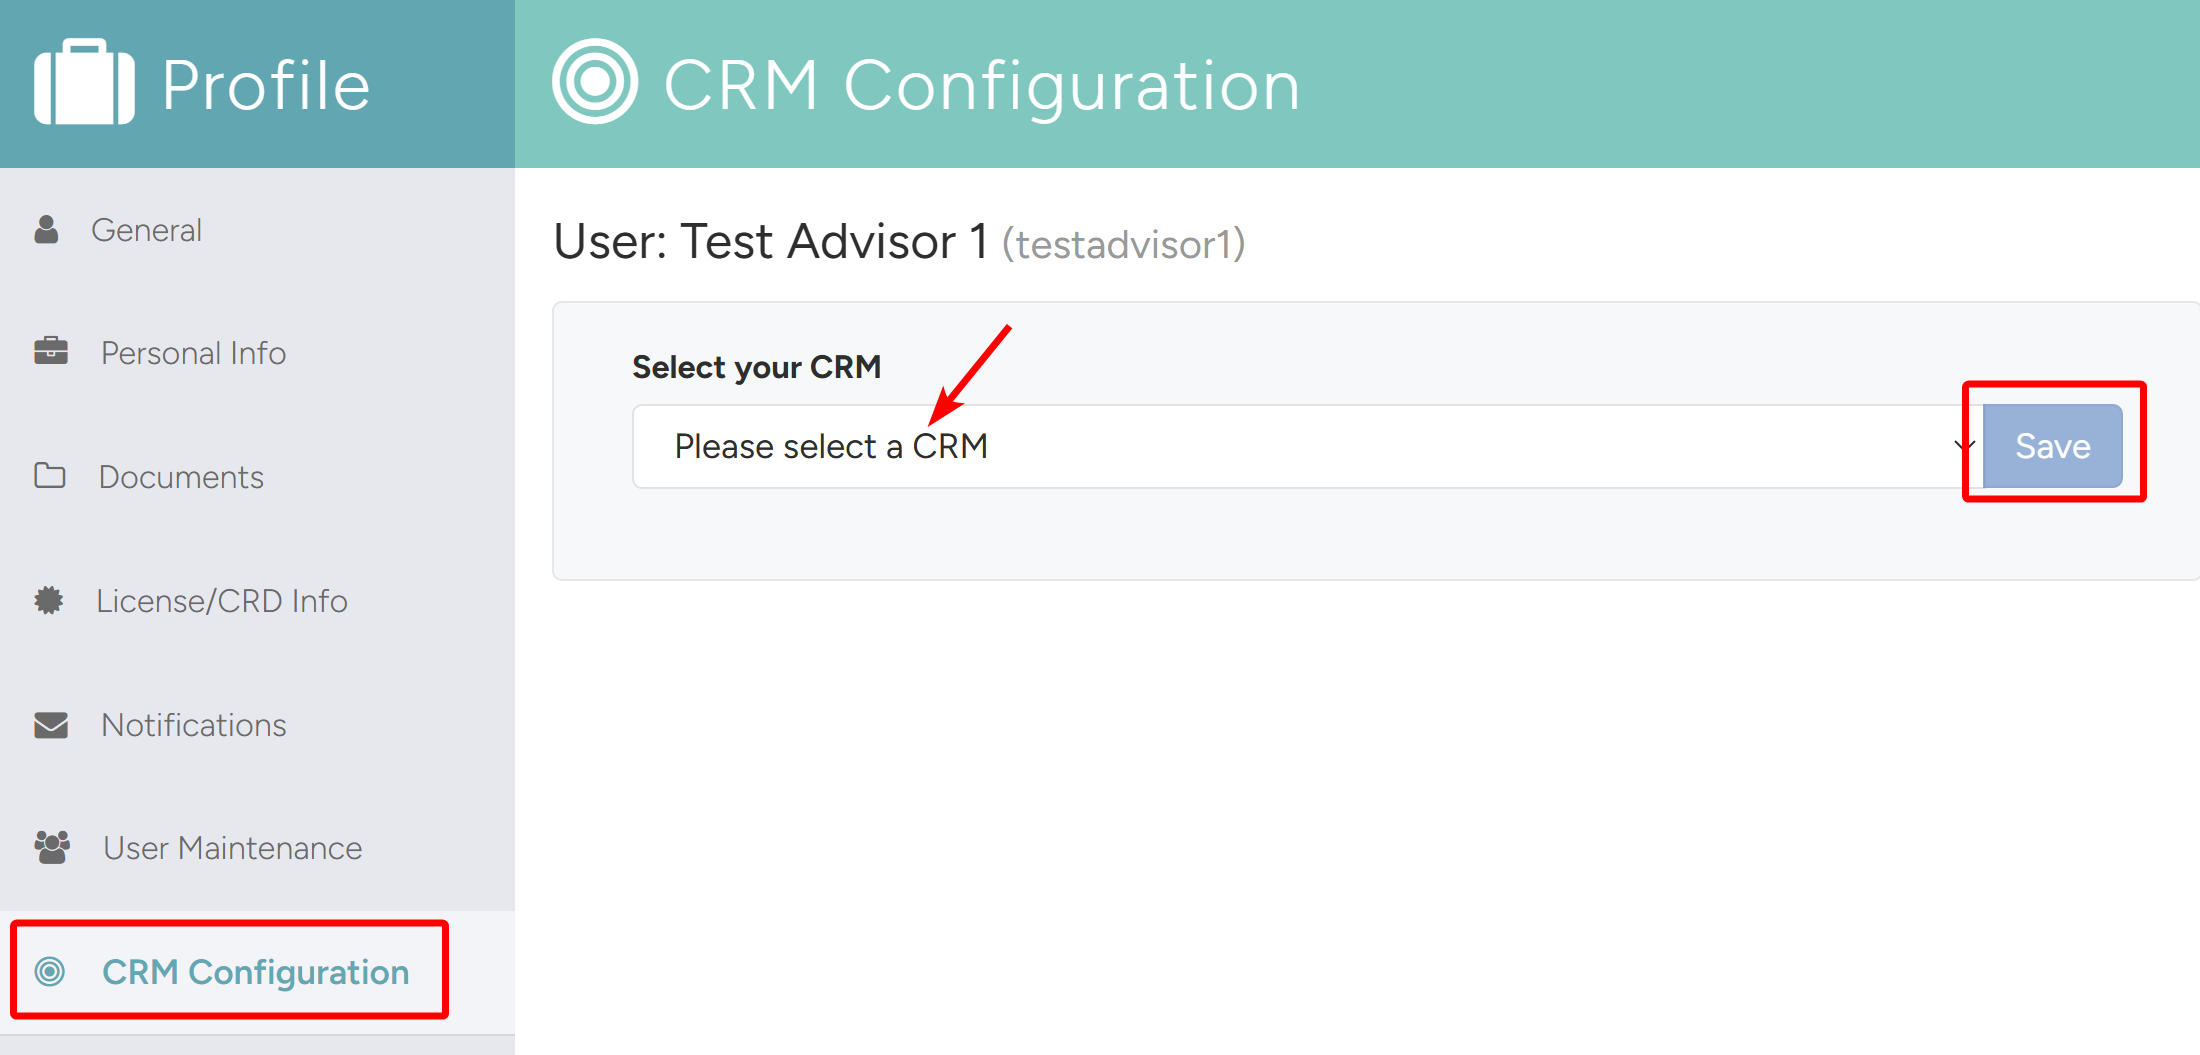
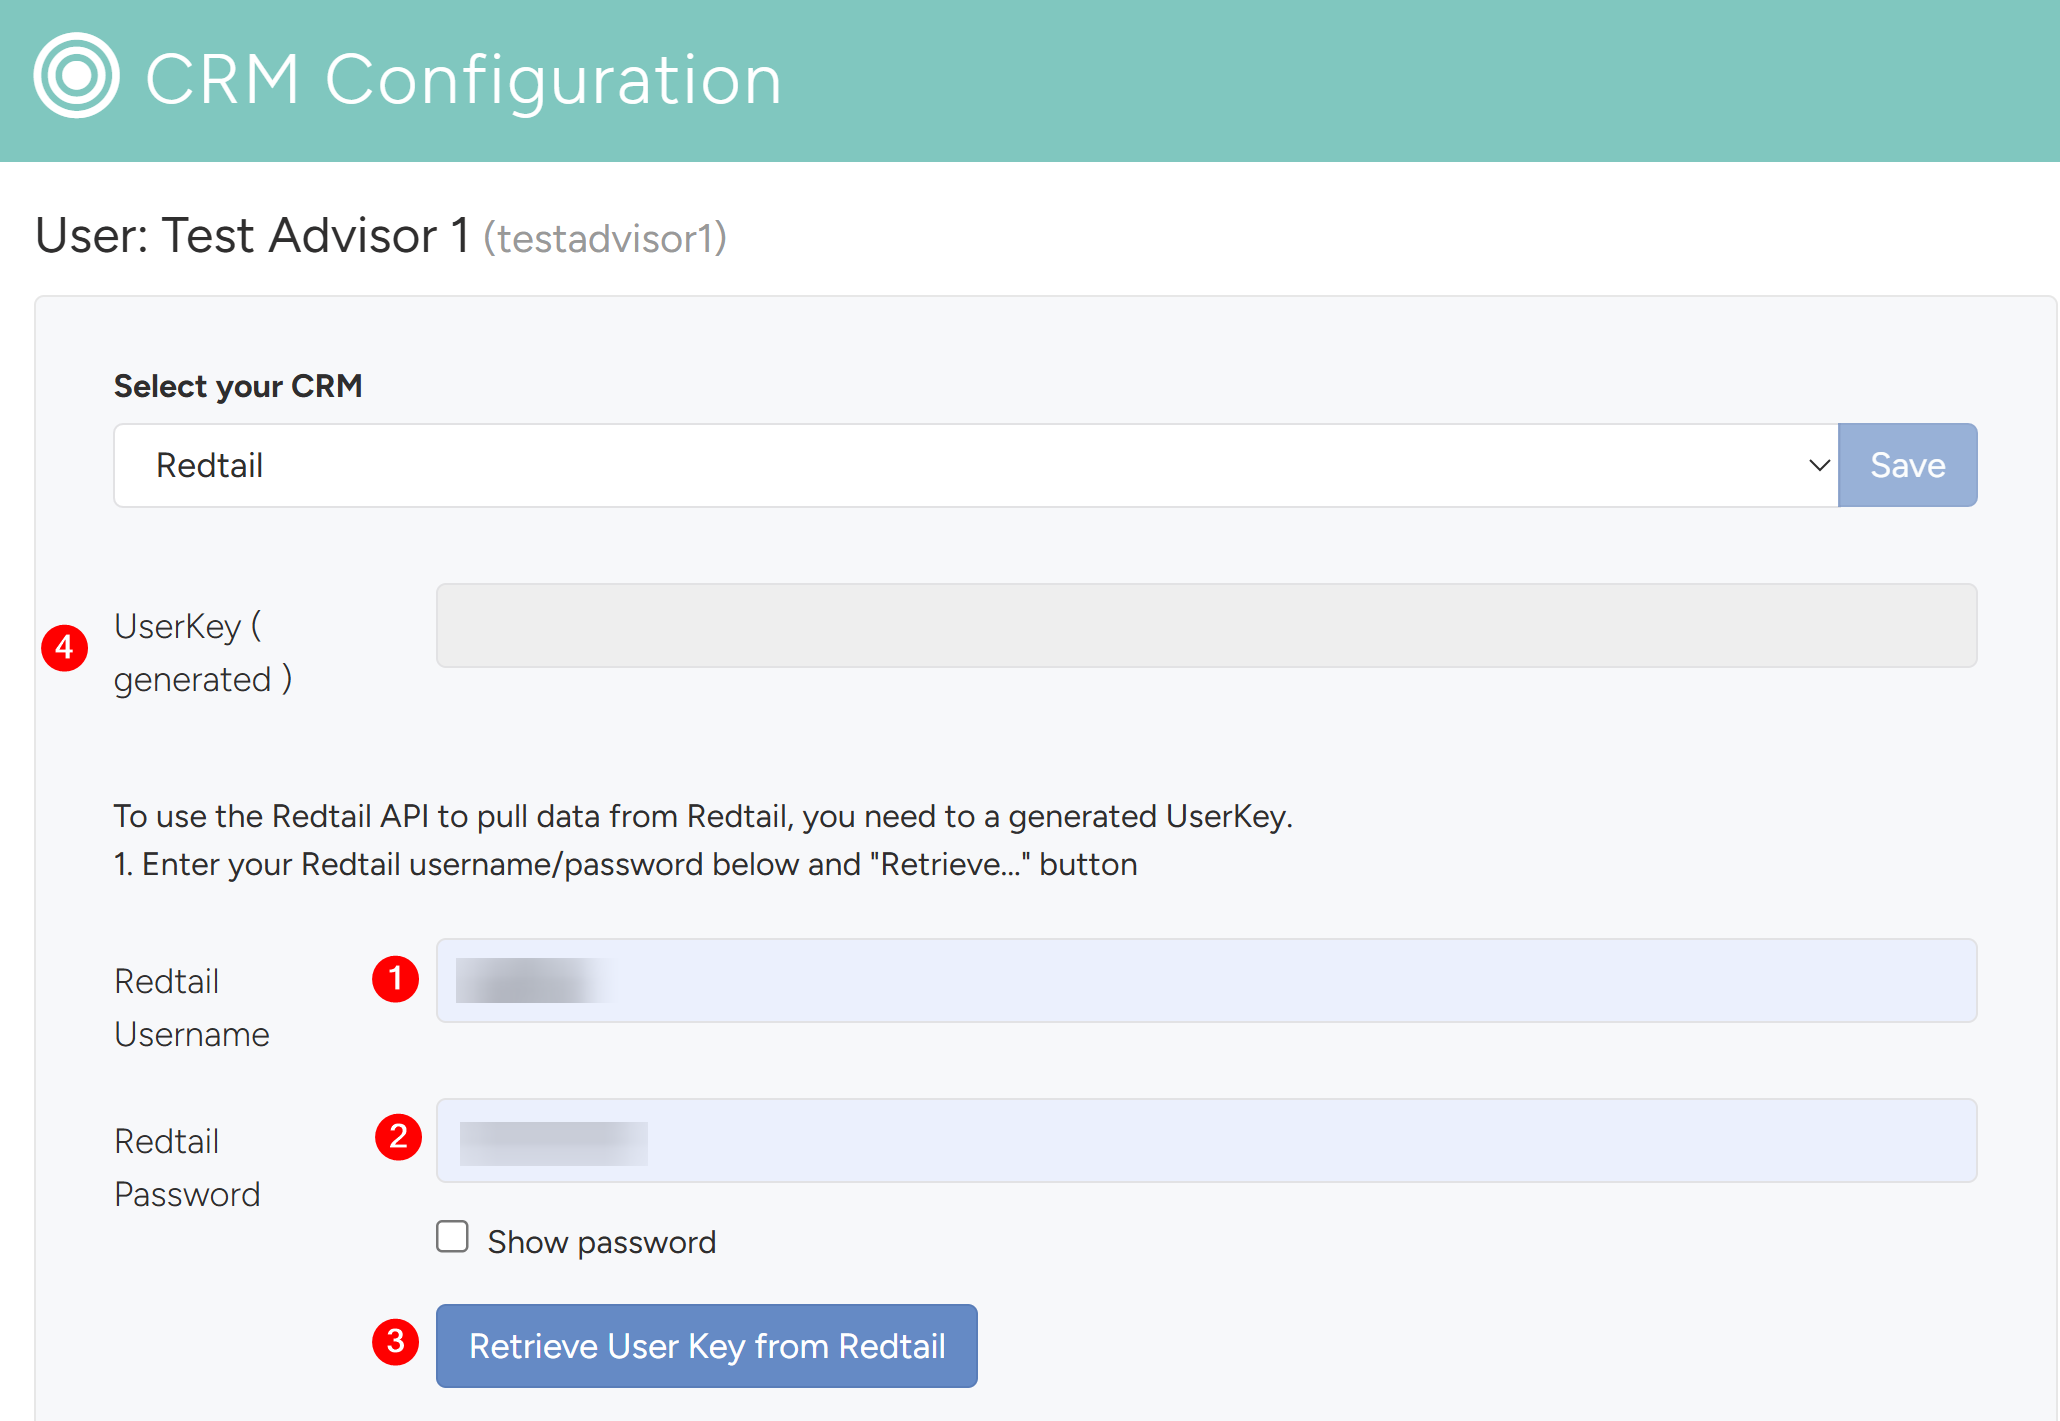
- The page will reload with more details to fill in. To generate the User Key:
- Enter the Username.
- Enter the password.
- Click the Retrieve User Key from Redtail button.
- The Userkey will generate.
5.3.8 Features Permissions
- The Feature Permissions tab is where Admin/Manager roles can edit and toggle on/off the features for each user.

Note
Admin/Manager roles can only change the Feature Permissions.
Note
If the user will be submitting Workflows, or they will be part of the approval process, you must go in and check the box “Can Submit Workflow“.
5.3.9 Preferences
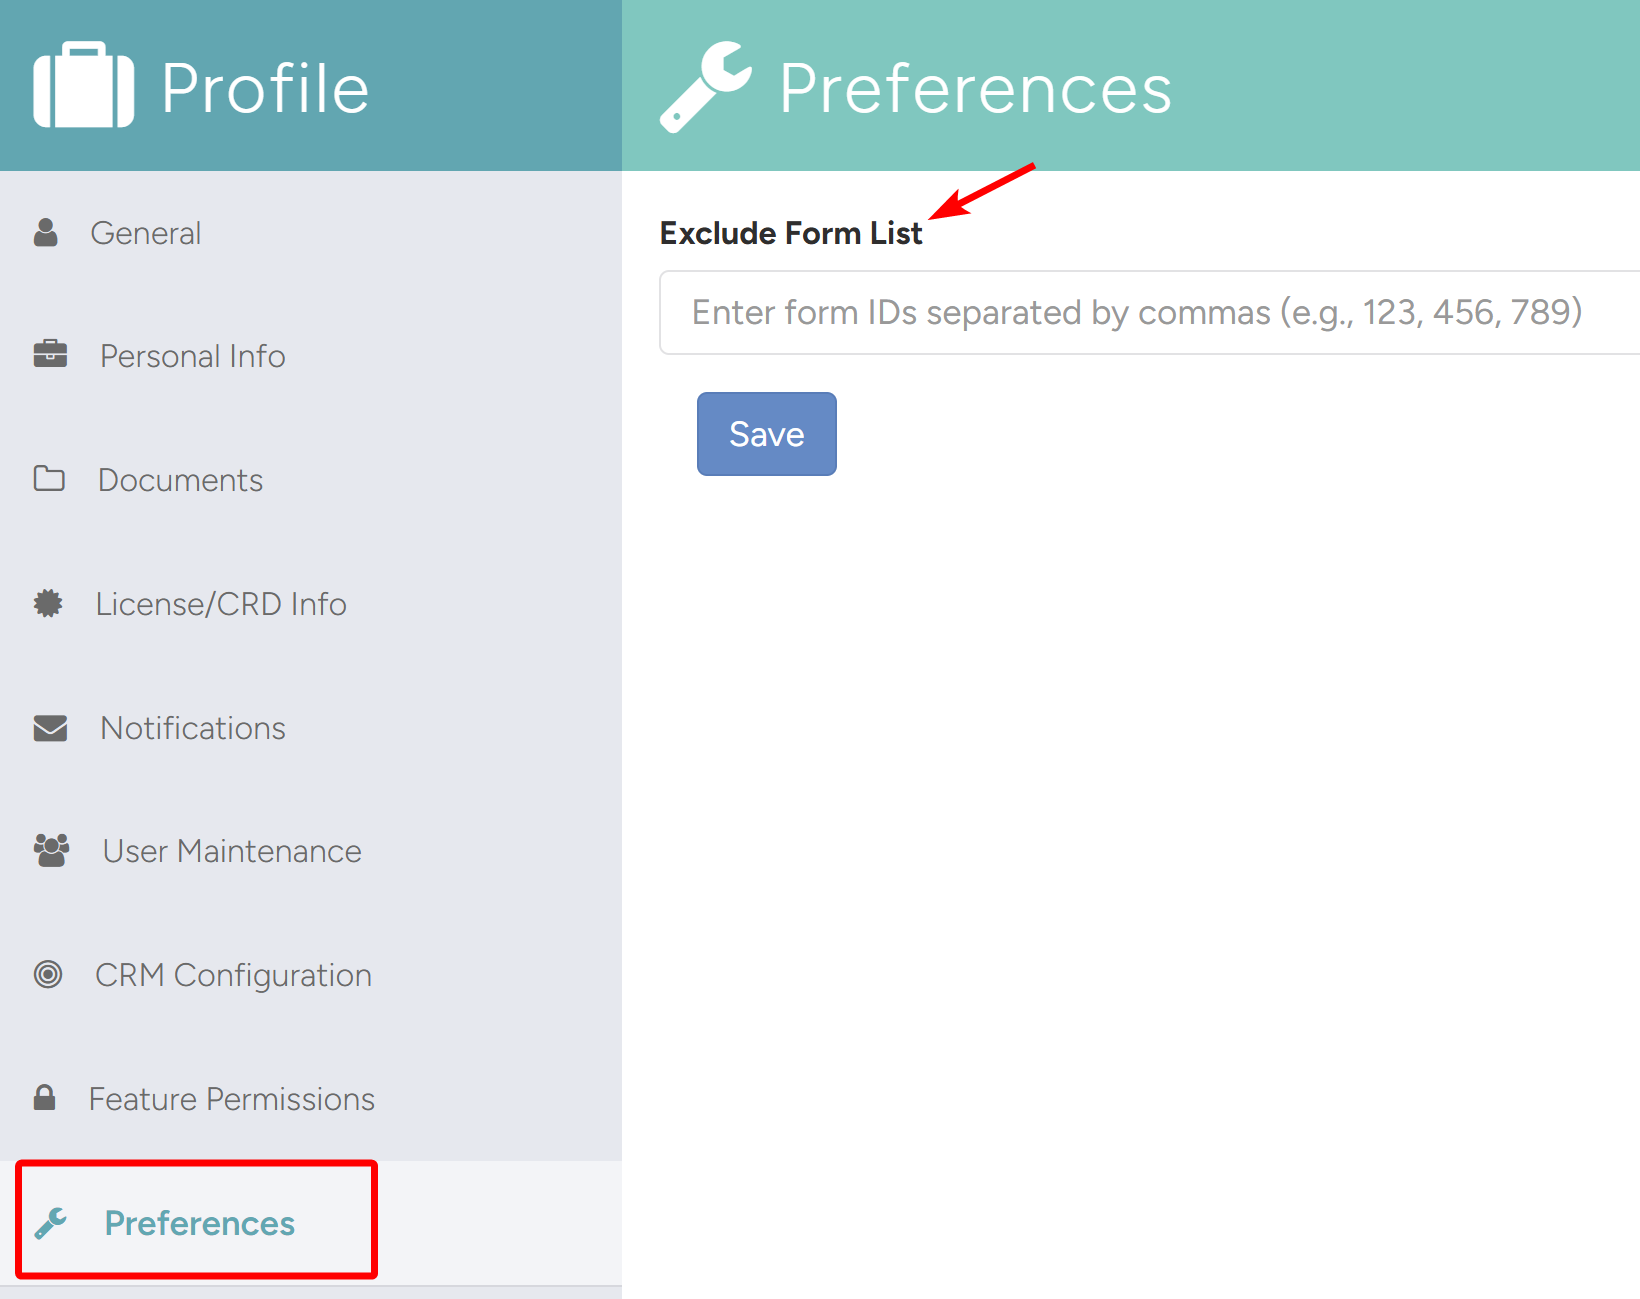
- The Preferences Tab allows to hide specific forms for the user from the Forms Library so the forms are not visible when building workflows.
- To designate forms to hide, in the Exclude Form List field, enter the Form IDs of the forms you want to hide, separated by commas, and click Save. Example:
123, 456, 789.
5.3.10 Commissions
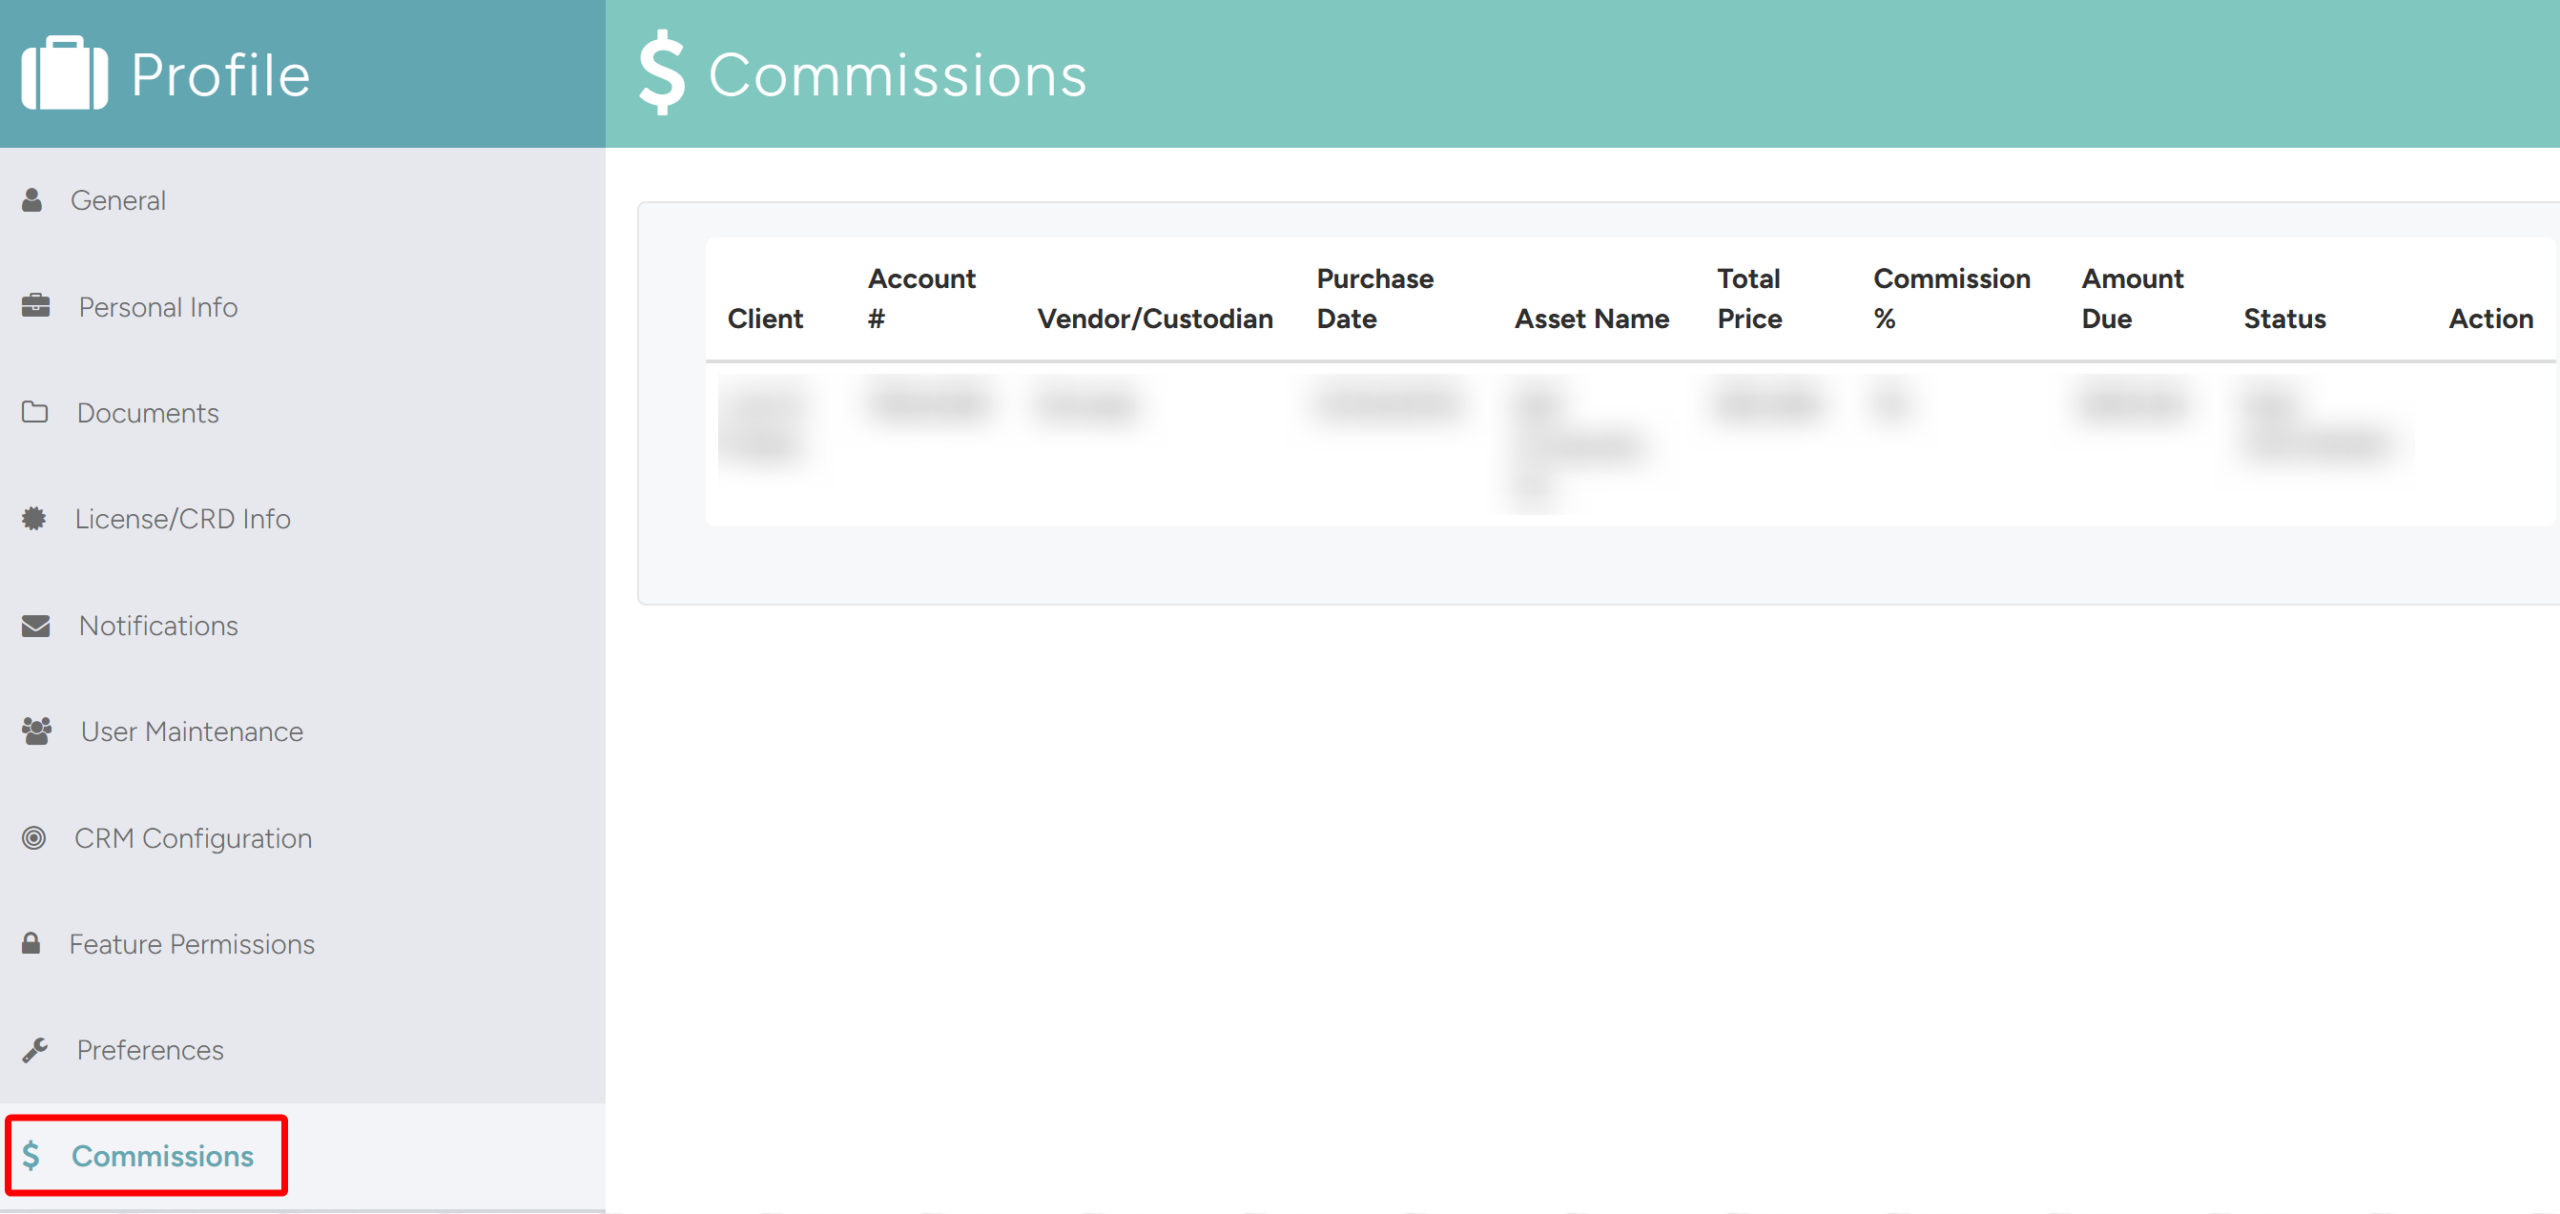
- The Commissions tab provides a view of the commission records associated with the user’s account. Each row displays the following information: