

E-Signature Process
The E-Signature feature facilitates the electronic signing of documents, streamlining the process of obtaining signatures without the need for physical paperwork. Users can electronically sign documents securely and efficiently, ensuring compliance with legal and organizational standards. This feature enhances workflow efficiency by reducing the time and effort required for document signing, while also providing a secure and verifiable method for authorizing and validating important documents.
10.1 Preparing Workflow for e-Signature
For preparing a workflow for e-Signature, follow the steps below.
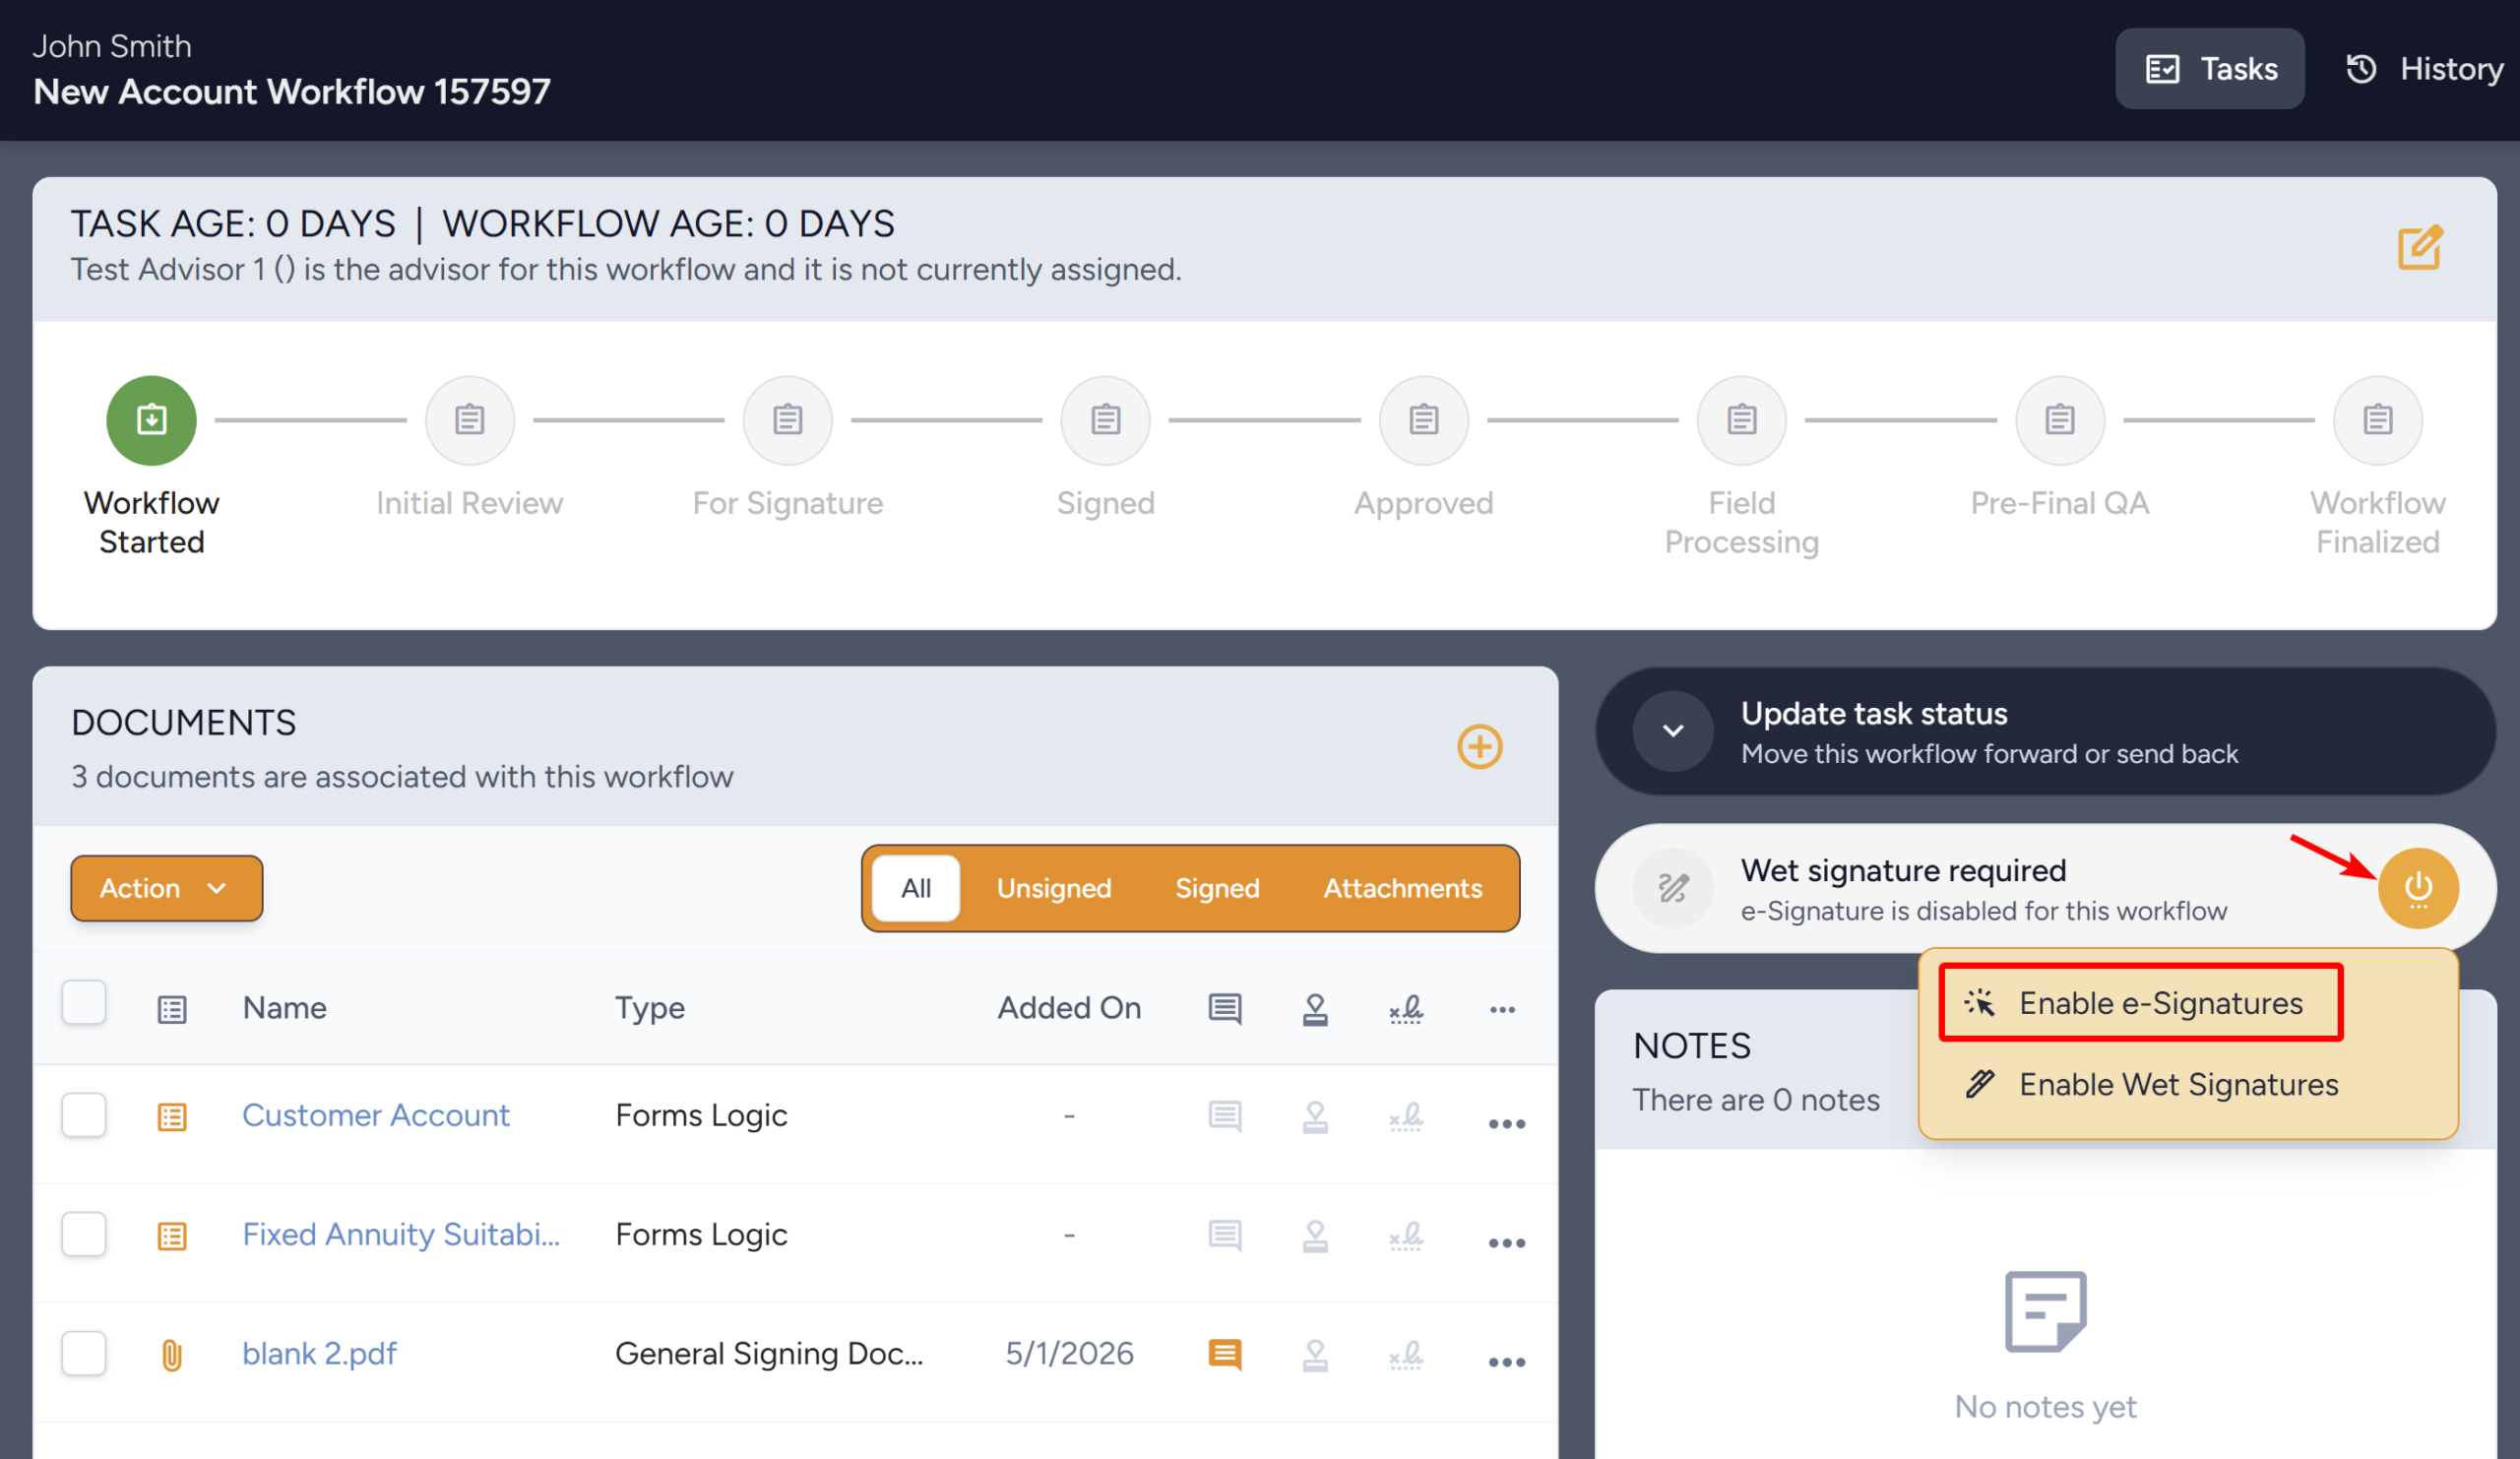
- Inside the Workflow, click the Power Icon on the right side of the Signature Indicator. From the dropdown, click Enable e-Signatures.
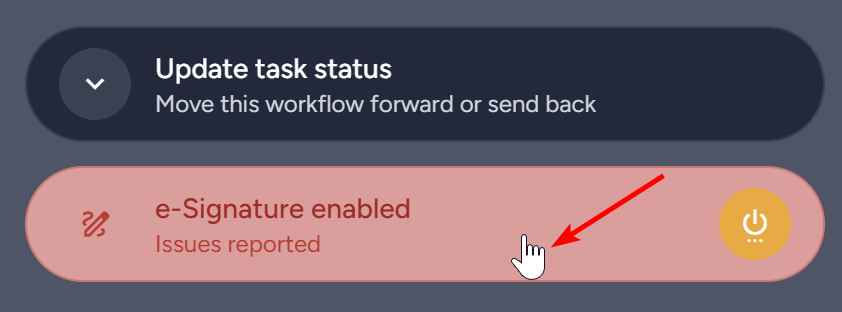
- The Signature Indicator will show that e-Signature is enabled
- If there are no e-Signature validation errors, the Signature Indicator will be green and the workflow is ready to be submitted. If so, skip to Section 8.2 Submitting Workflow for e-Signature.

- If there are e-Signature validation errors, the Signature Indicator will be Red and say Issues Reported. If so, you need to resolve these errors before submitting the Workflow.

- To resolve the e-Signature validation errors, click on the Signature Indicator.
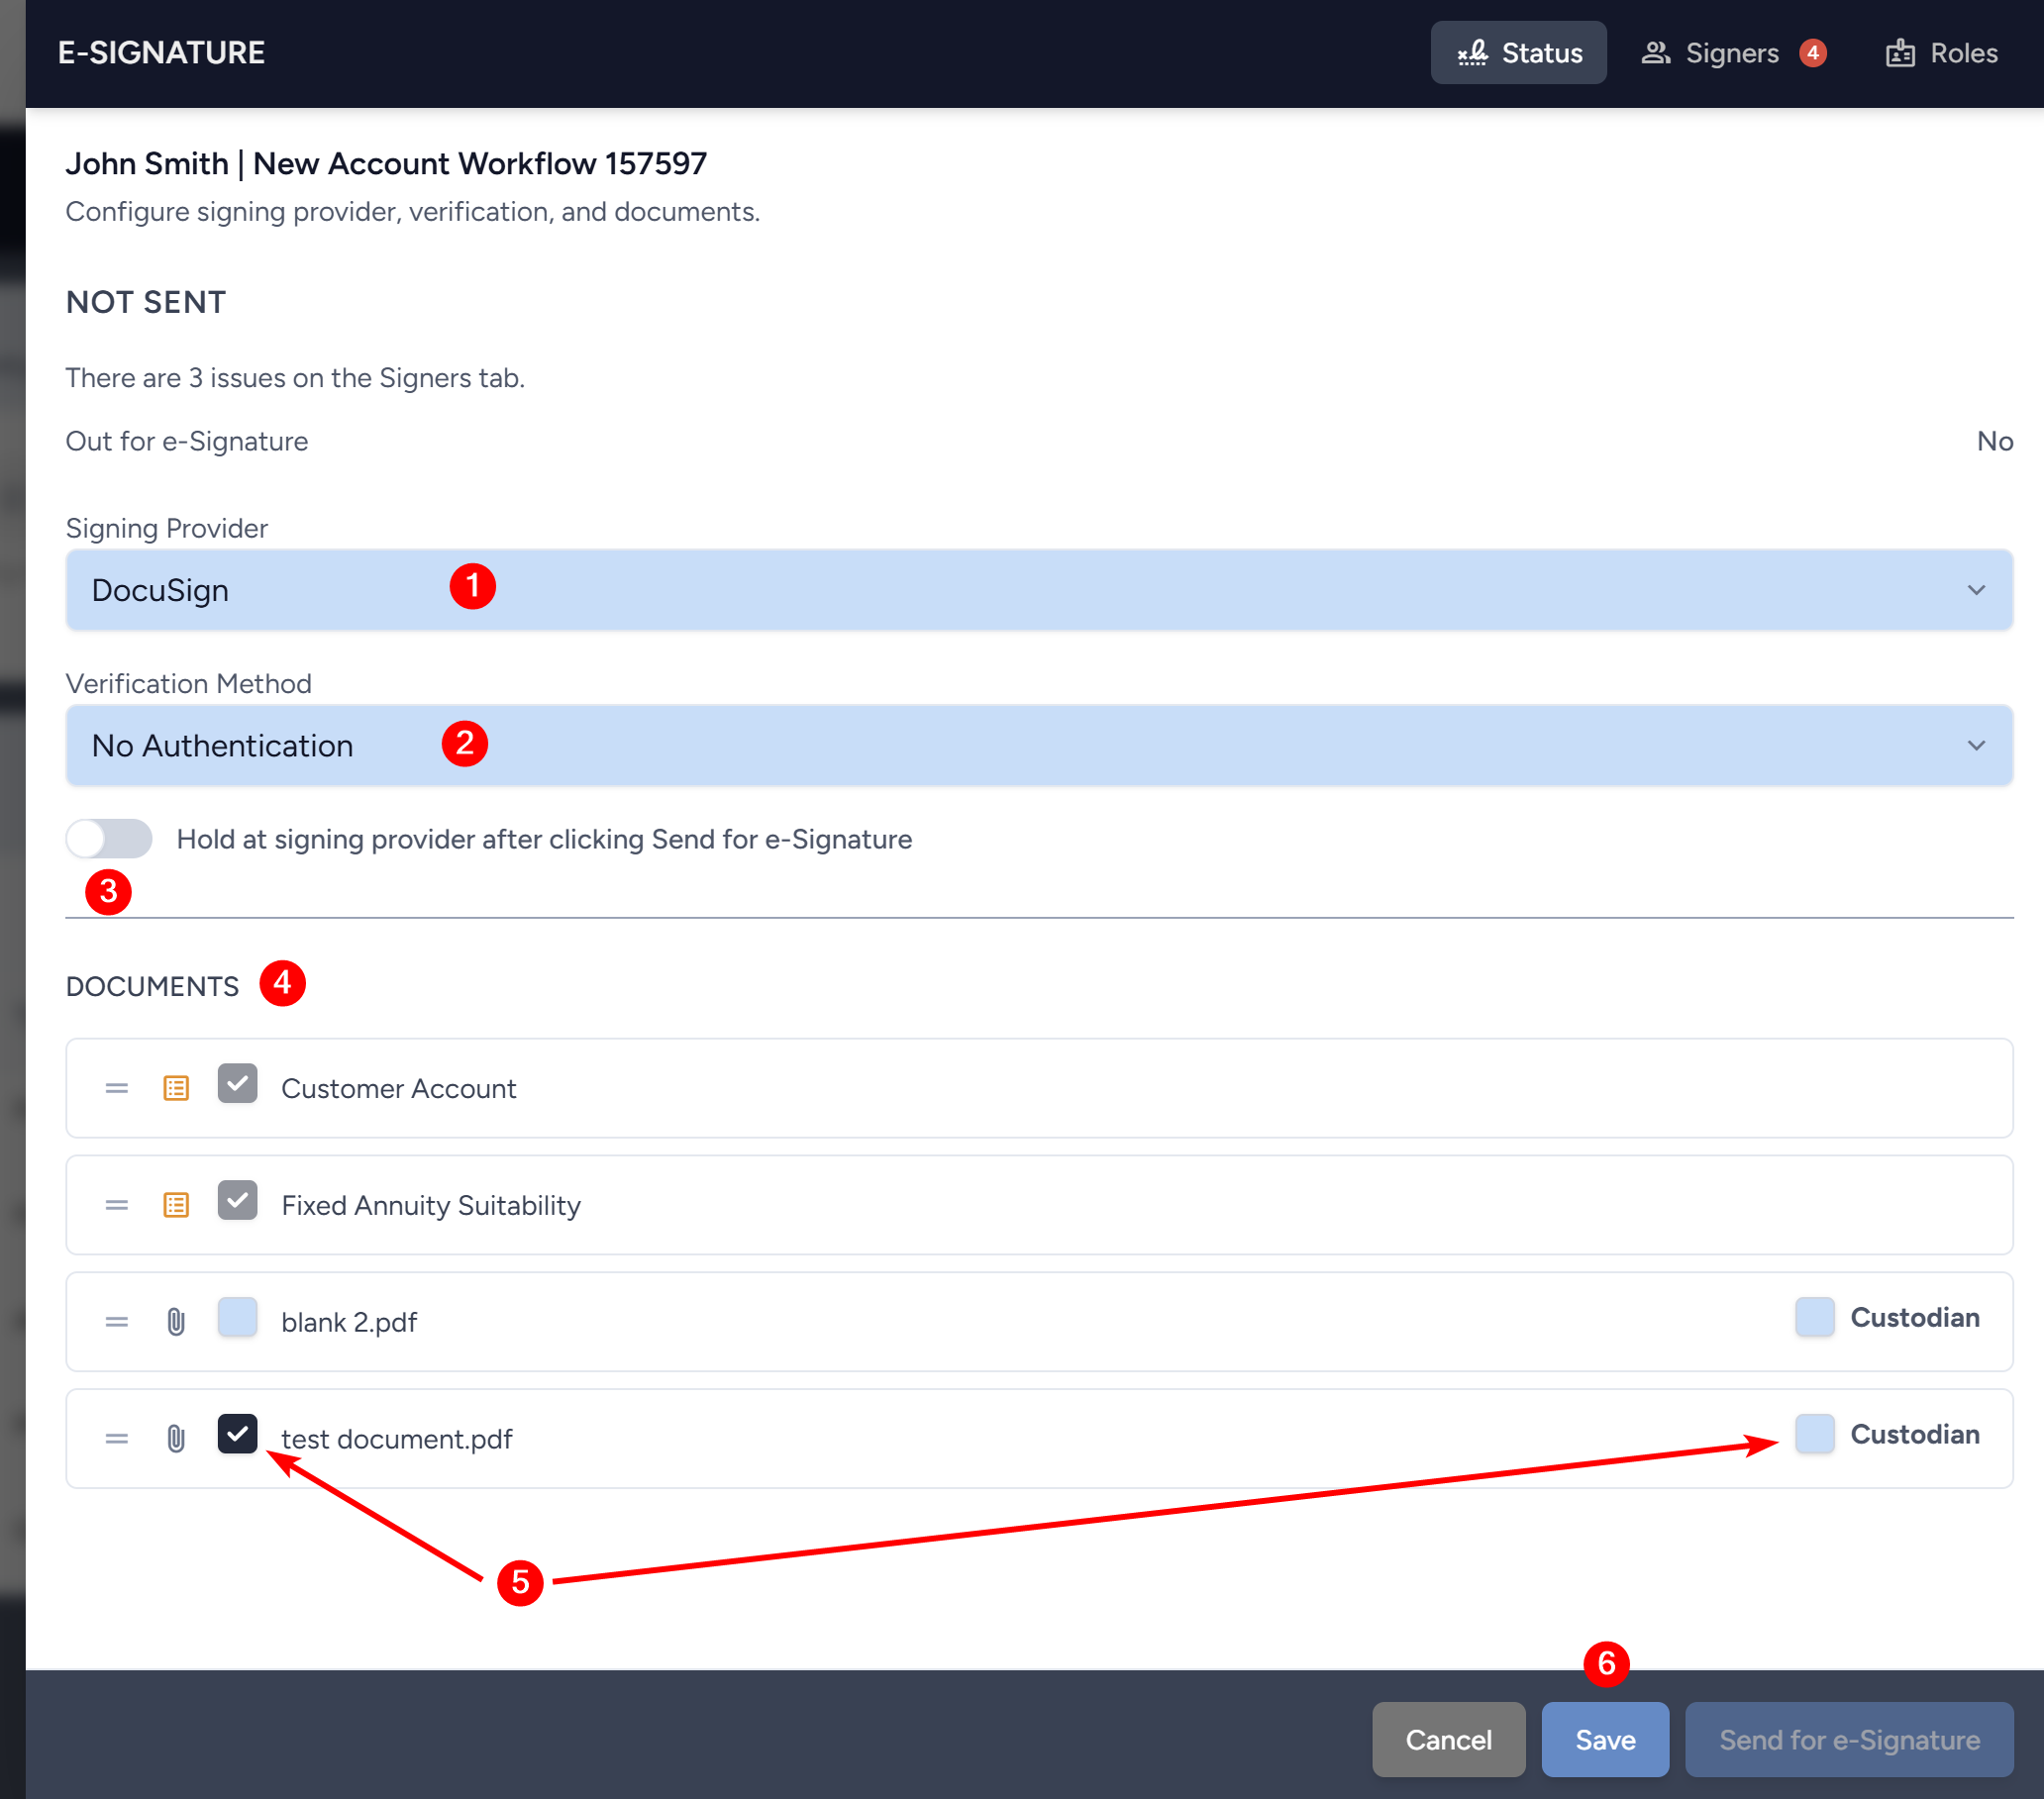
- The e-Signature drawer will open in the Status tab. In this tab, you can do the following:
- See and/or set the Signing Provider.
- Change the Verification method.
- Toggle on or off Hold at signing provider.
- Review the Documents and rearrange the order.
- Designate Uploaded Documents to be sent.
- Check which uploaded documents are included for e-Signature.
- If the document needs to be forwarded to a third-party custodian after signing, check the Send to Custodian option for that document.
- Save changes at the bottom.
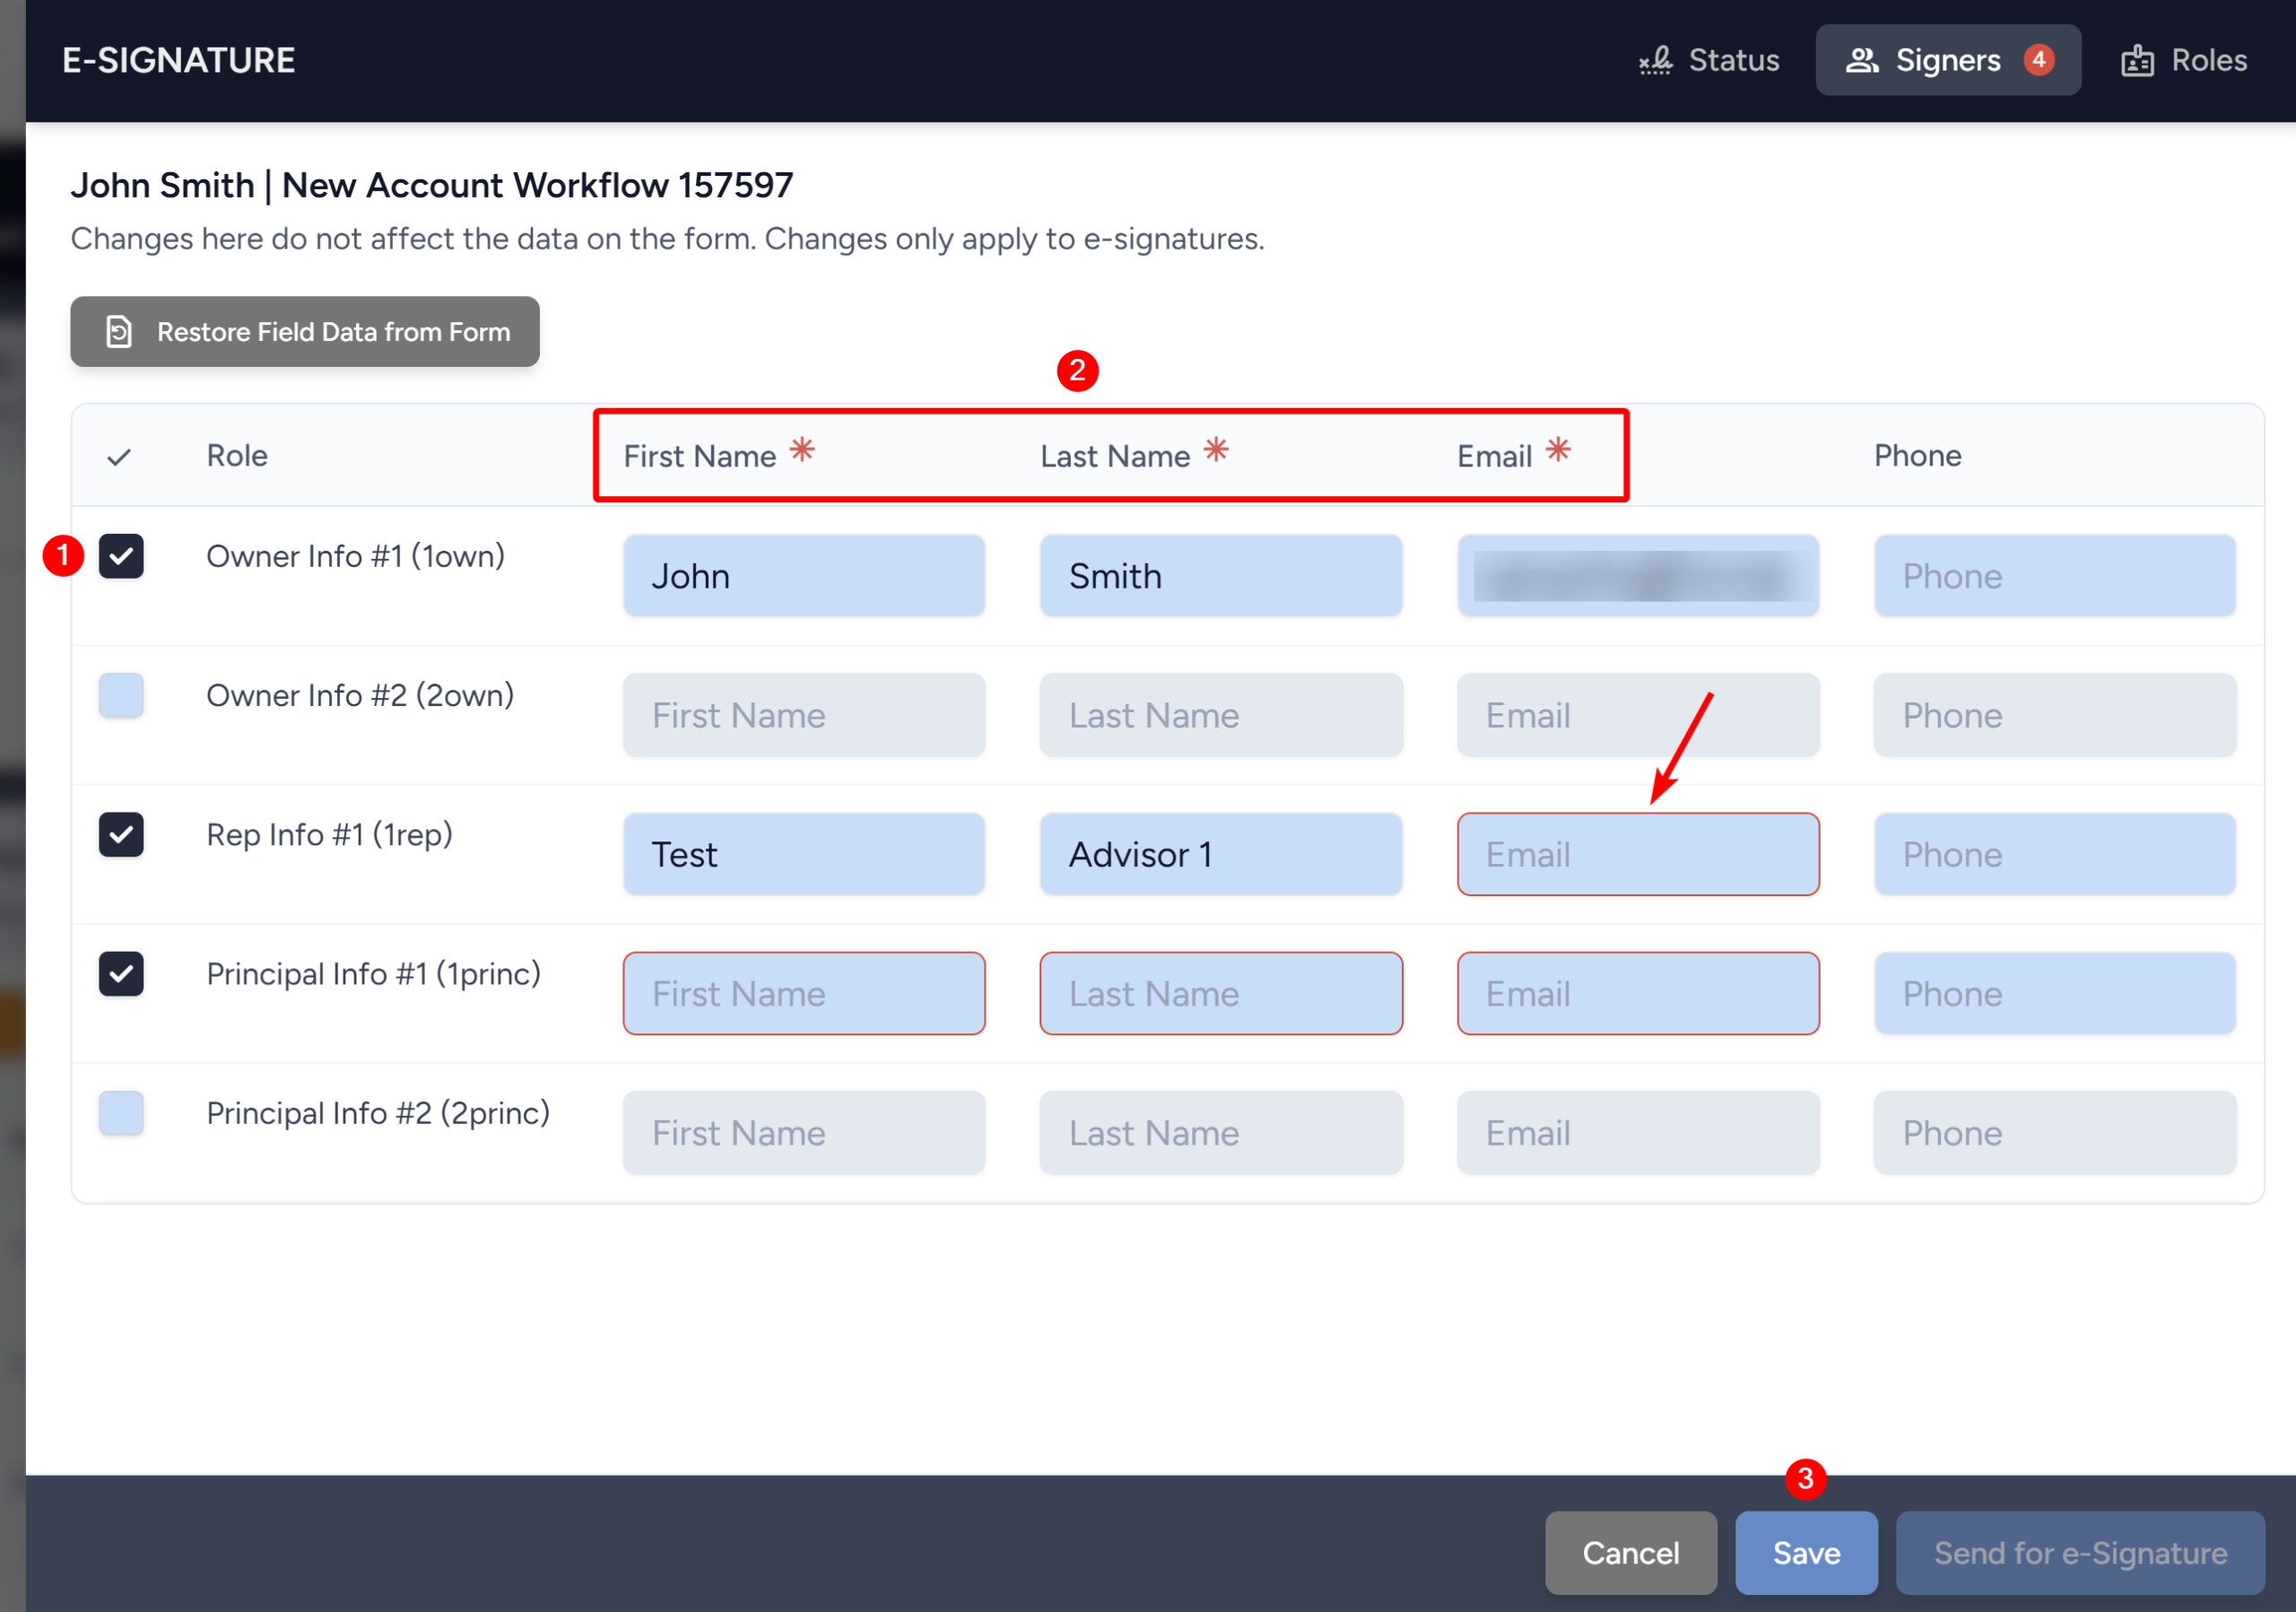
- Once you everything looks good in the Status tab, click on the Signers tab in the upper right.

- The Signers tab is where you will do the following:
- Select or deselect Roles for signing
- Fill in the fields that are required (marked with a red asterisk) based on the designated verification method. Fields that need to be filled in will have a red boarder.
- Click Save when all required information is filled in and accurate. The validation errors will be resolved.
- Navigate back into the Workflow and now the Signature Indicator will be green – which indicates the workflow is ready for submission.

10.2 Submitting Workflow for e-Signature
For submitting a workflow for e-Signature, follow the steps below.
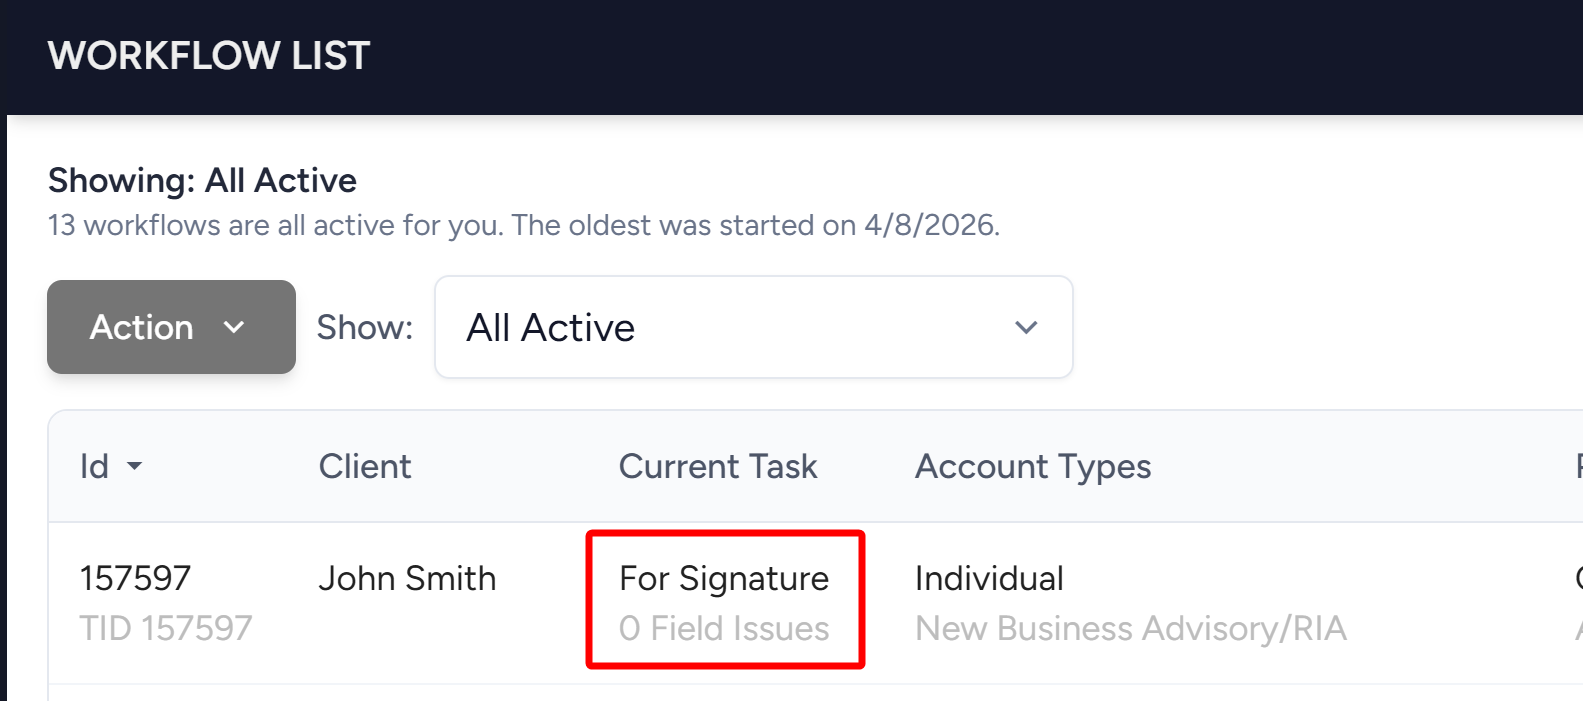
- Click the Update Task Status button. From the dropdown, click Progress Forward. This will submit the Workflow and move it to the next Status (in this case it would be “For Signature”).
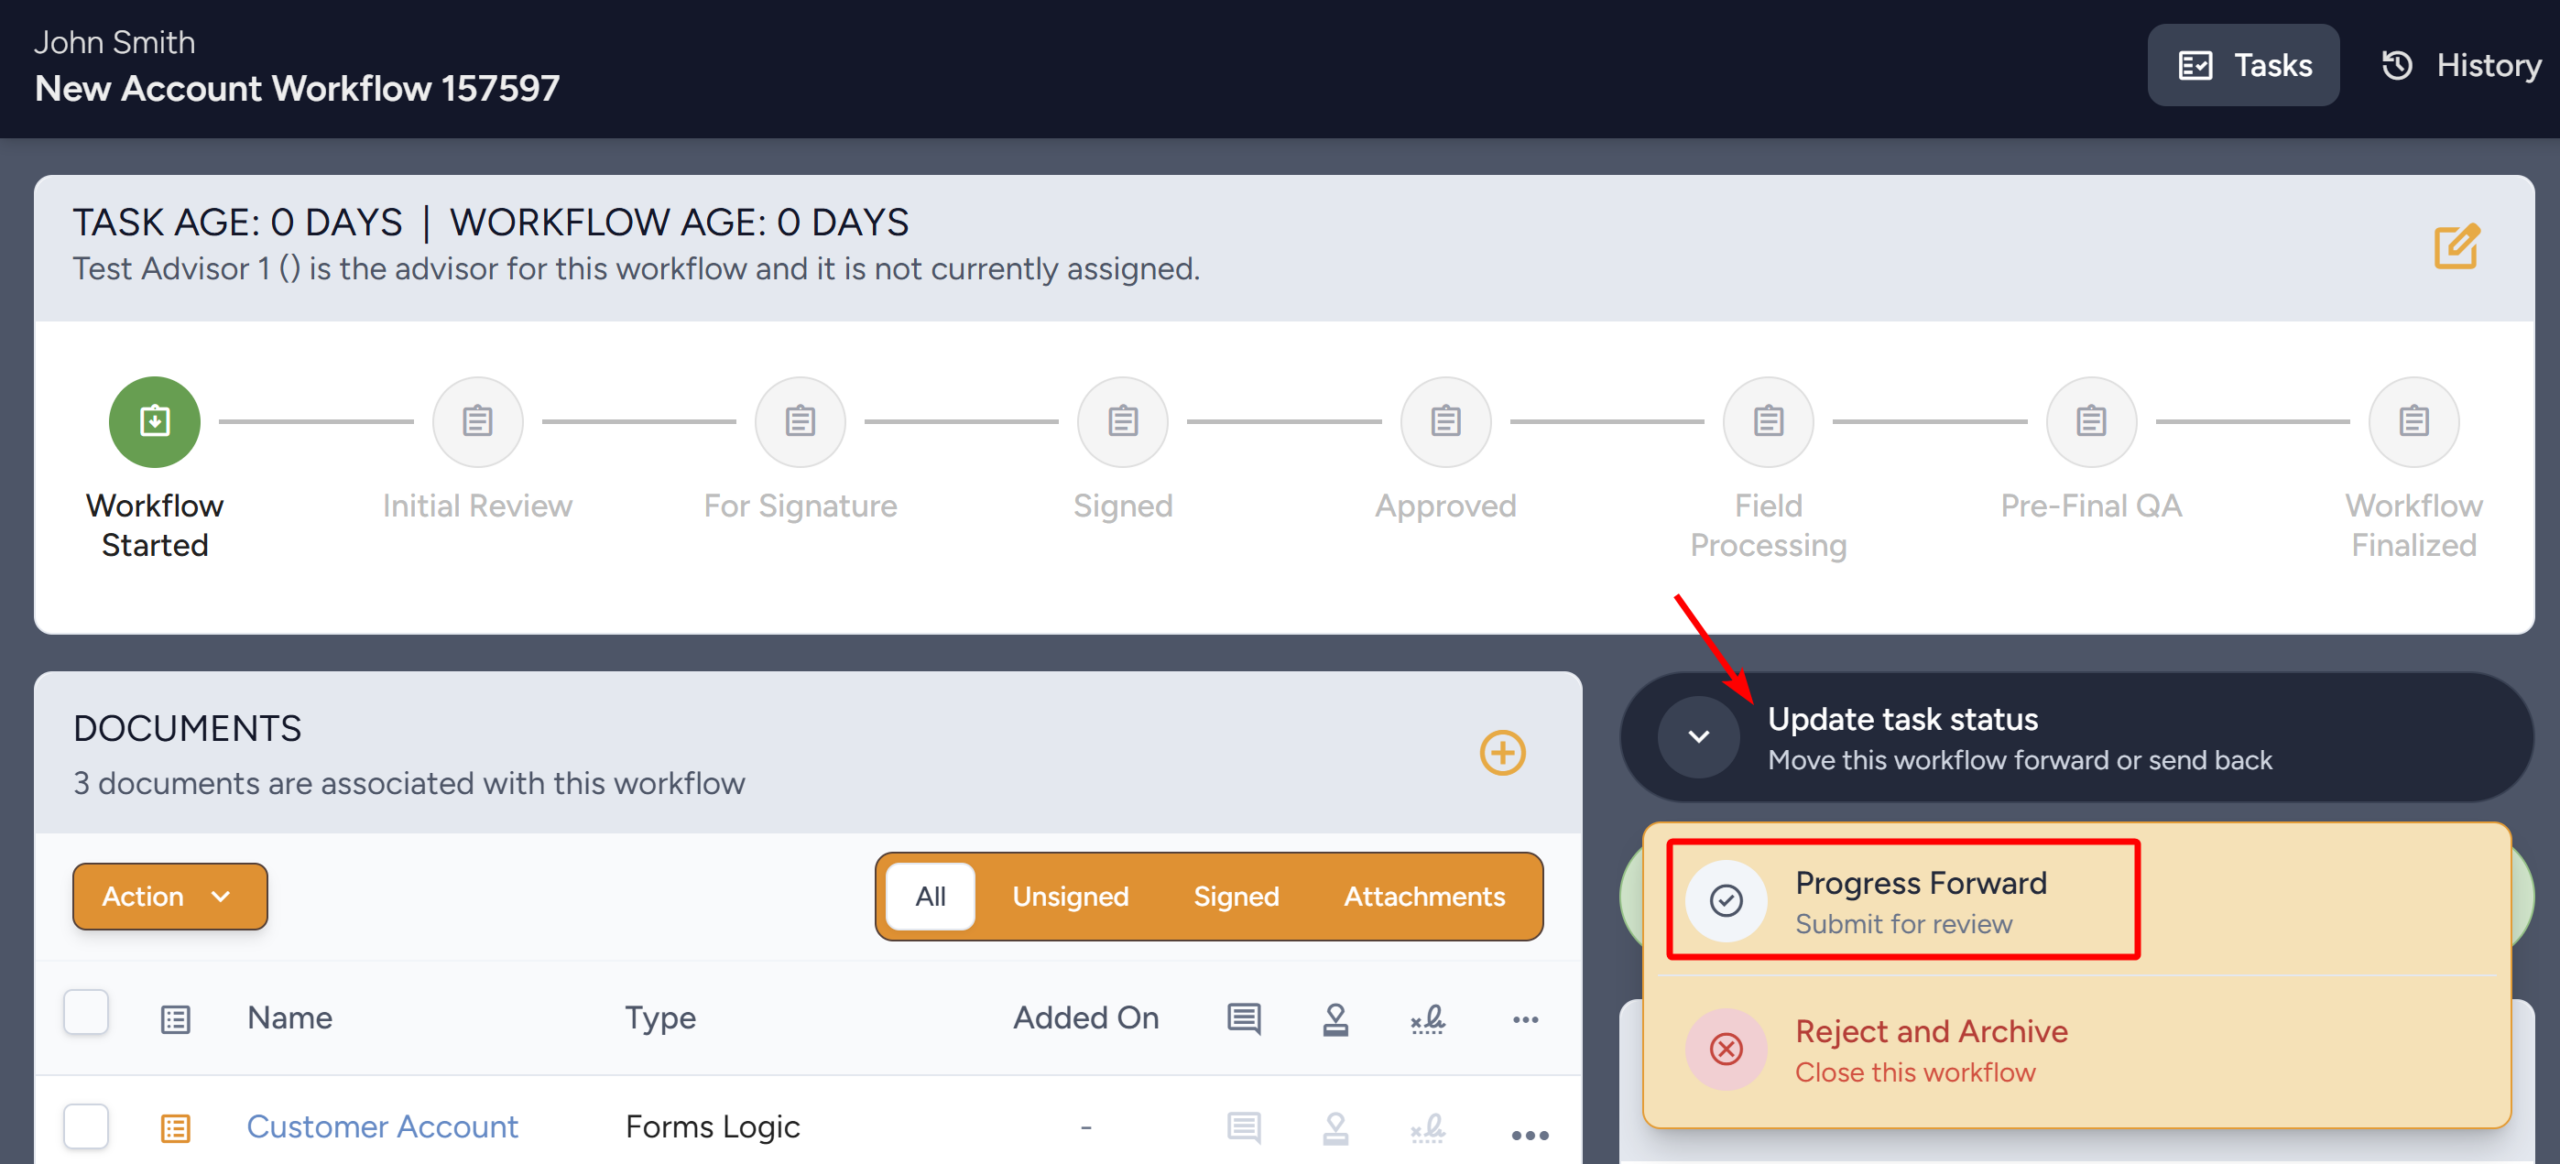
- The Workflow is now in For Signature.
10.3 Sending Workflow for e-Signature
For sending a workflow for e-Signature, follow the steps below.
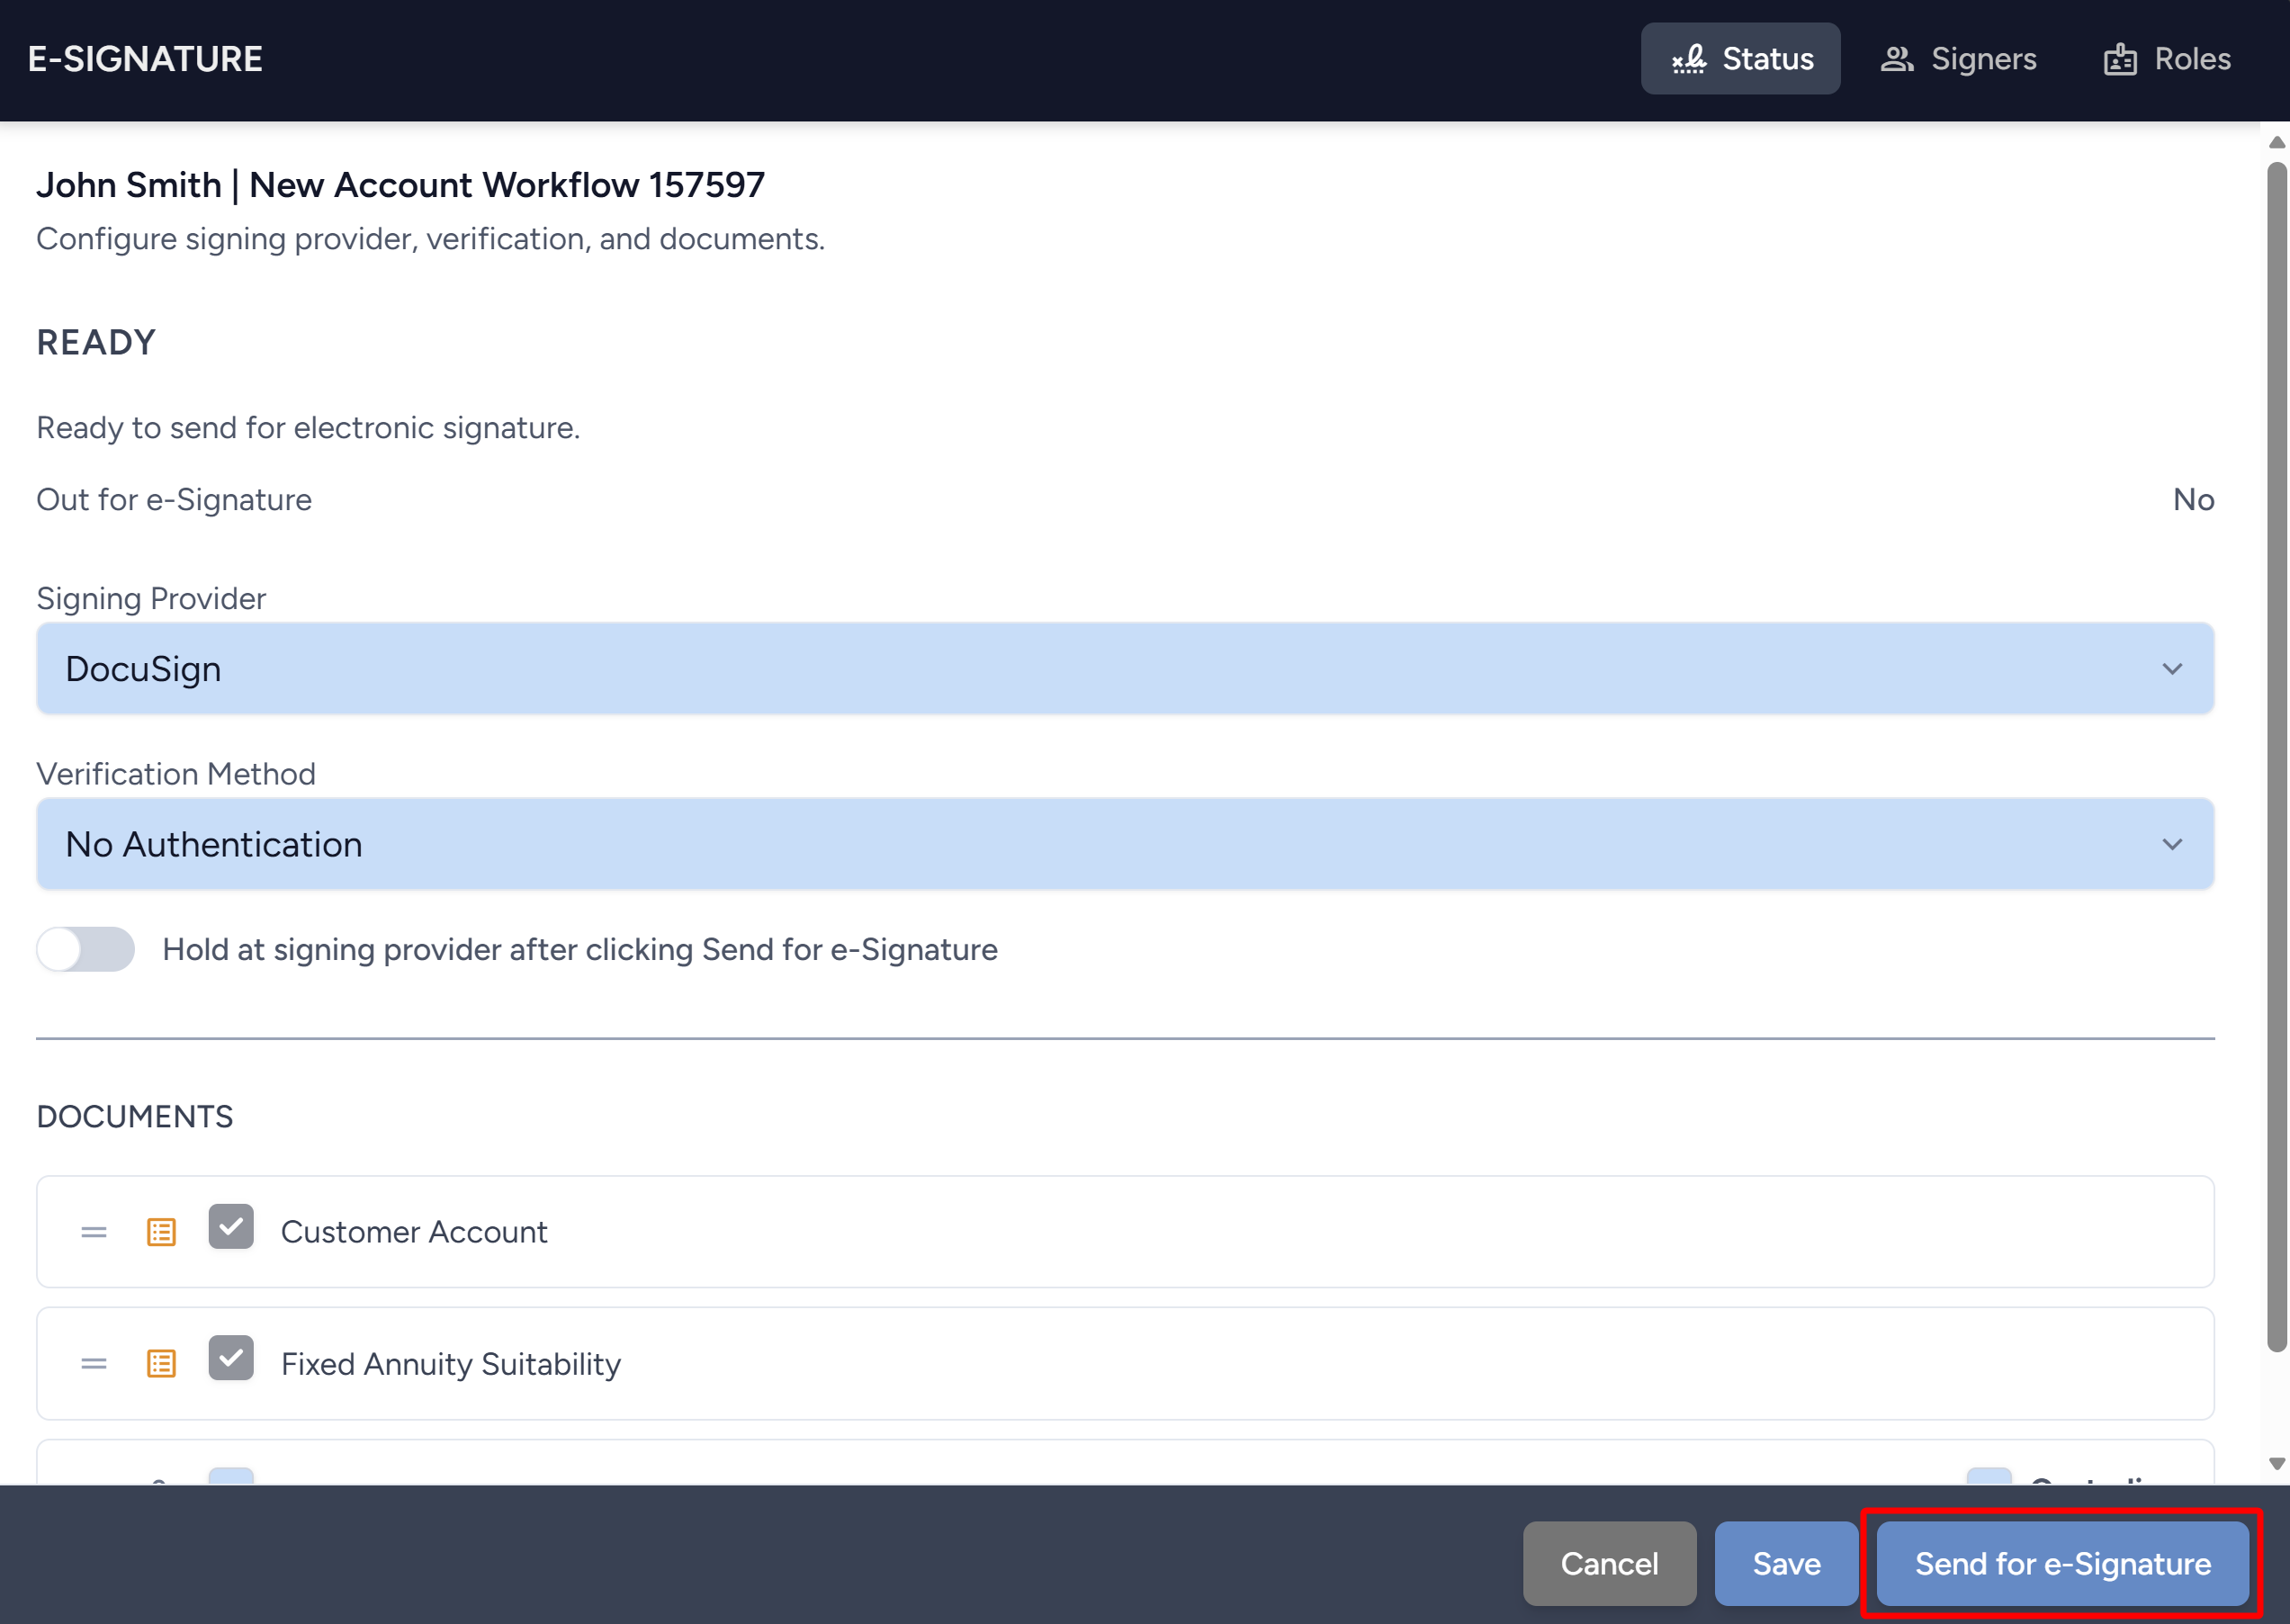
- Now the Workflow is ready to be sent to the e-sign vendor. Navigate inside the Workflow and click on the e-Signature Indicator to open the E-signature Drawer.

- Once the E-signature Drawer opens, click the Send for e-Signature button in the bottom right of any of the tabs. This will send the Workflow for e-Signature.
- While the Workflow’s documents are in the process of being e-signed, in the Workflow List the three dots on the far right for the Workflow show the current status of the e-sign. In this case, it will show esign: Pending and the date.
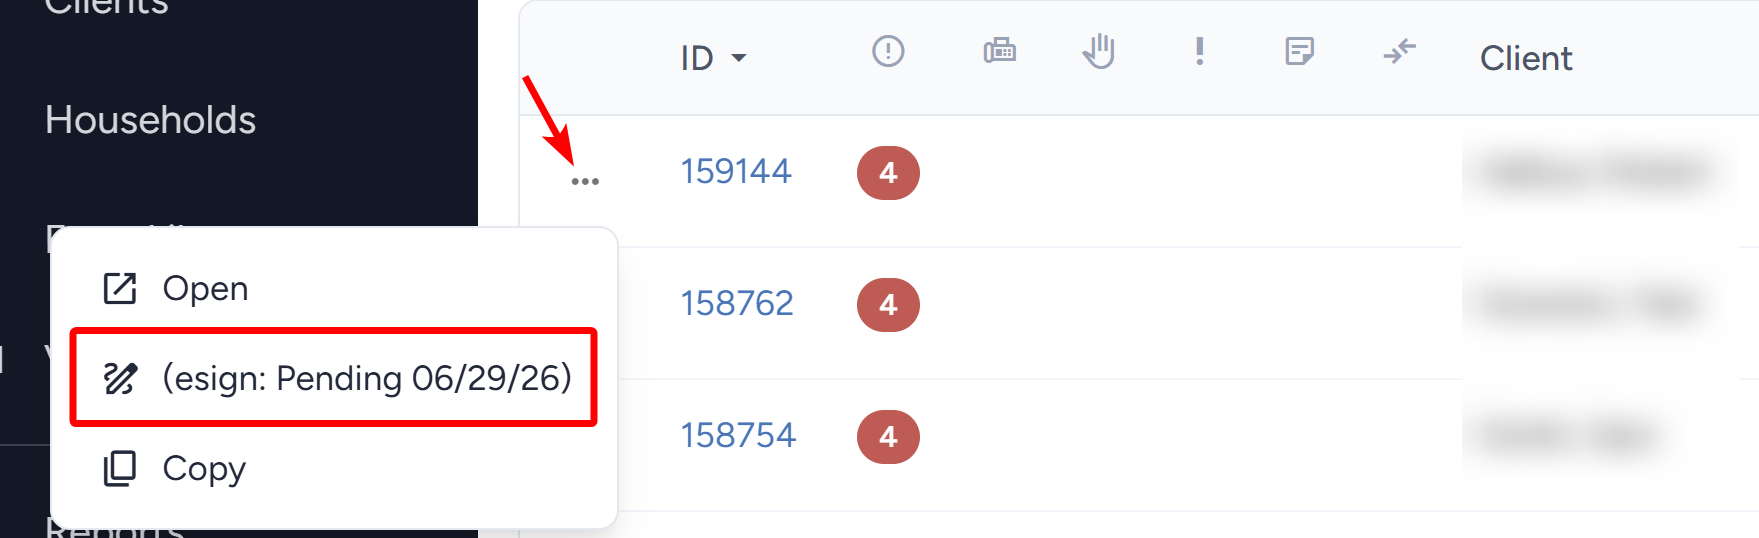
- When the e-sign is done, the current status will update to esign: Signed and the date.

- After being e-signed, the Workflow’s current Task will depend on the next Task after it being signed.