Print for Wet Signatures
The Print for Wet Signatures feature allows users to generate and print documents that require physical signatures. This feature ensures that all necessary fields are included and formatted correctly for easy signing. By providing a streamlined process for printing documents, it supports compliance with legal and procedural requirements that mandate physical signatures.
9.1 Printing Document for Wet Signatures
To print the document for wet signatures, follow the steps below.
- In the Workflow, click the Action button in the Documents section. From the dropdown, click Print/Package/Send.
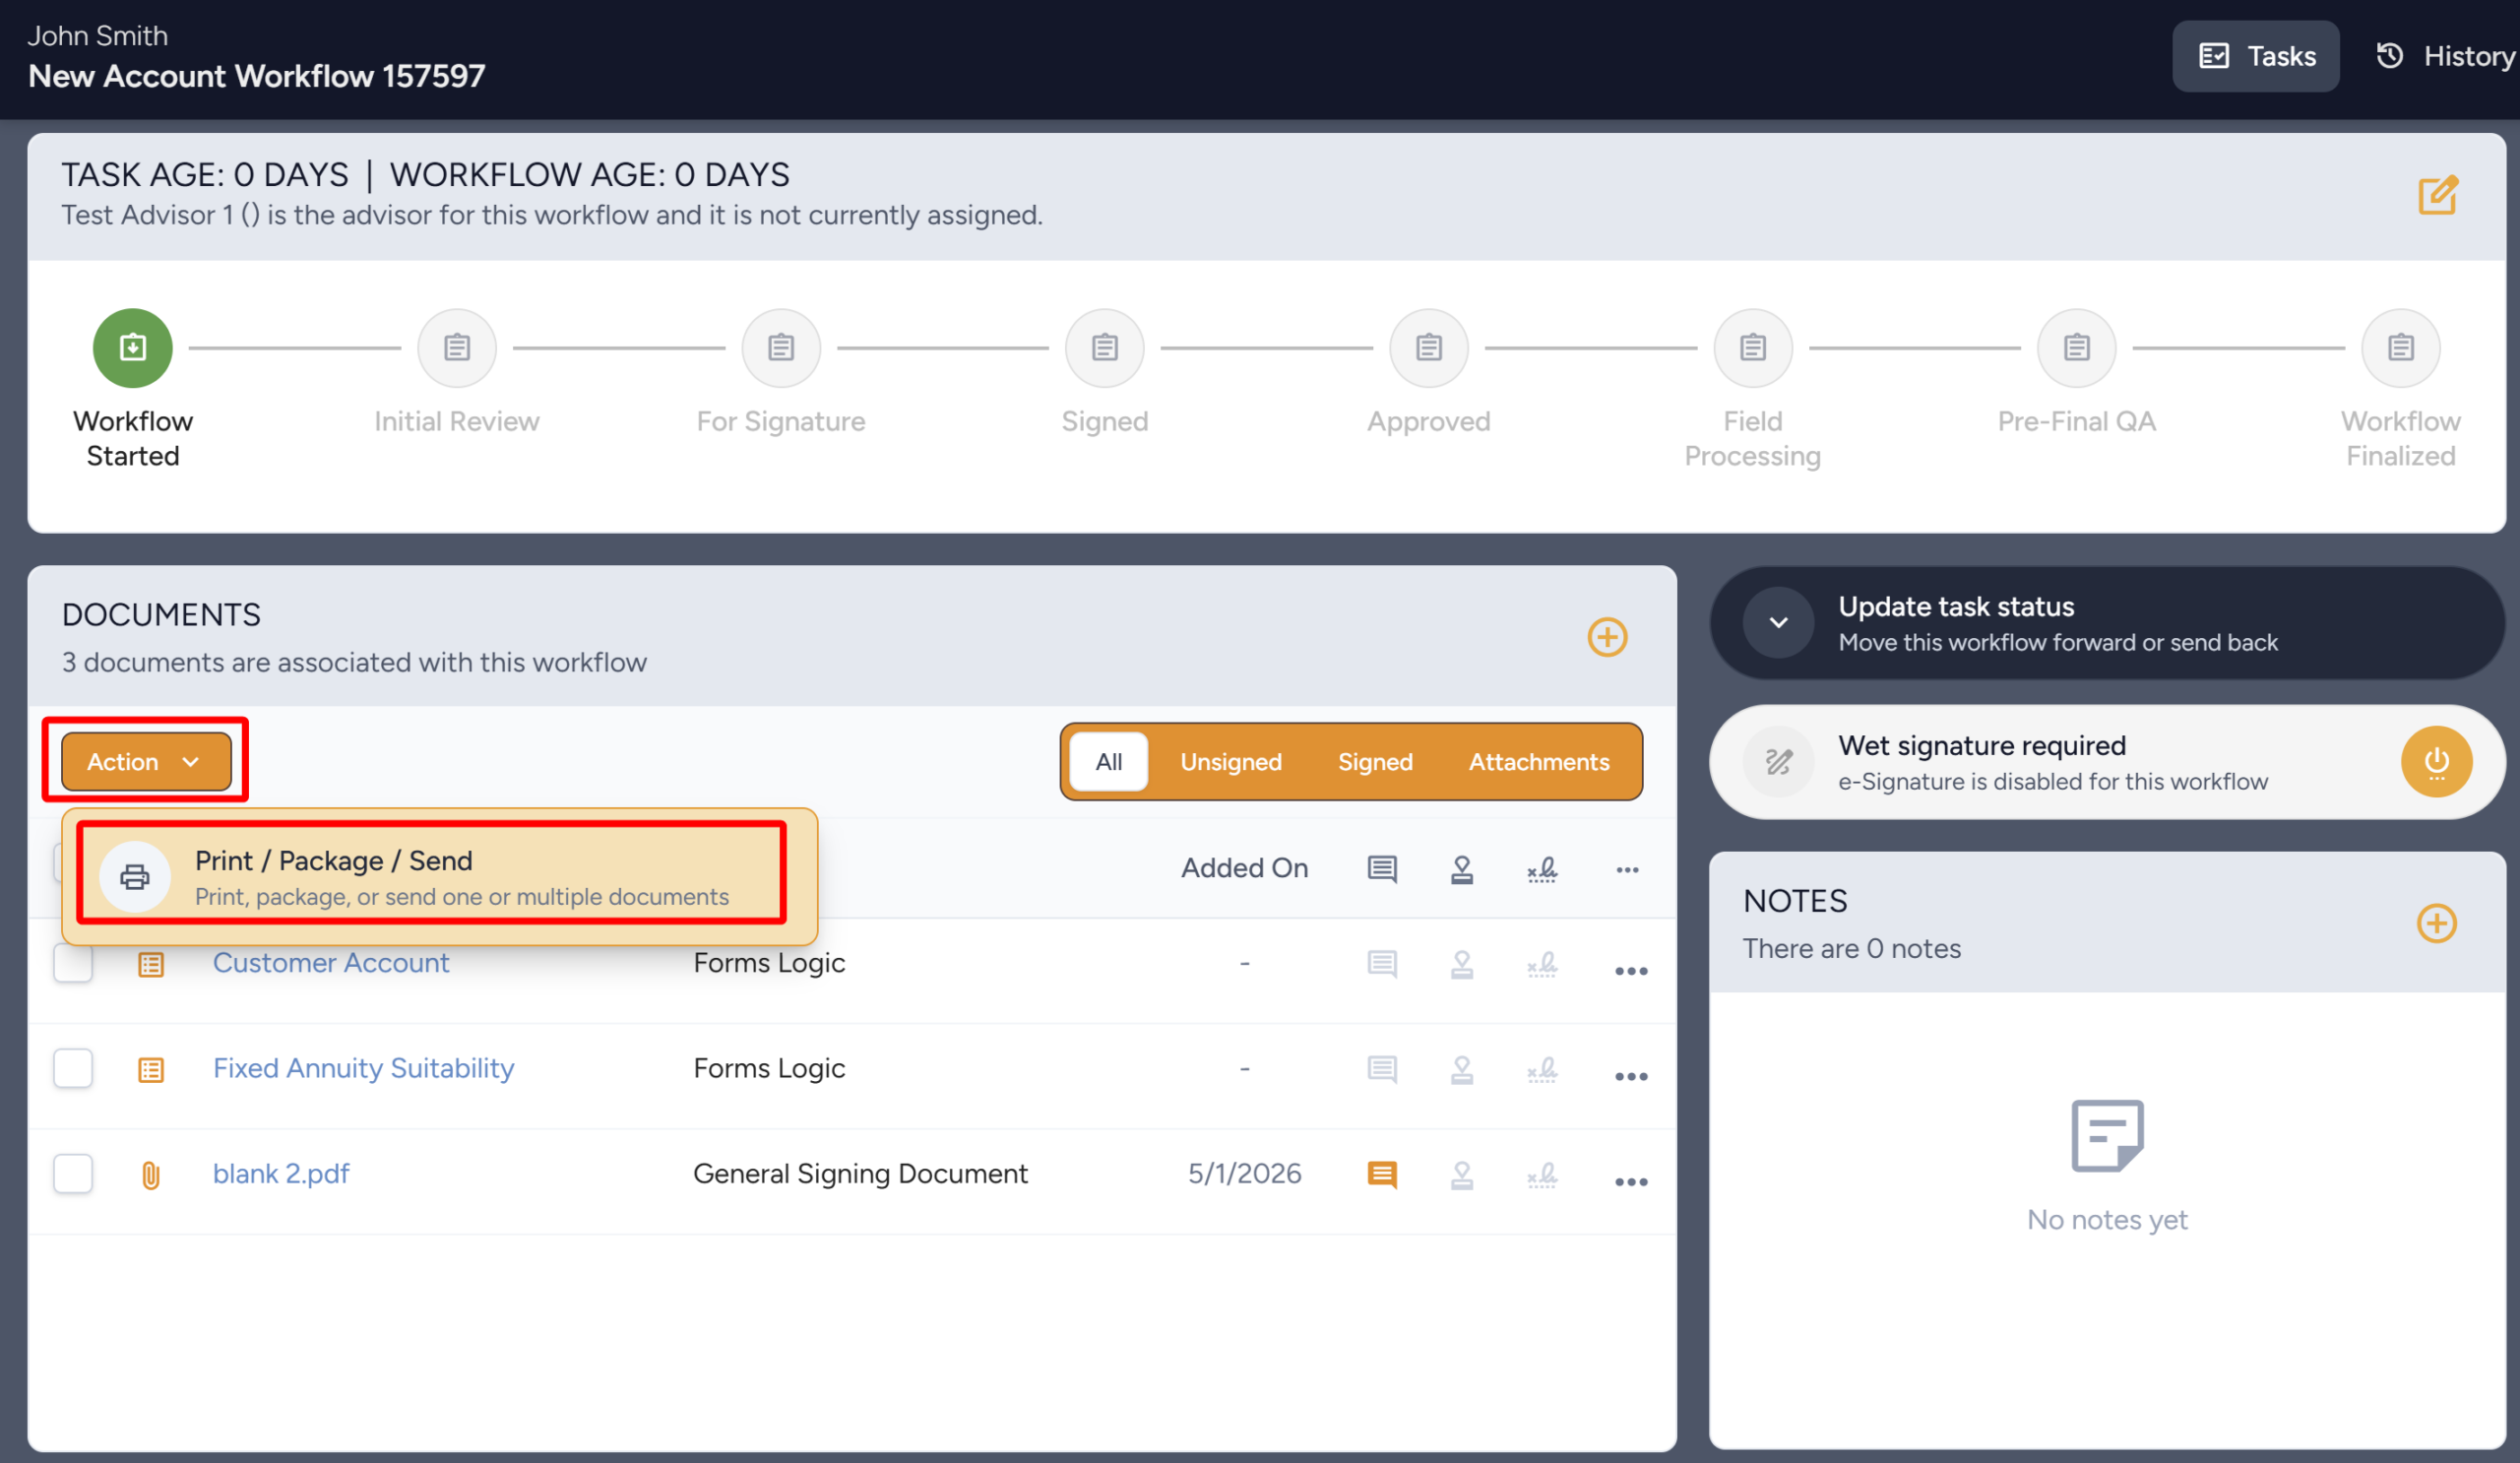
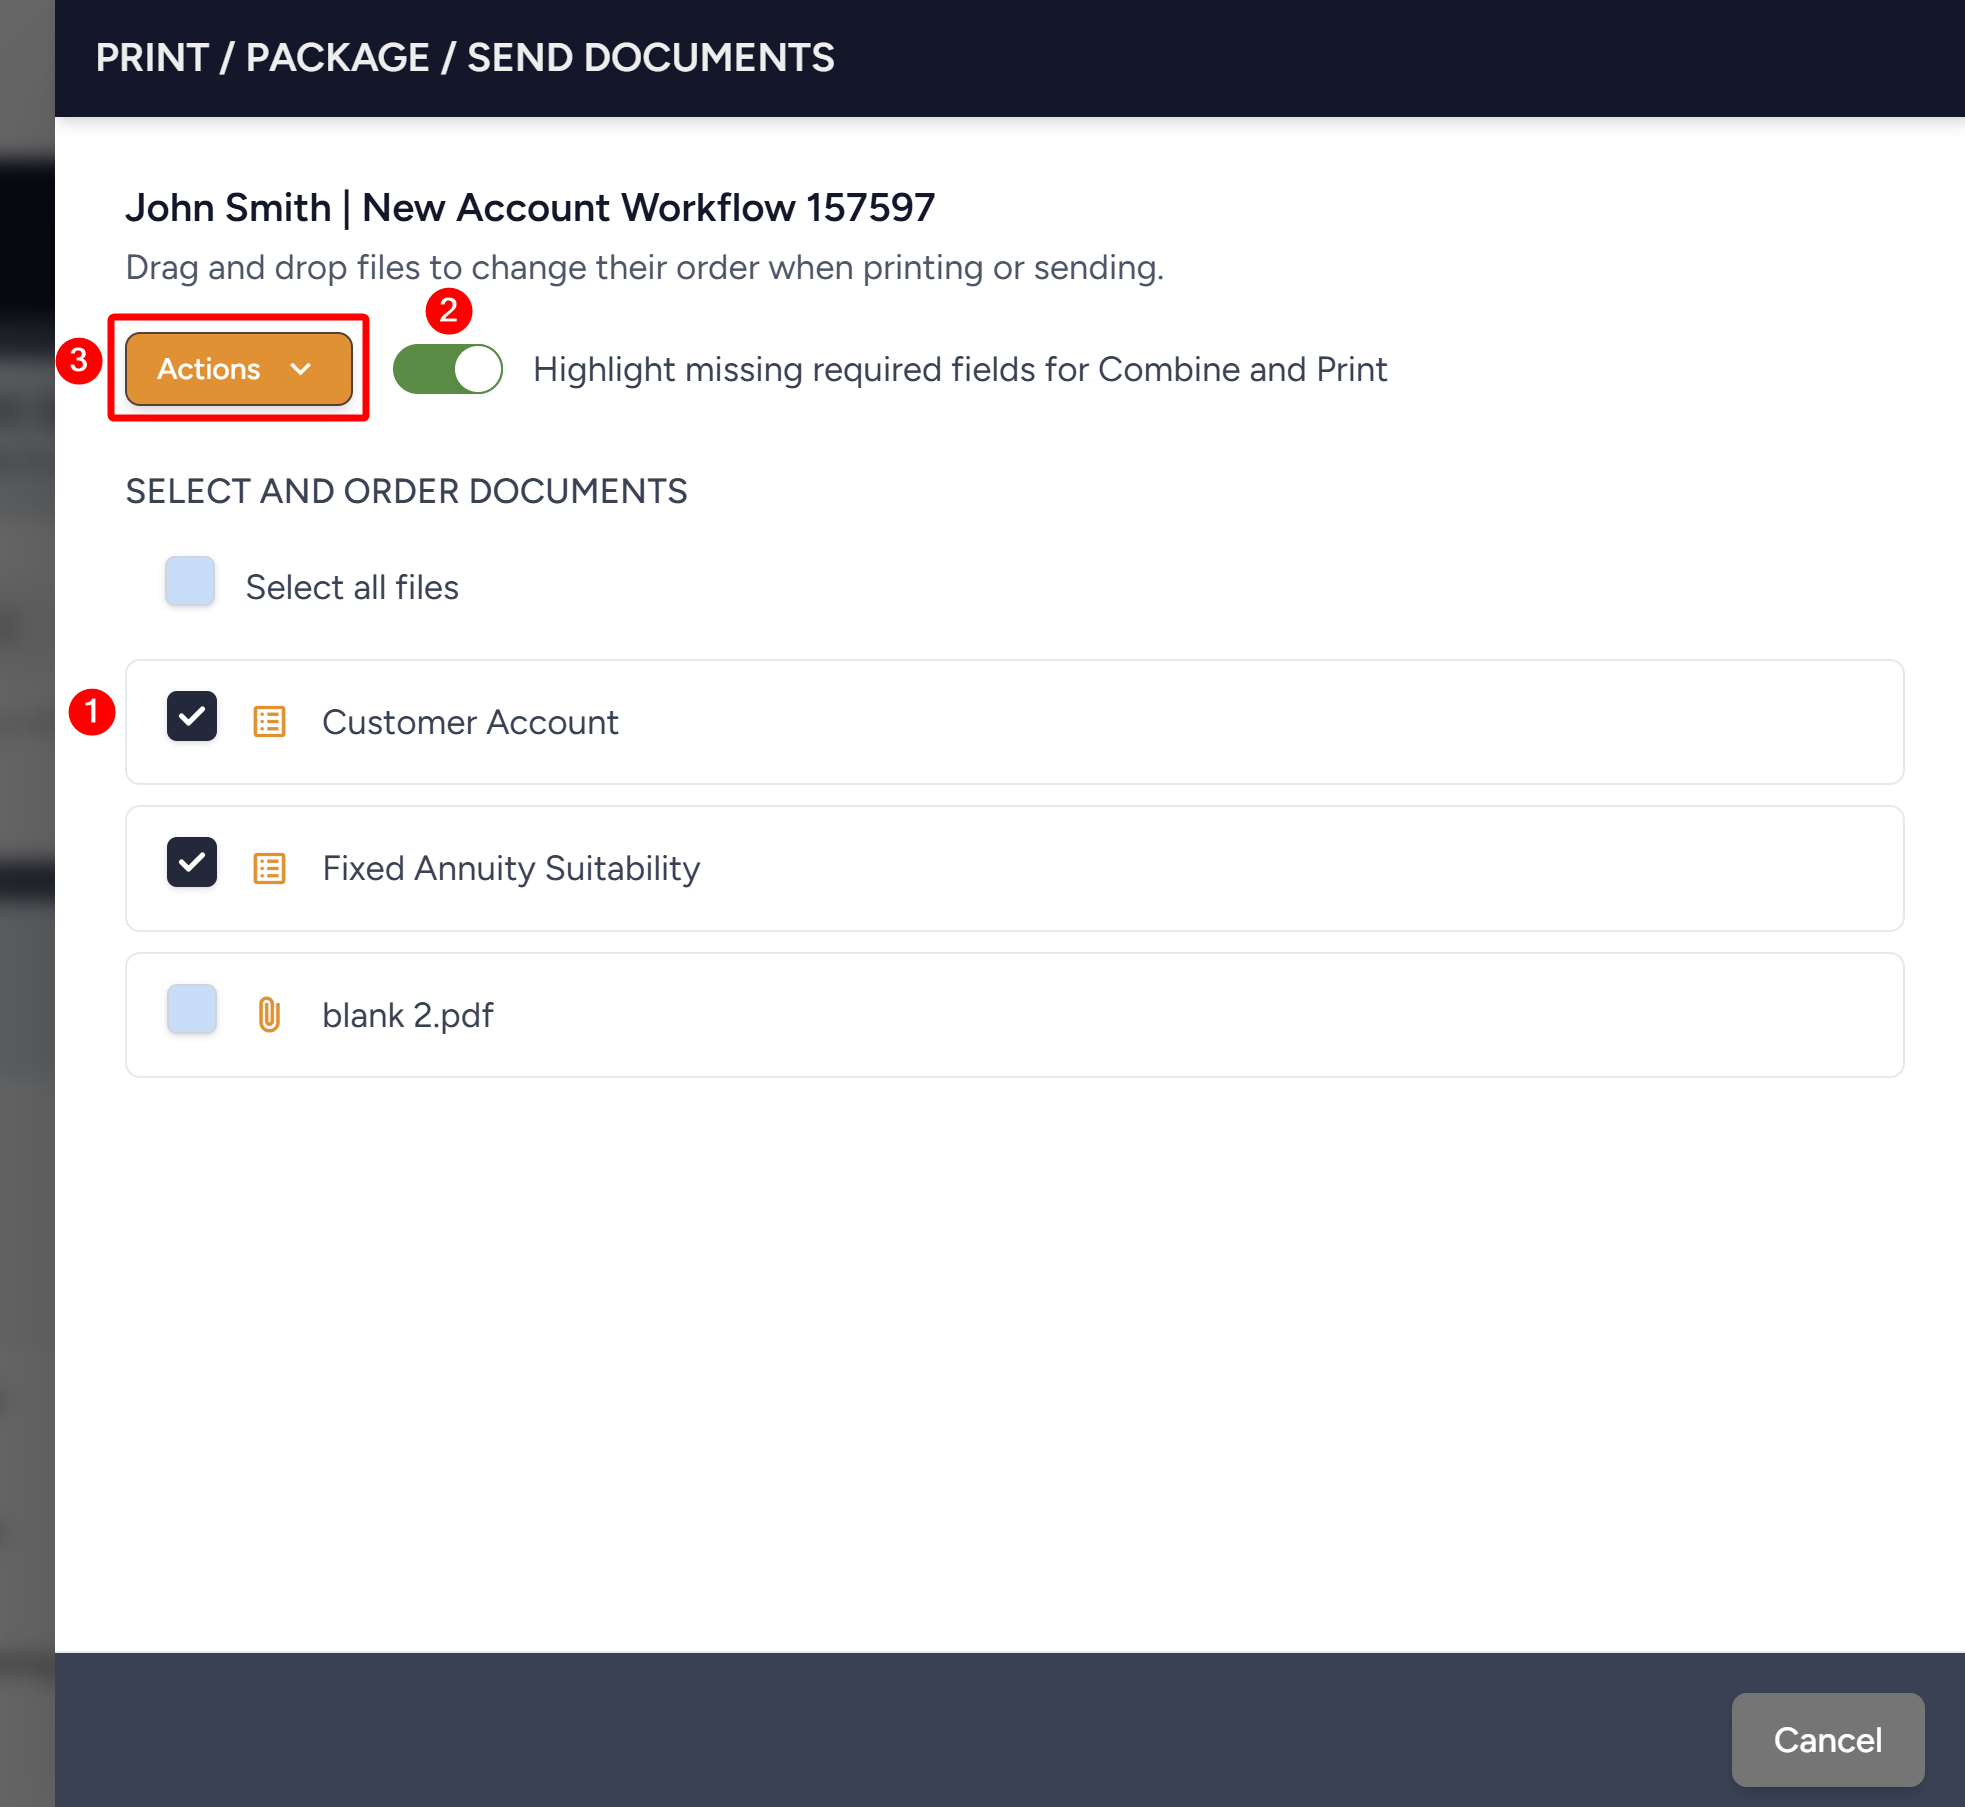
- The Print/Package/Send Documents drawer will open.
- Select the forms/documents you want to include in this generated PDF. You can reorder them as well.
- Toggle on/off if you want the missing required fields to be highlighted in the generated print PDF.
- Click the Actions button.
- From the dropdown, click Combine and Print.
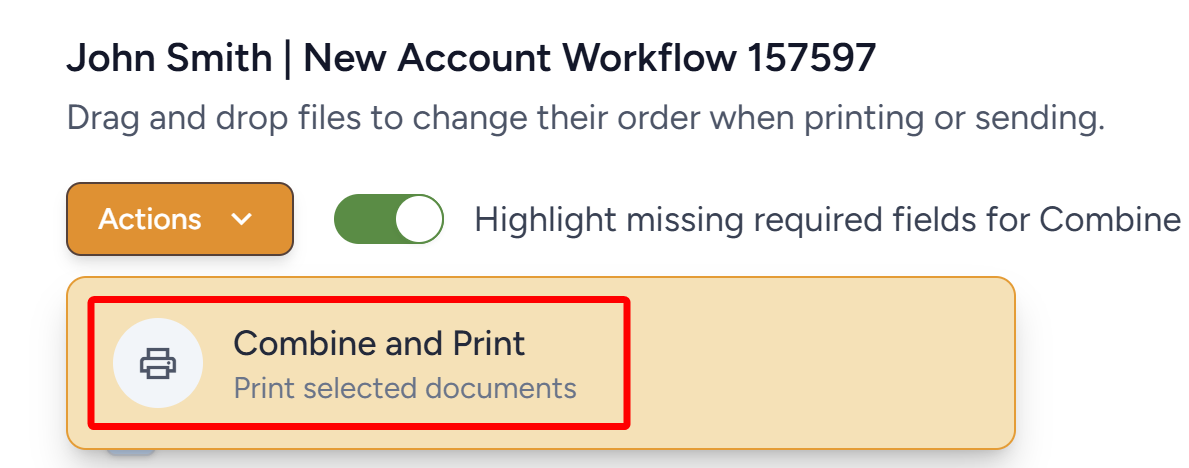
- A PDF of the combined forms/documents will generate
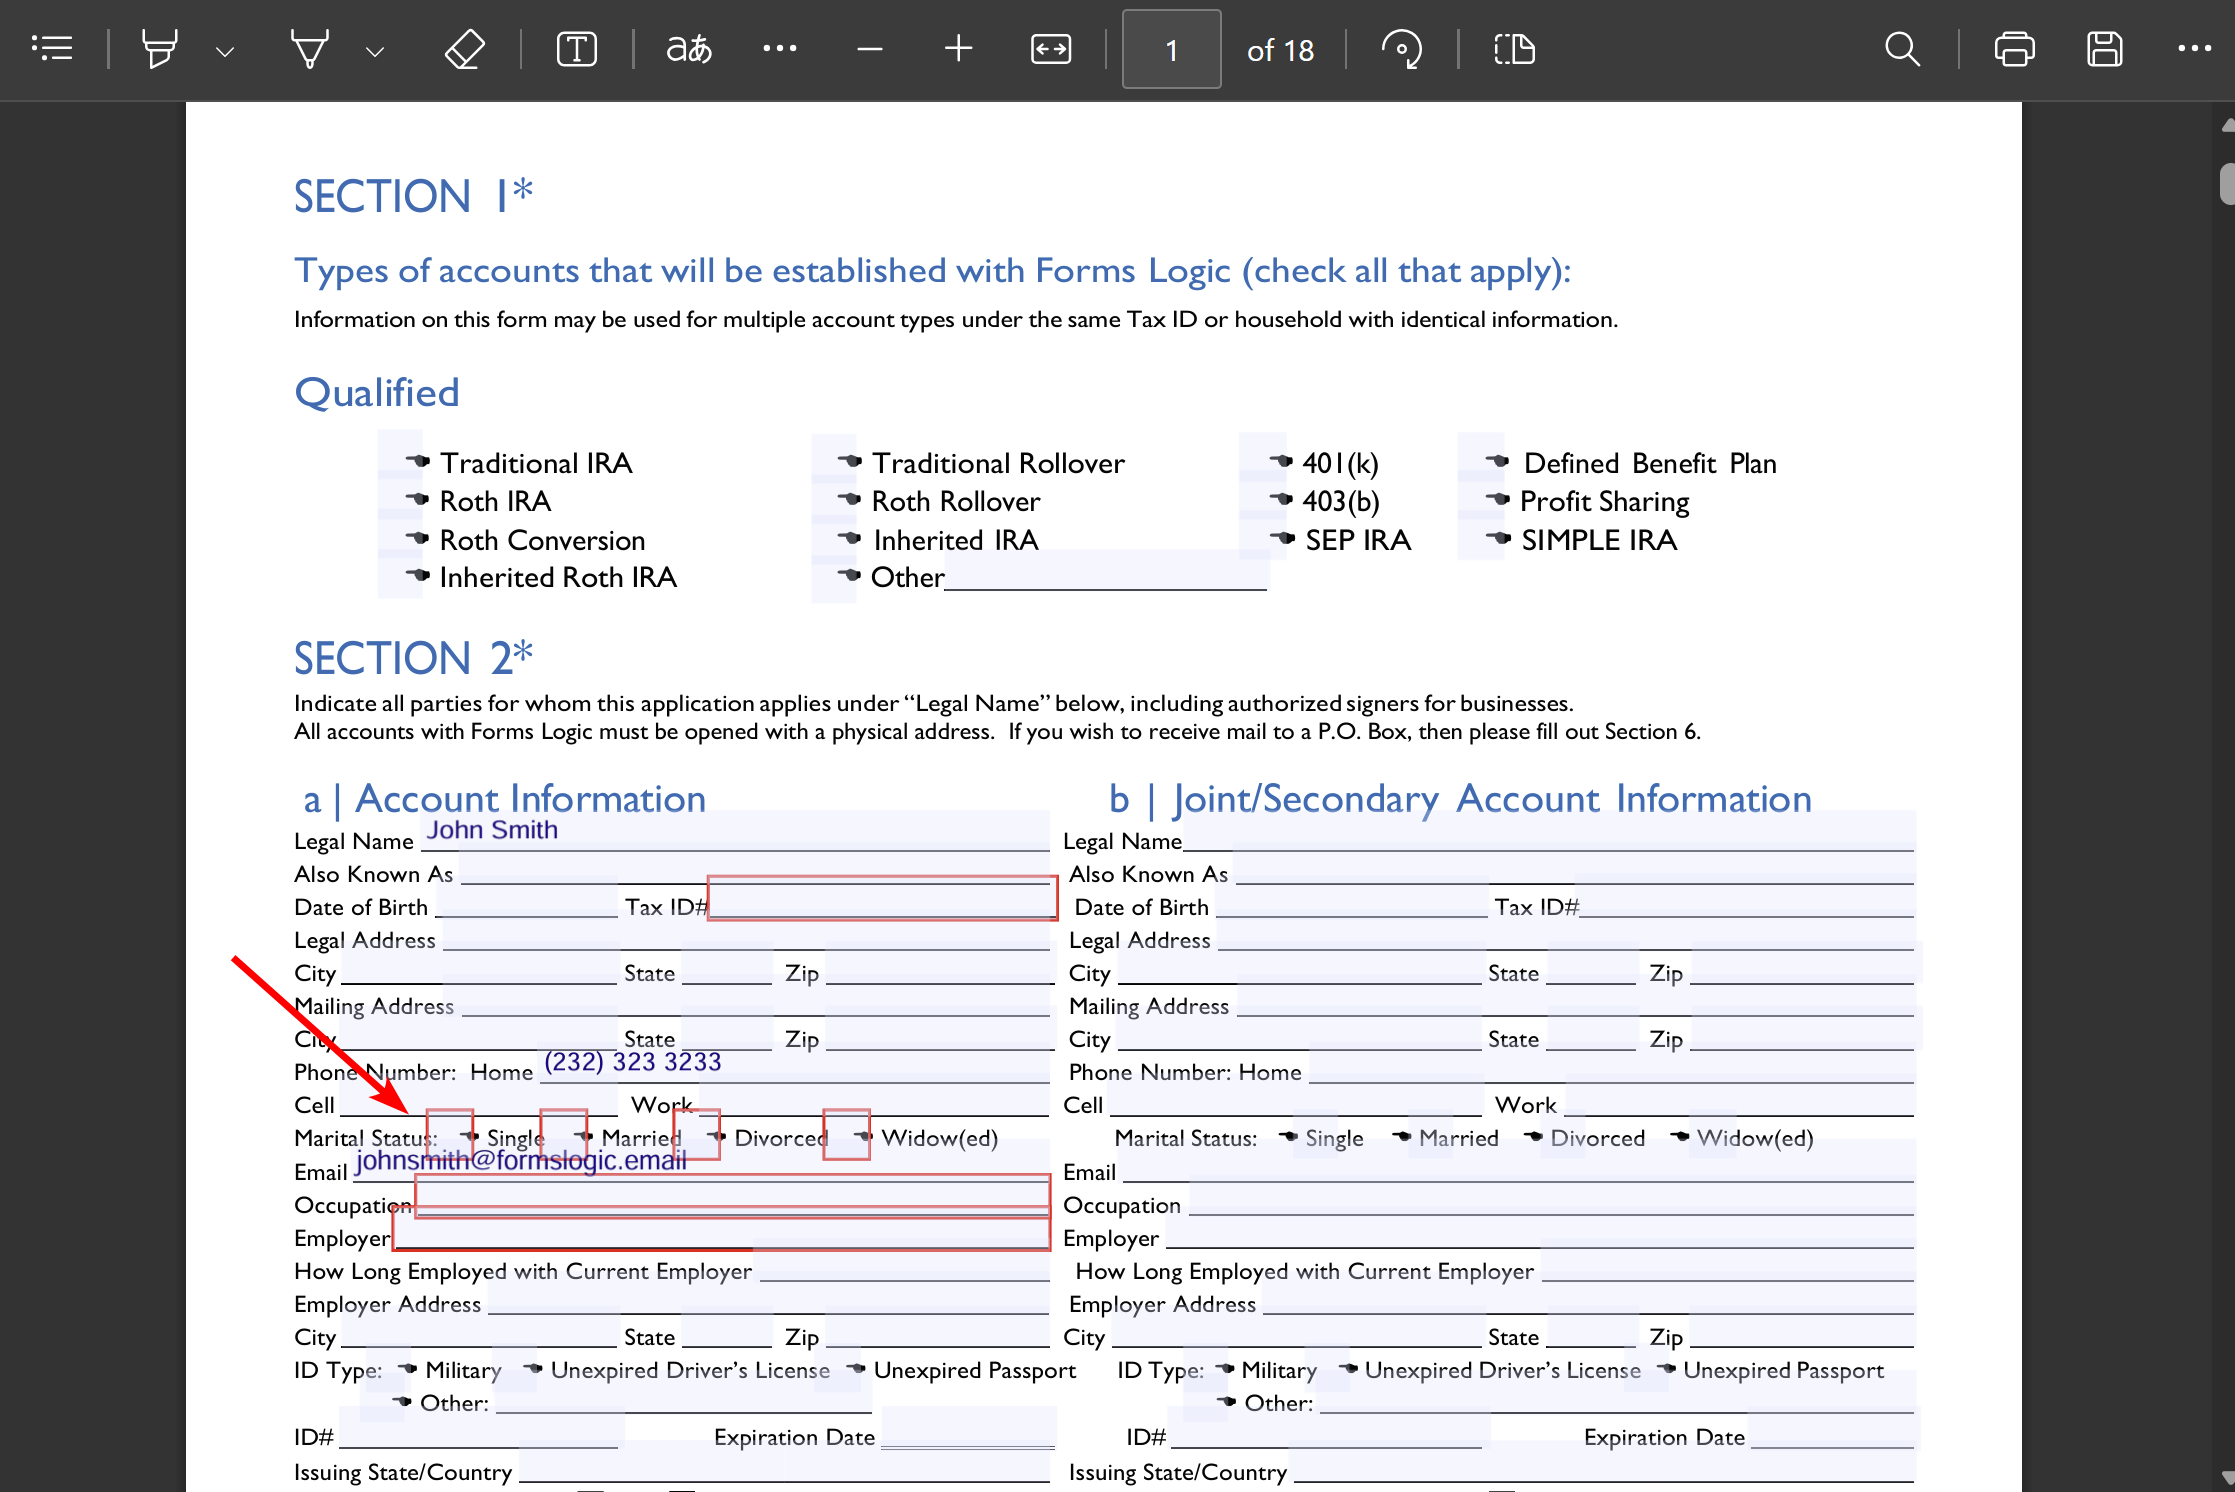
- If highlighting missing required fields was toggled on, any required fields that have not been filled in will be highlighted in red on the generated PDF as shown below.
- Obtain the signatures on the document from your client, then scan the completed documents so they can be uploaded into the workflow. You may also add any missing information if necessary.
9.2 Uploading Document with Signatures
- In order to upload the document you scanned with signatures, go into the same Workflow.
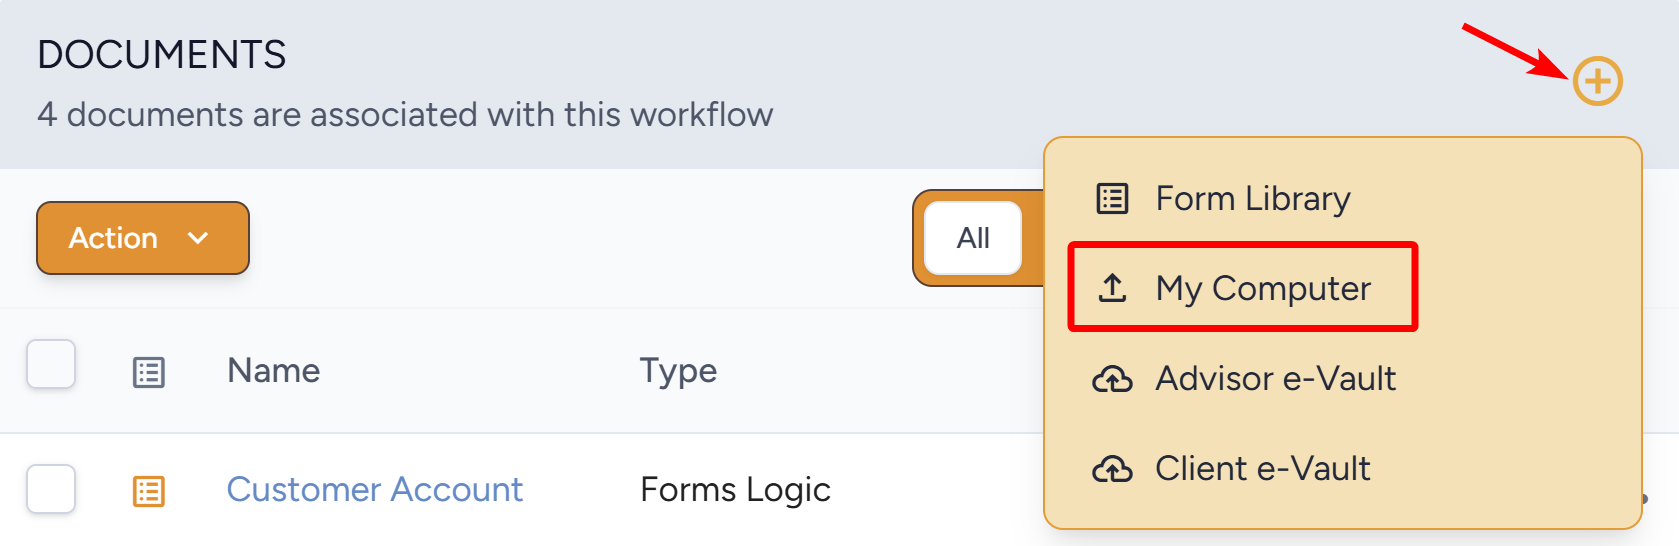
- Under the Documents section, click the Plus Icon on the right side and click My Computer from the dropdown — which allows you to upload documents from your computer
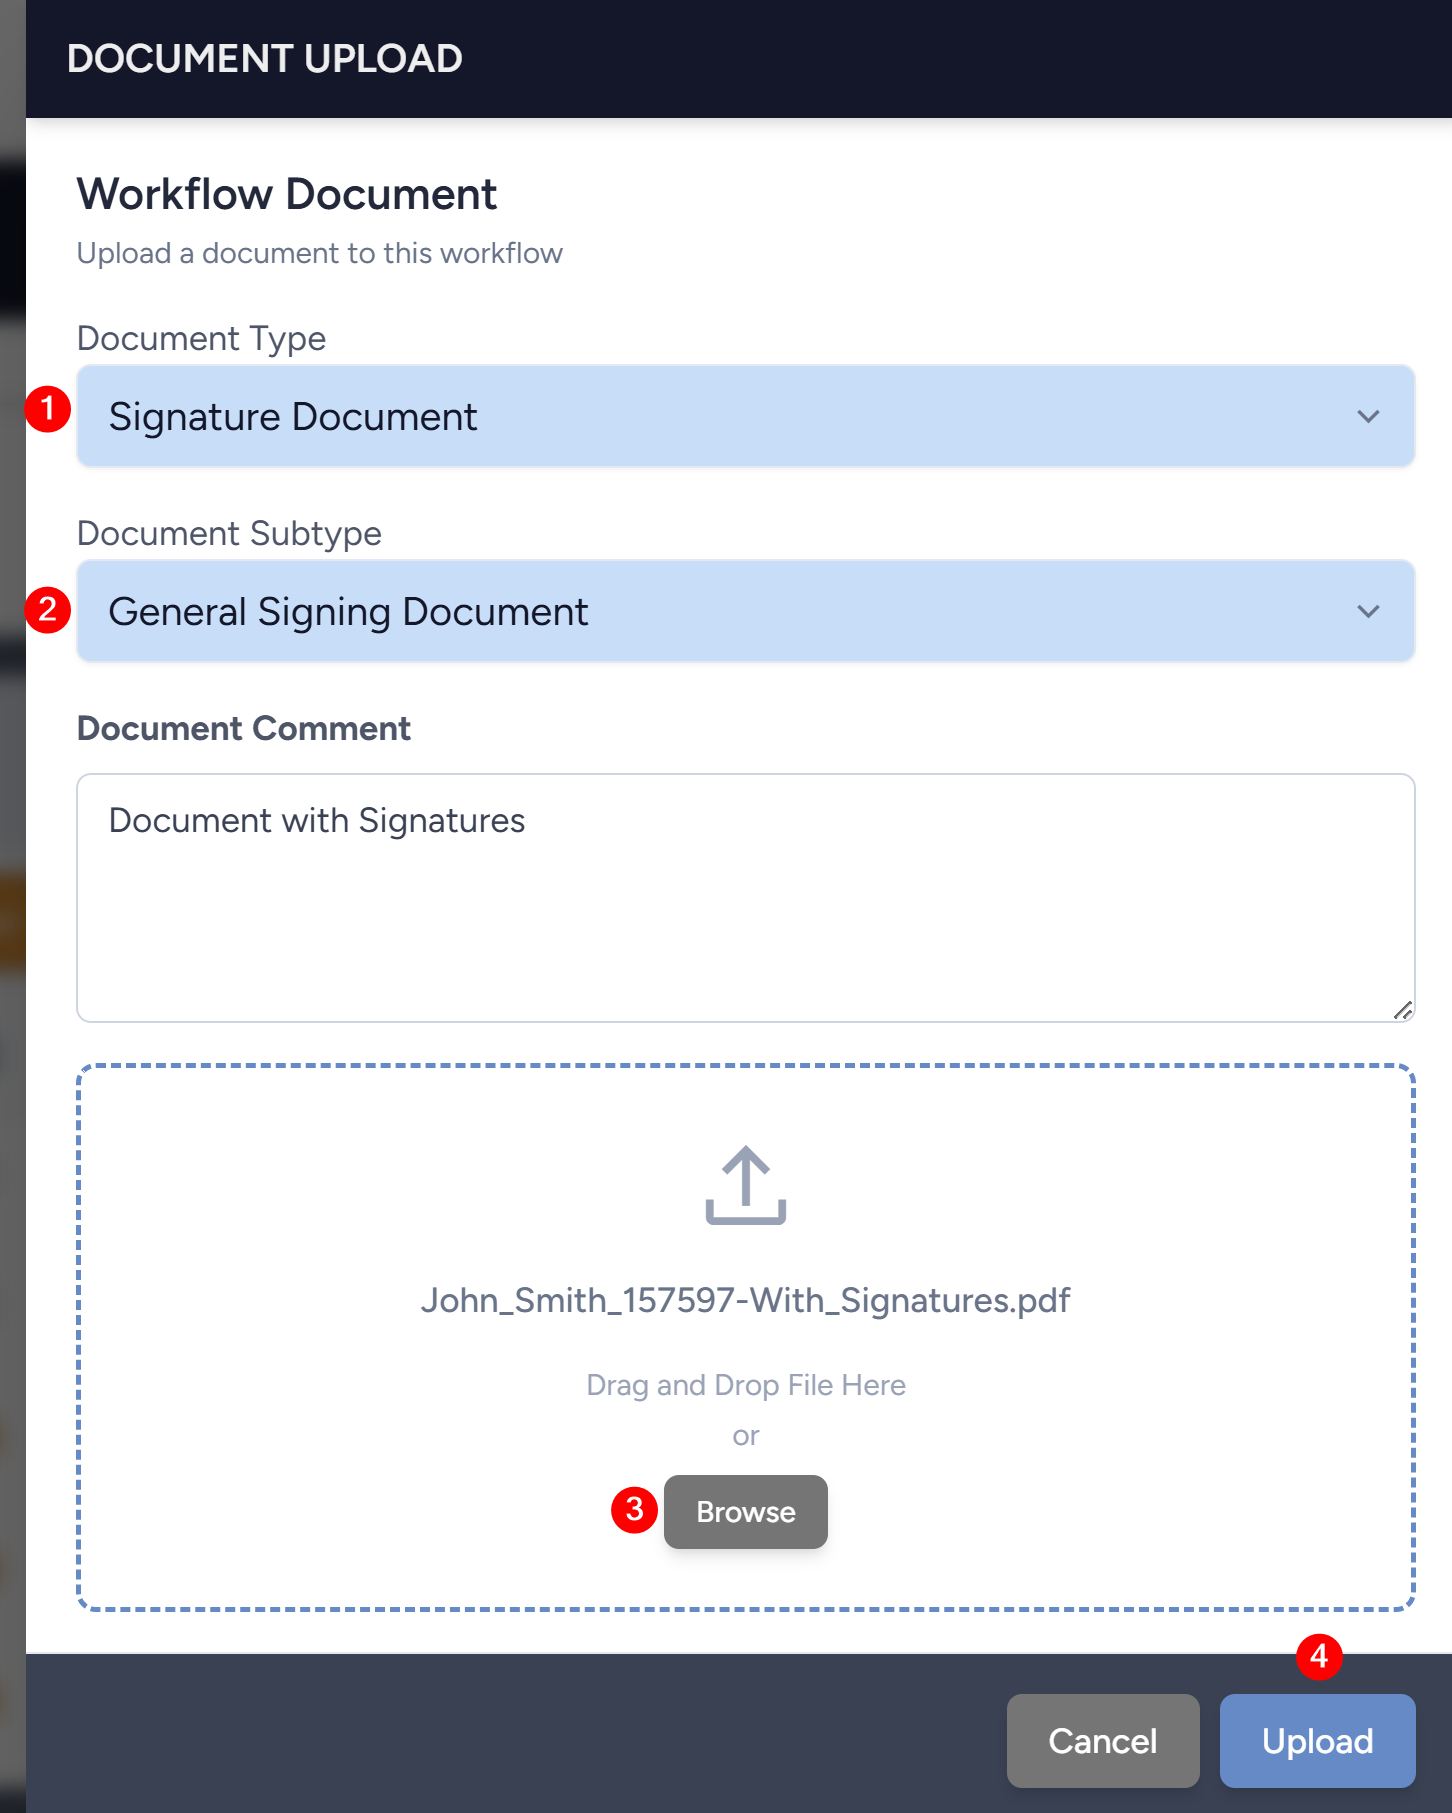
- The Document Upload drawer will open, which is where you can do the following:
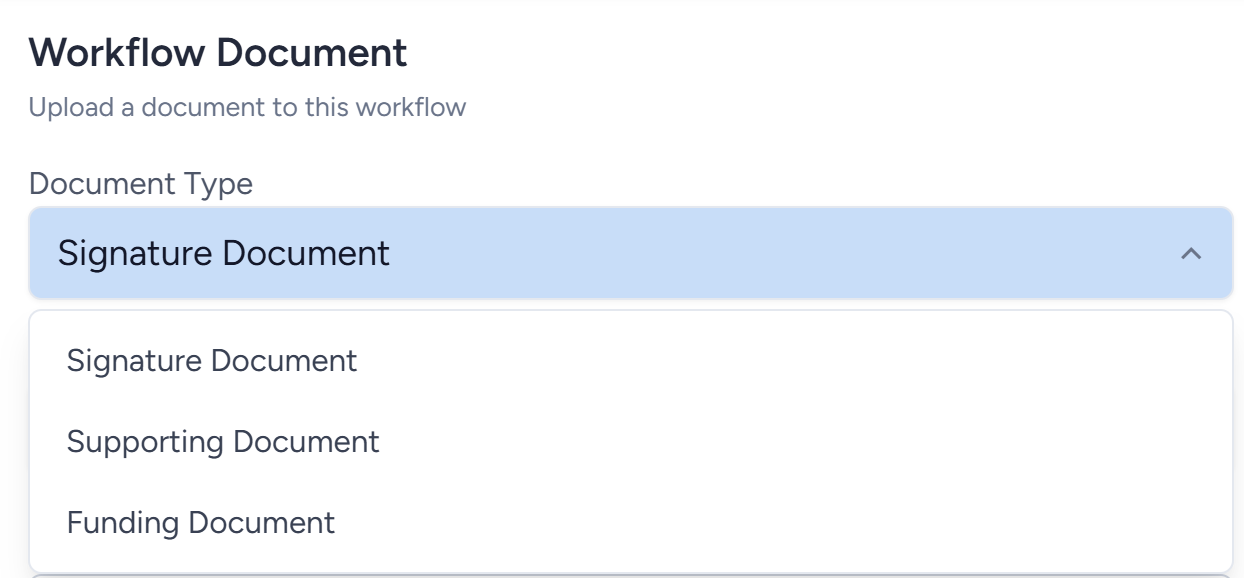
- Choose the Document Type – in this case, choose Signature Document from the dropdown.
- Choose the Document Subtype – in this case, choose General Signing Document.
- Choose the File to upload – in this case, choose the document you just added signatures to and scanned
- To upload the document, click the Upload button.
- If any additional documents are to be attached, you can select the Document Type from the drop down as shown below.
9.3 Submitting the Workflow
- In order to submit the workflow for review, navigate back to the Workflow screen.
- Ensure Wet Signature is toggled on in the Signature Indicator.
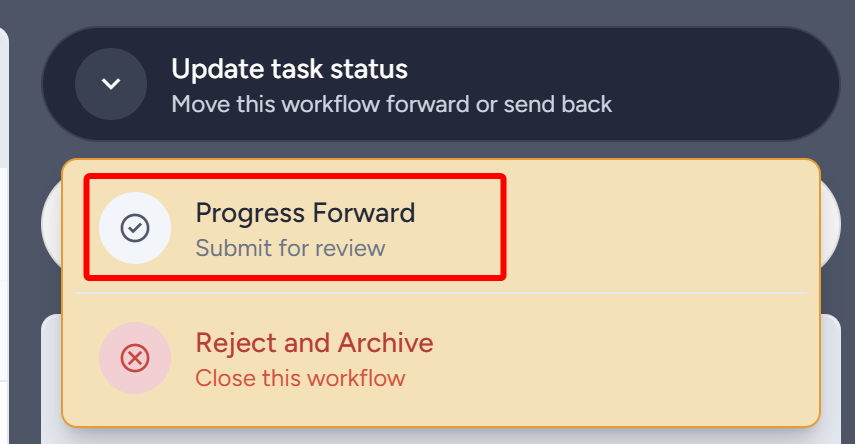
- Click the Update Task Status button.
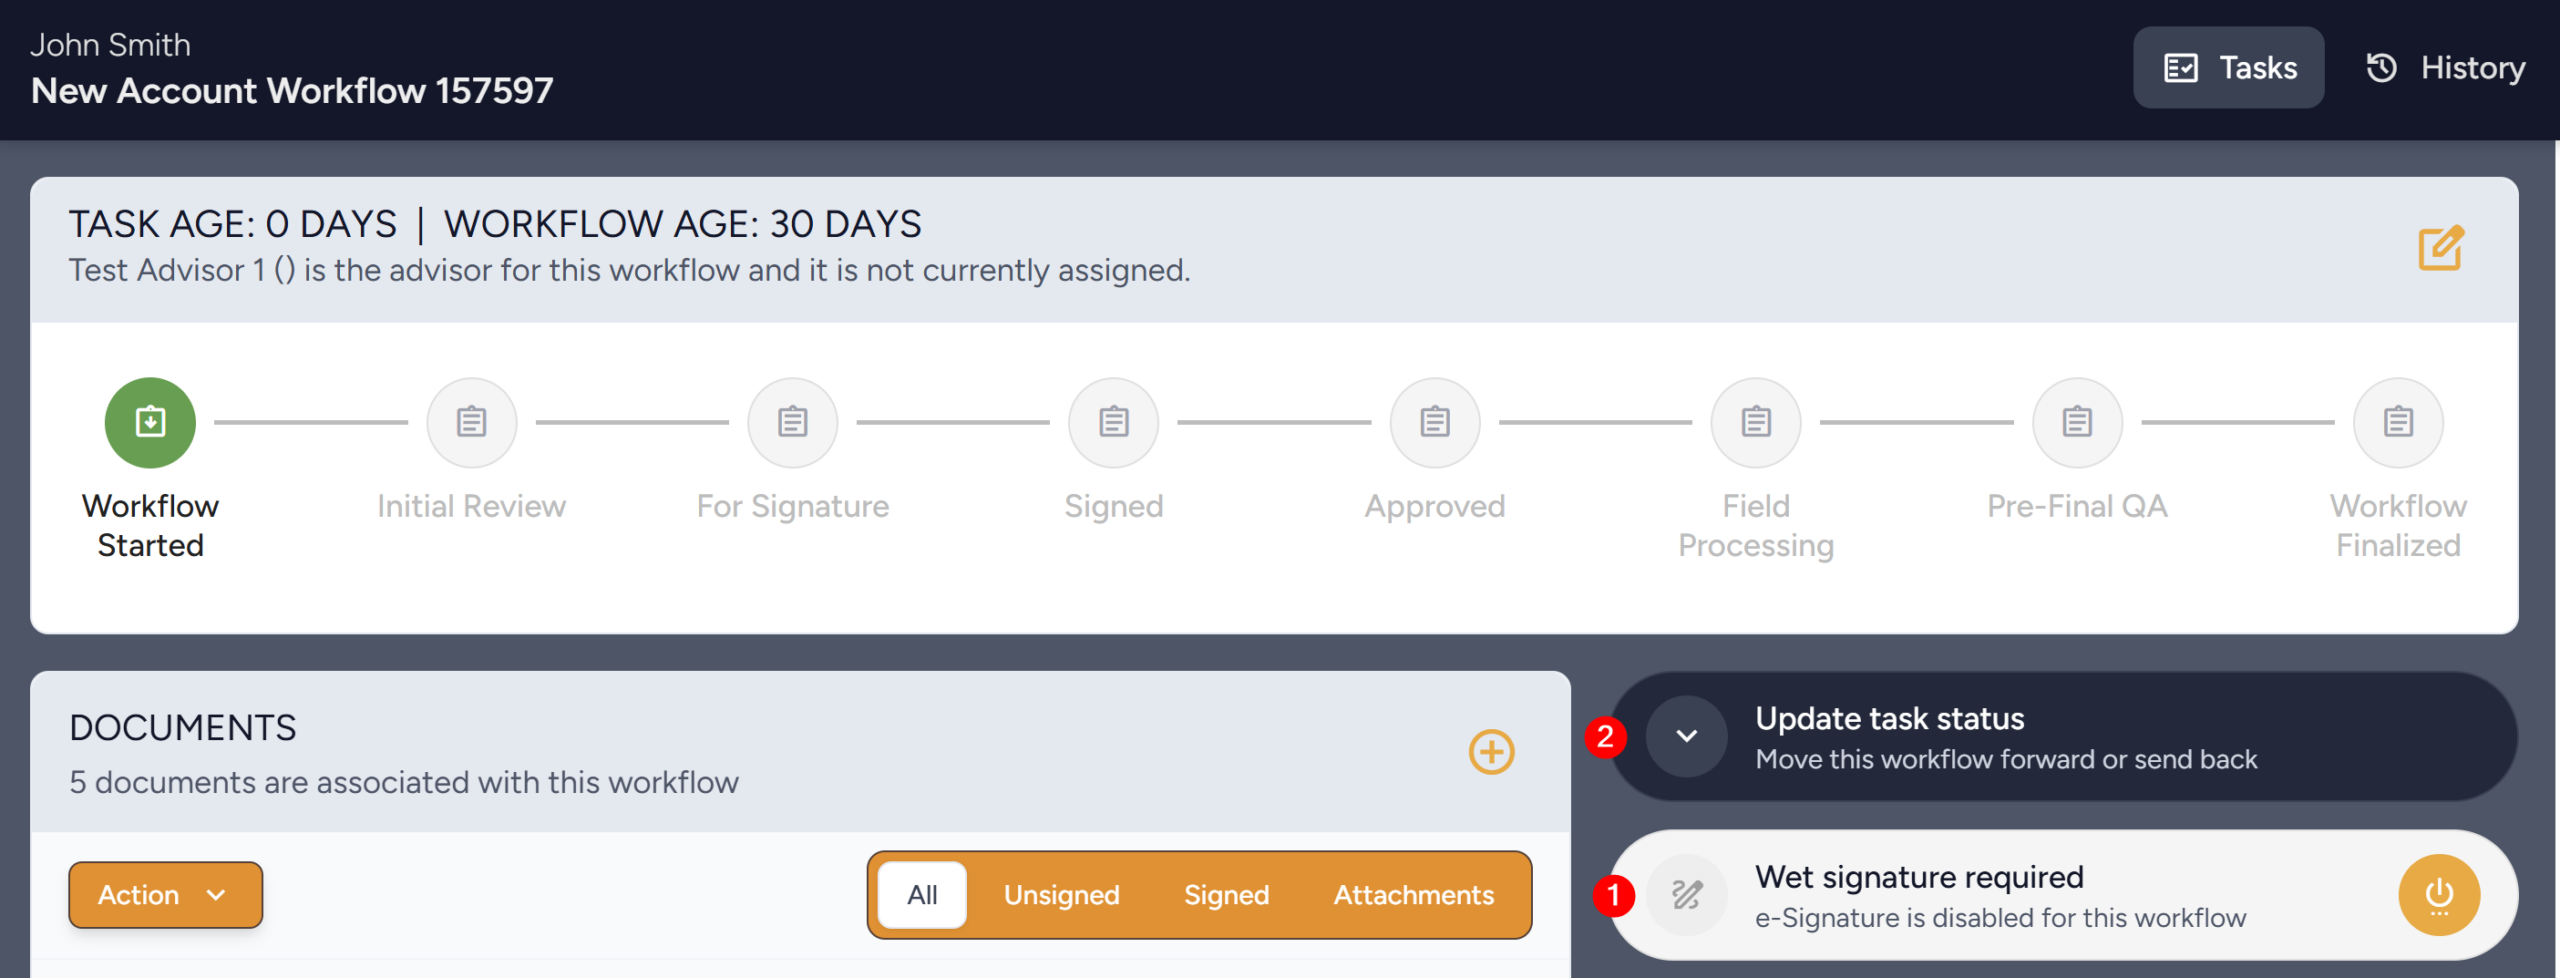
- Click Progress Forward from the dropdown, which will submit the workflow for review