

Faxing
The Faxing feature allows users to send completed forms directly to a vendor for account opening without leaving Forms Logic. Faxing can be initiated by either the back office or the advisor.
13.1 Sending a Fax
Once you have been notified that the transaction is approved, navigate into the workflow and follow the steps below to send the fax.
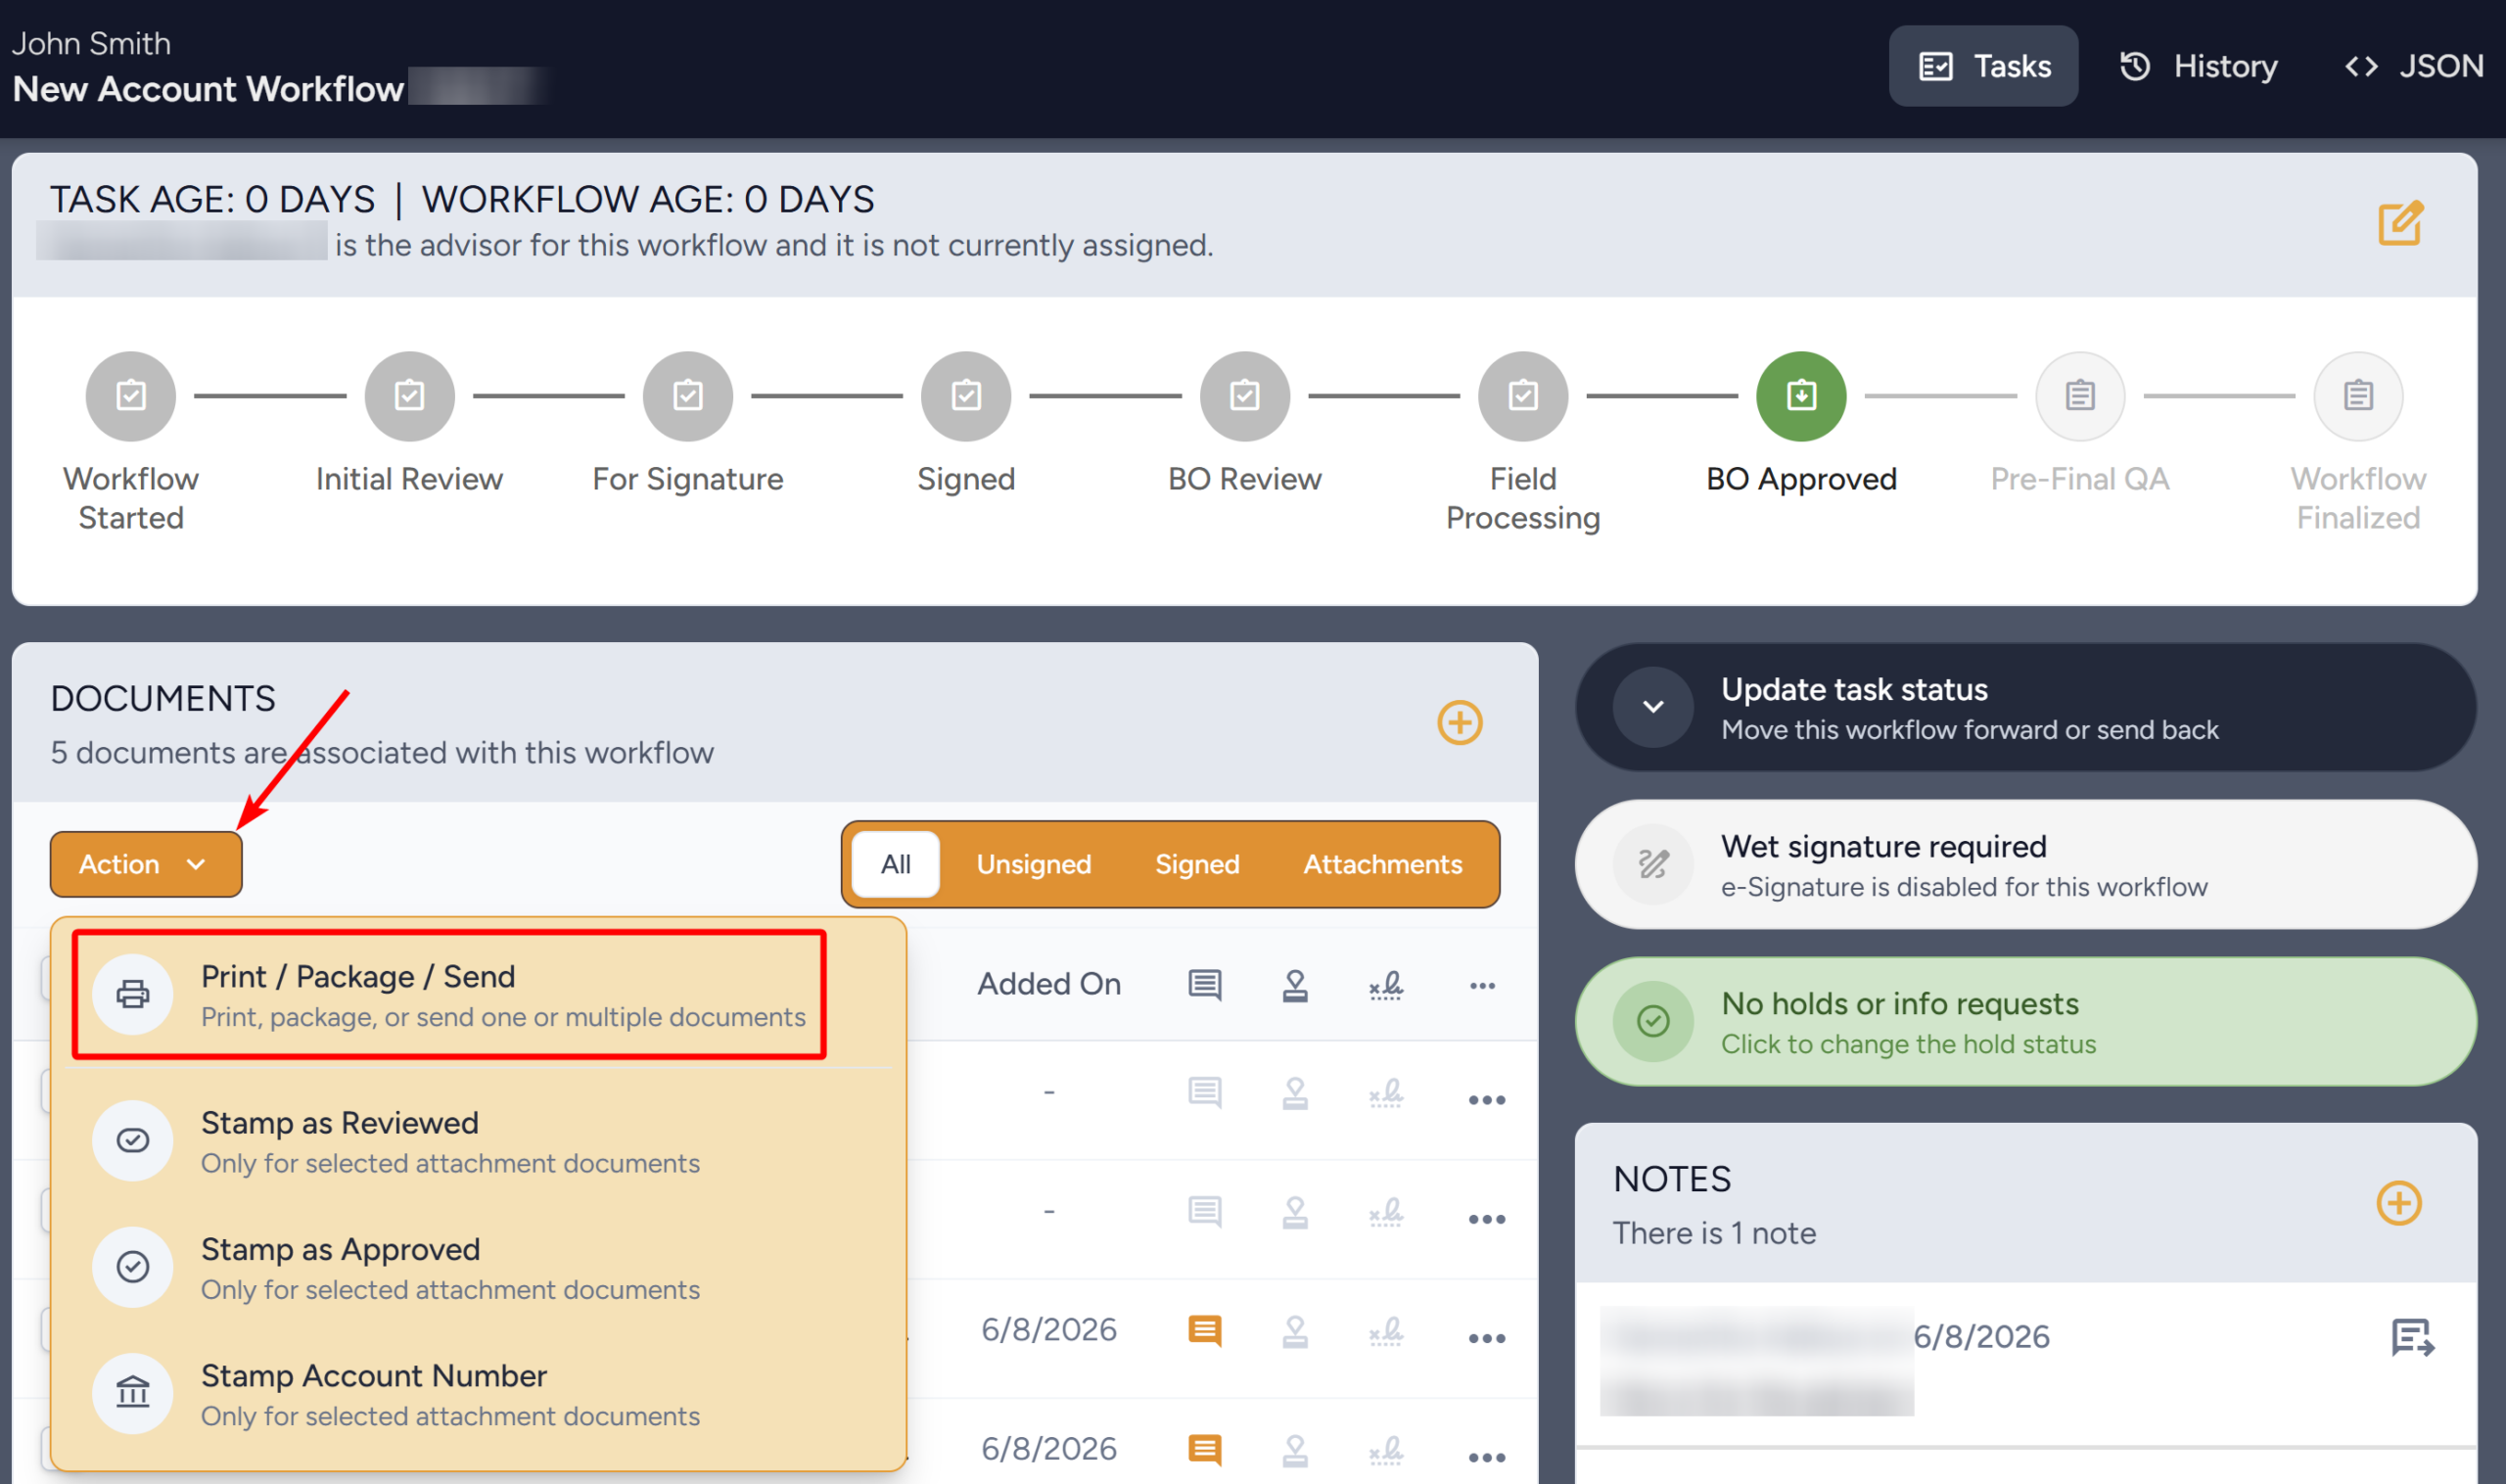
- In the Documents section, click the Action button and select Print/Package/Send from the dropdown.
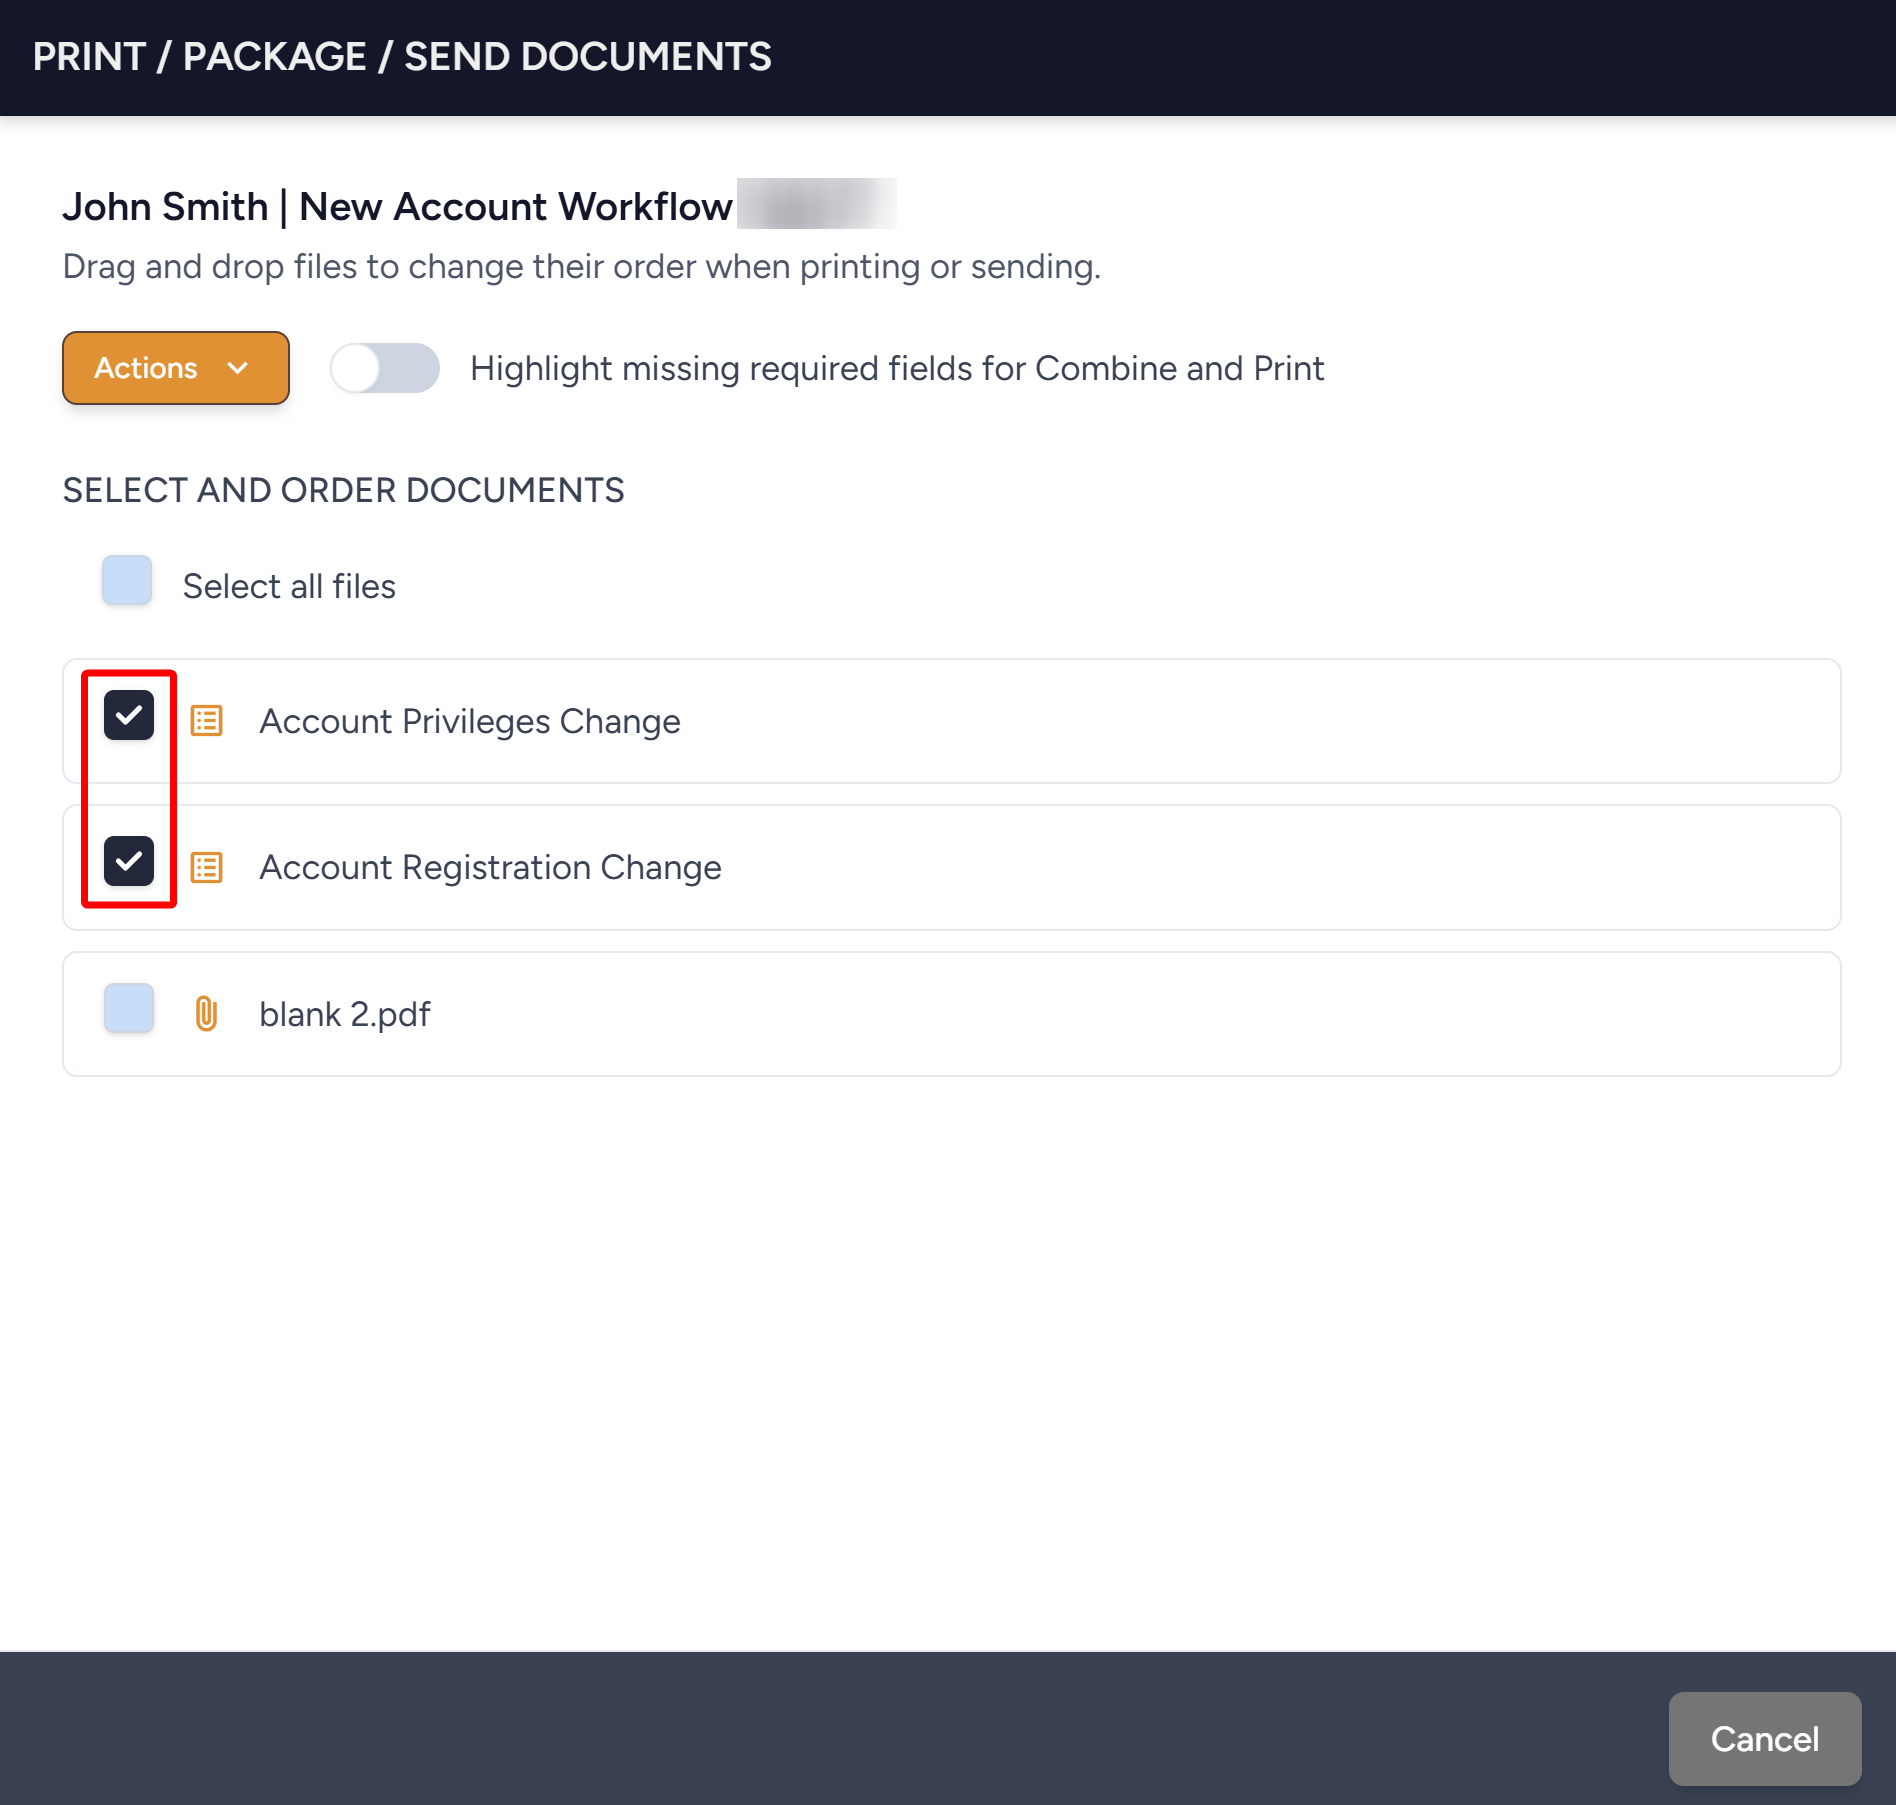
- The Print/Package/Send Documents drawer will open. Select the forms you wish to fax.
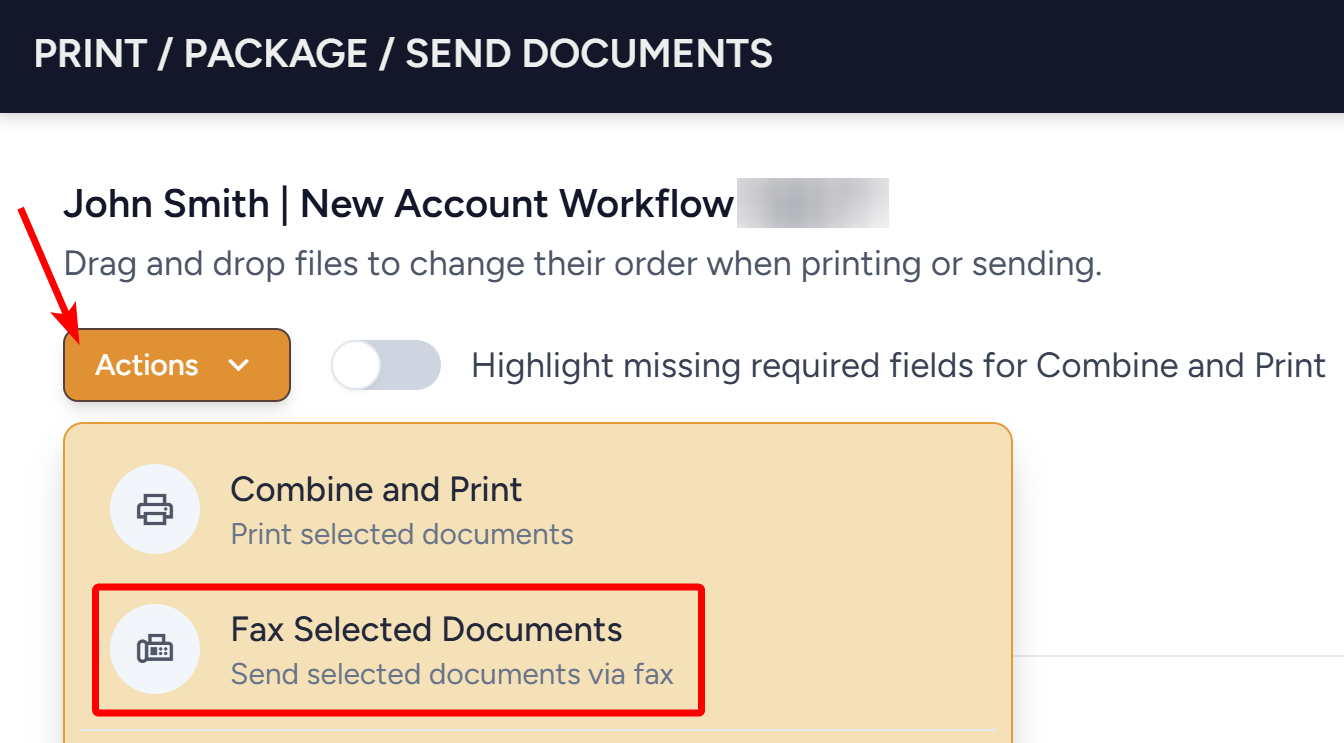
- Click on the Actions button and select Fax Selected Documents from the dropdown.
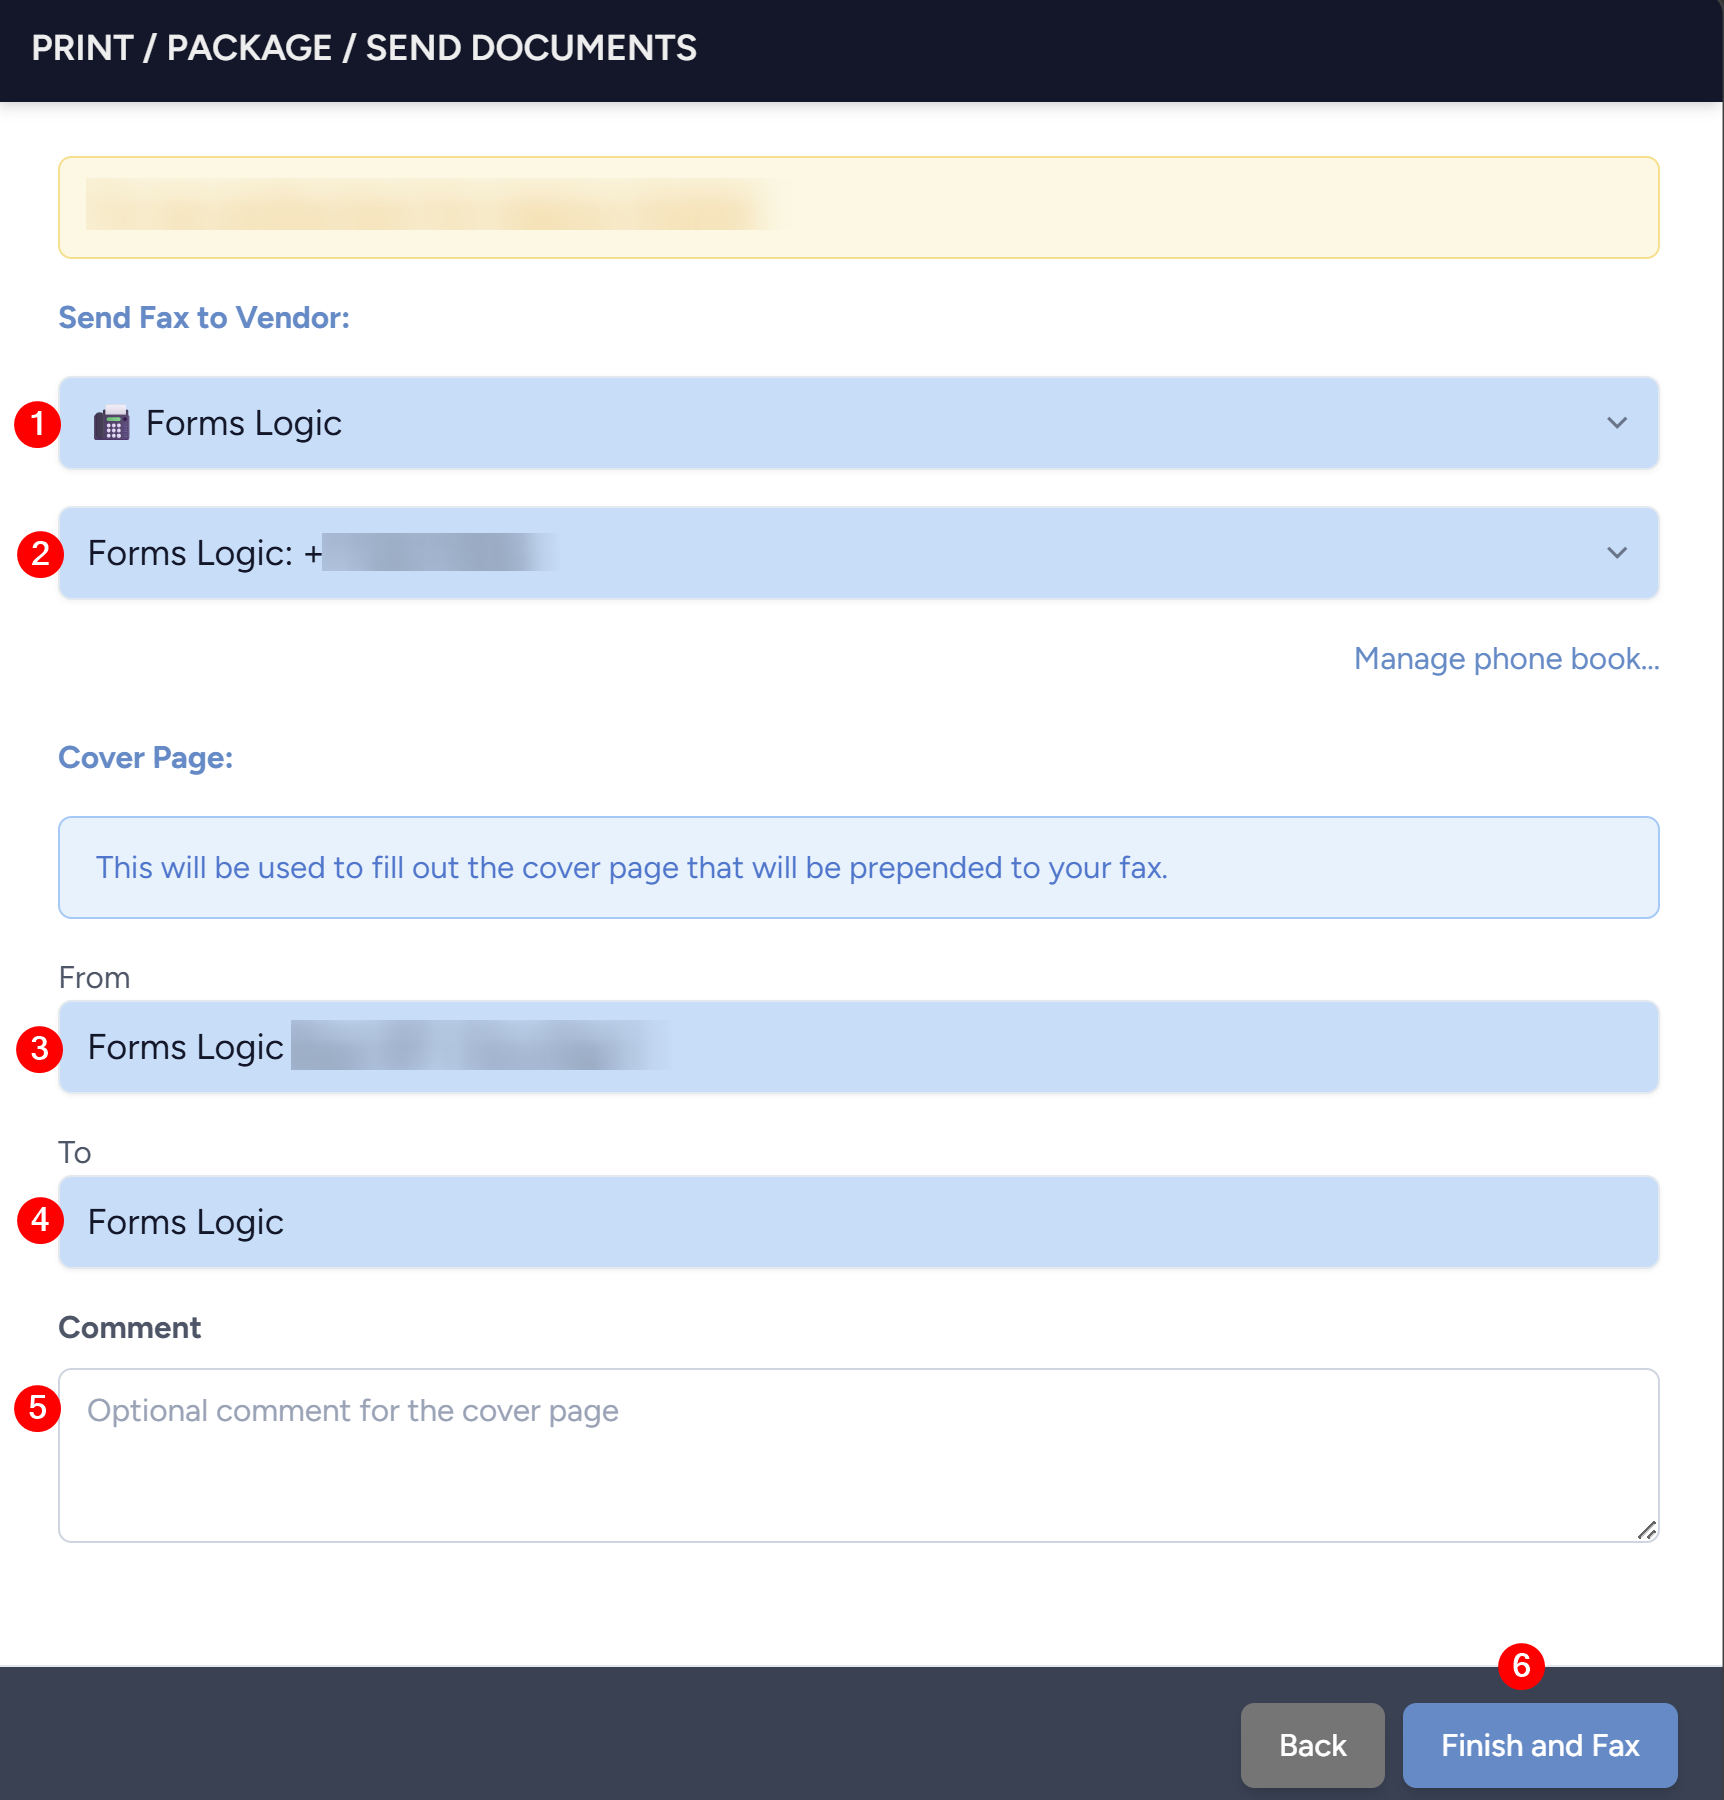
- Once the Fax screen populates, select the Vendor information and fill in the information for the Cover Page.
- Select the Vendor from the list.
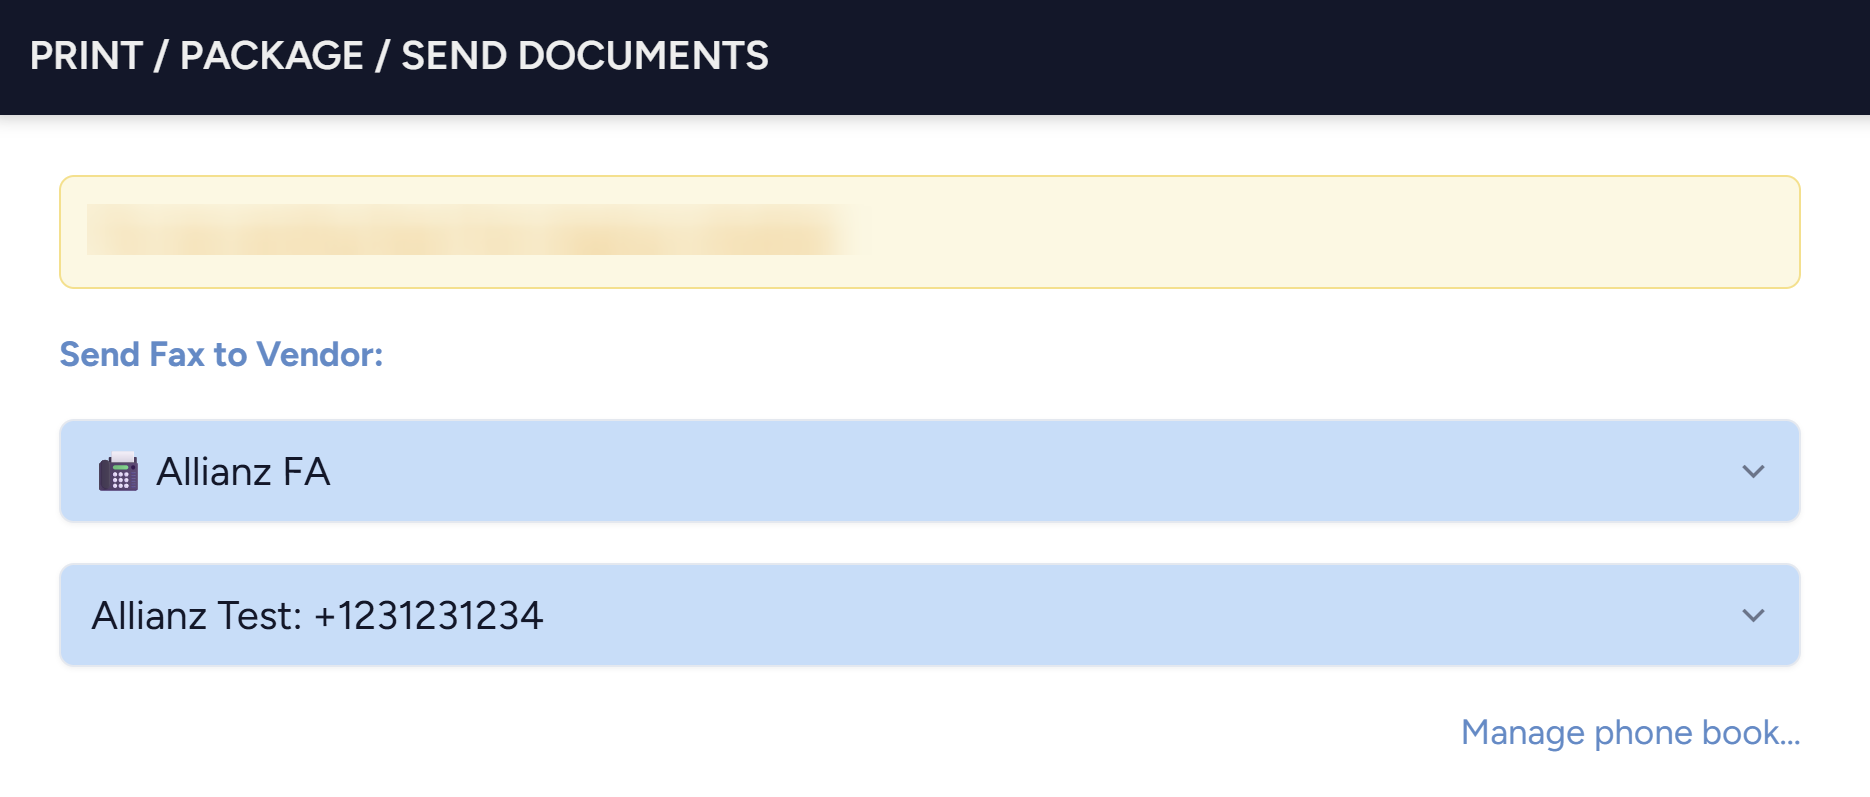
- The fax number icon next to the vendor means it is already in the system.
- Select the Fax Number from the selection.
- Enter who it is From.
- Enter who it is To.
- Add a Comment — this is optional.
- Once all of the information is accurate, click Finish and Fax to initiate the fax submission.
- Select the Vendor from the list.
13.2 Adding a Fax Number to the System
If a fax number is not available for your vendor, or your firm uses a special number, you can add one manually.
- In the Documents section of a workflow, click the Action button and select Print/Package/Send from the dropdown.
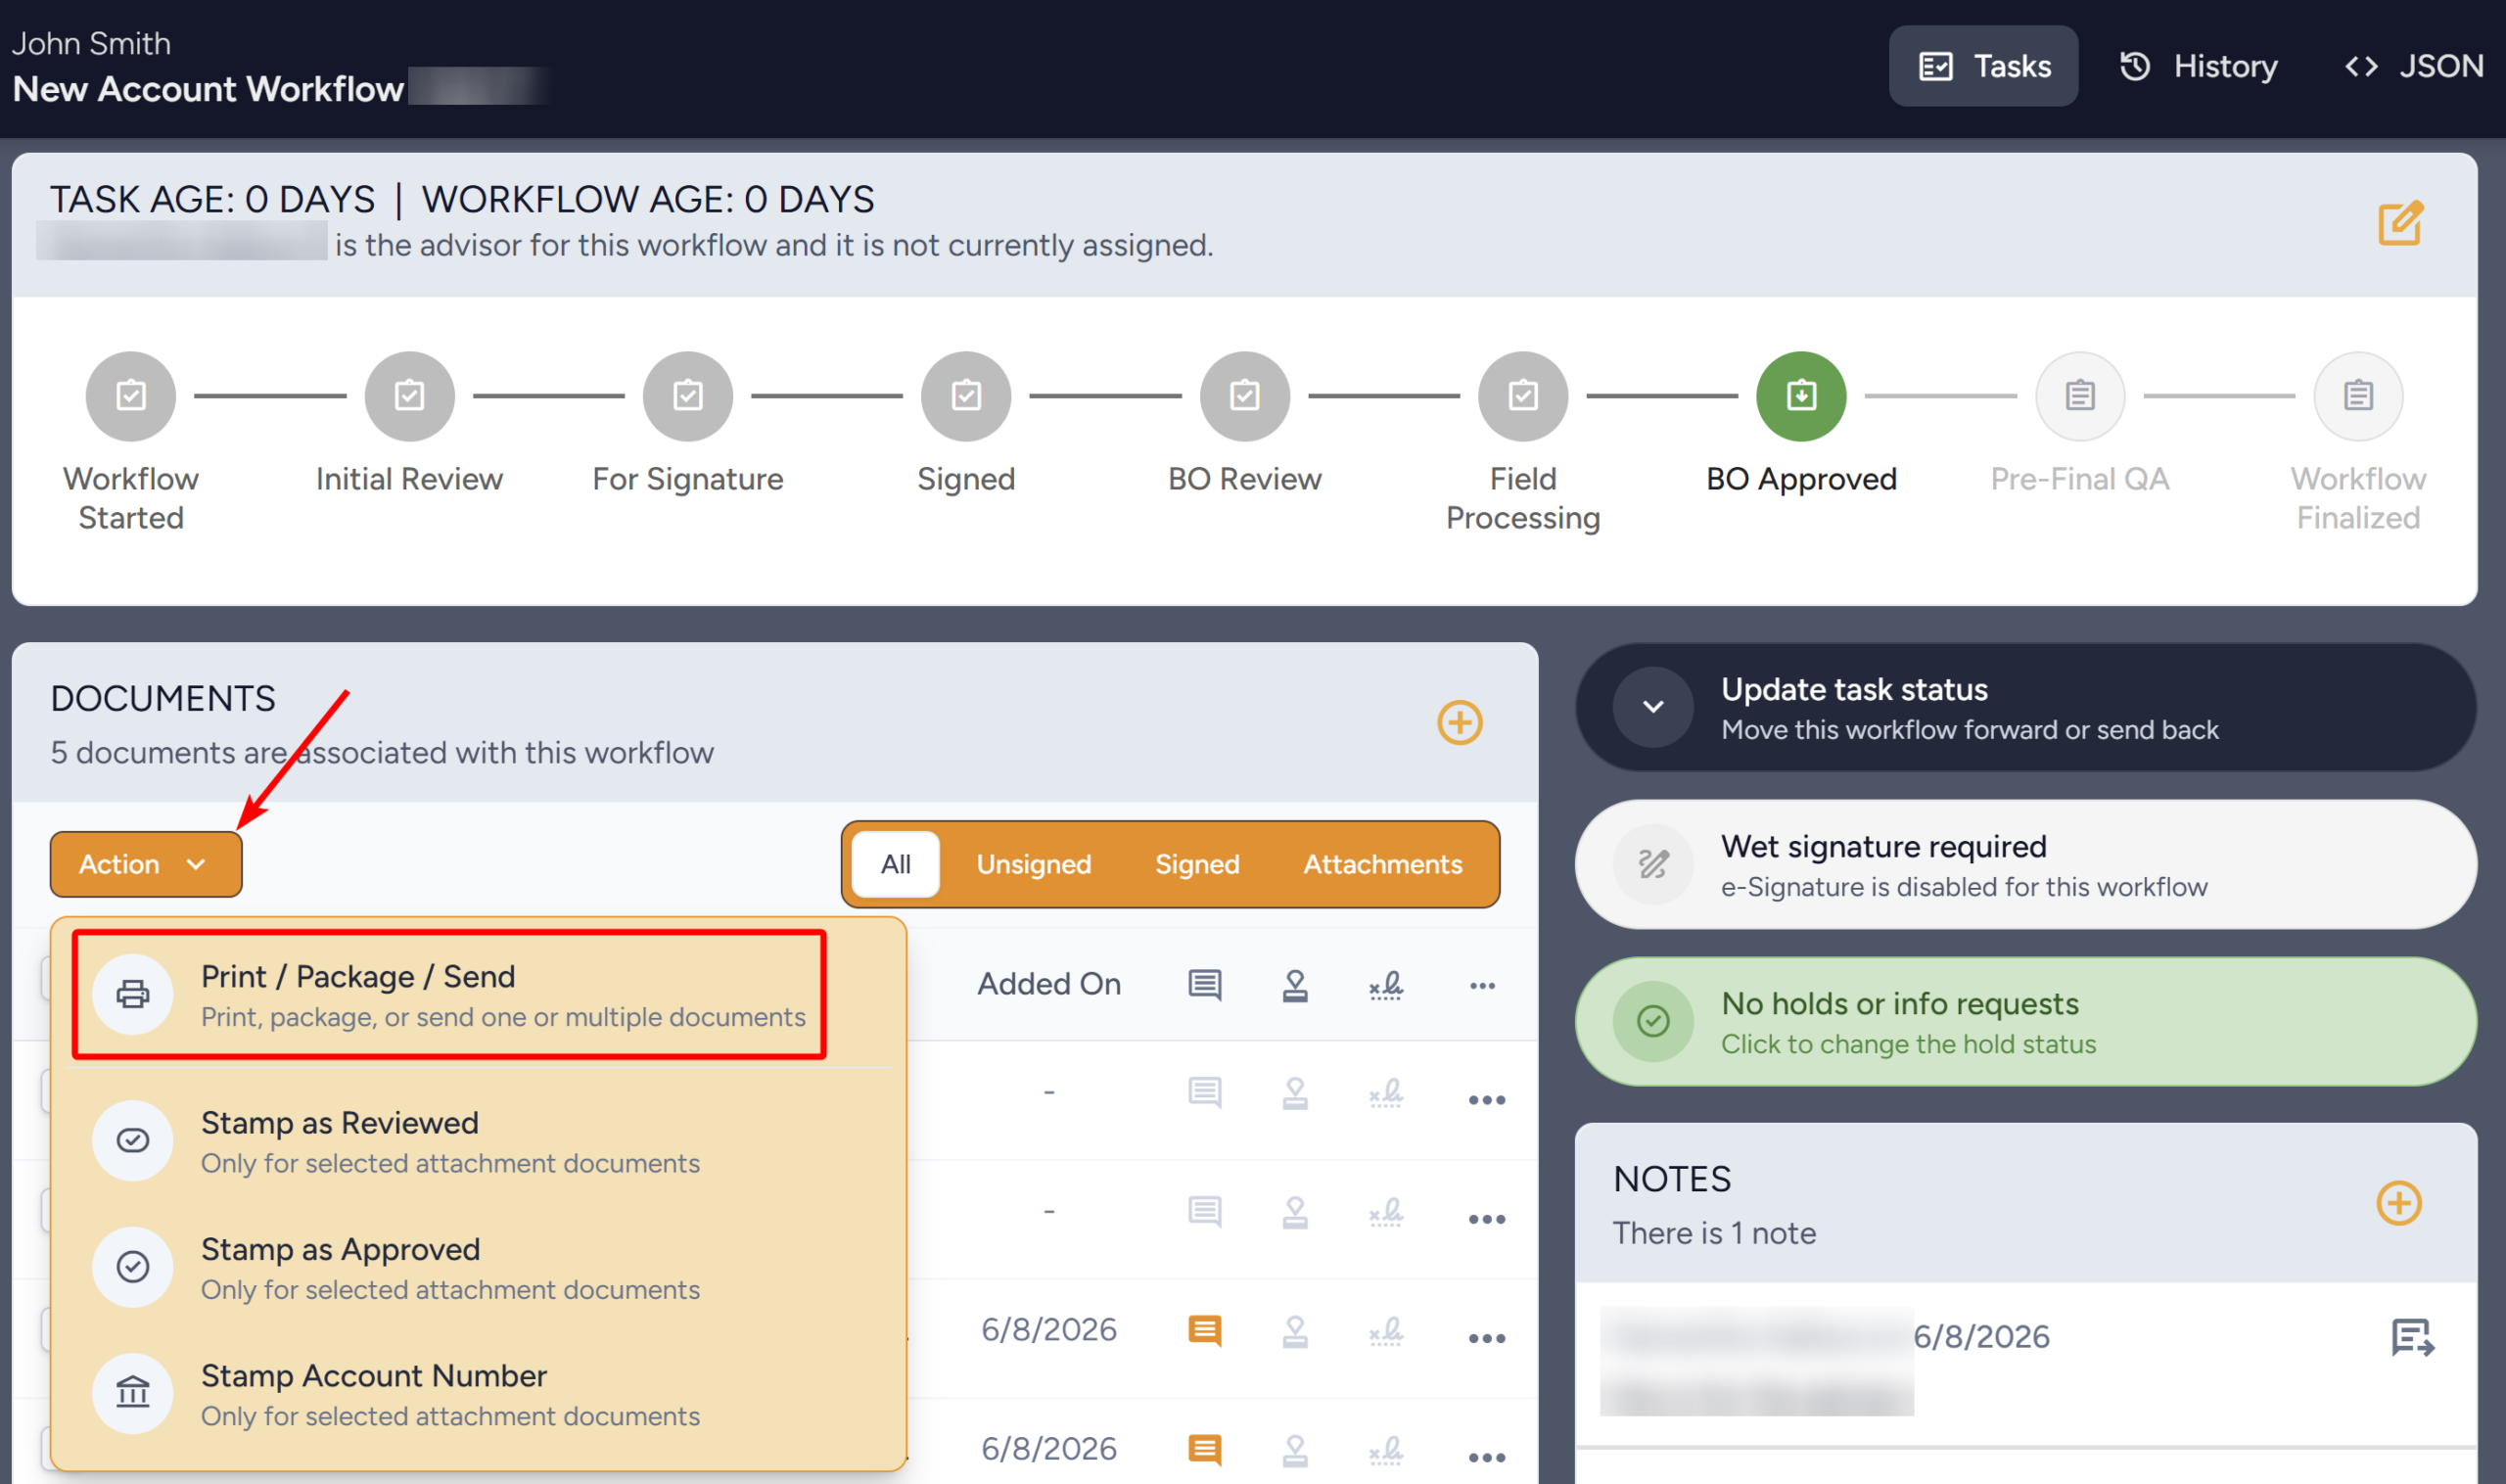
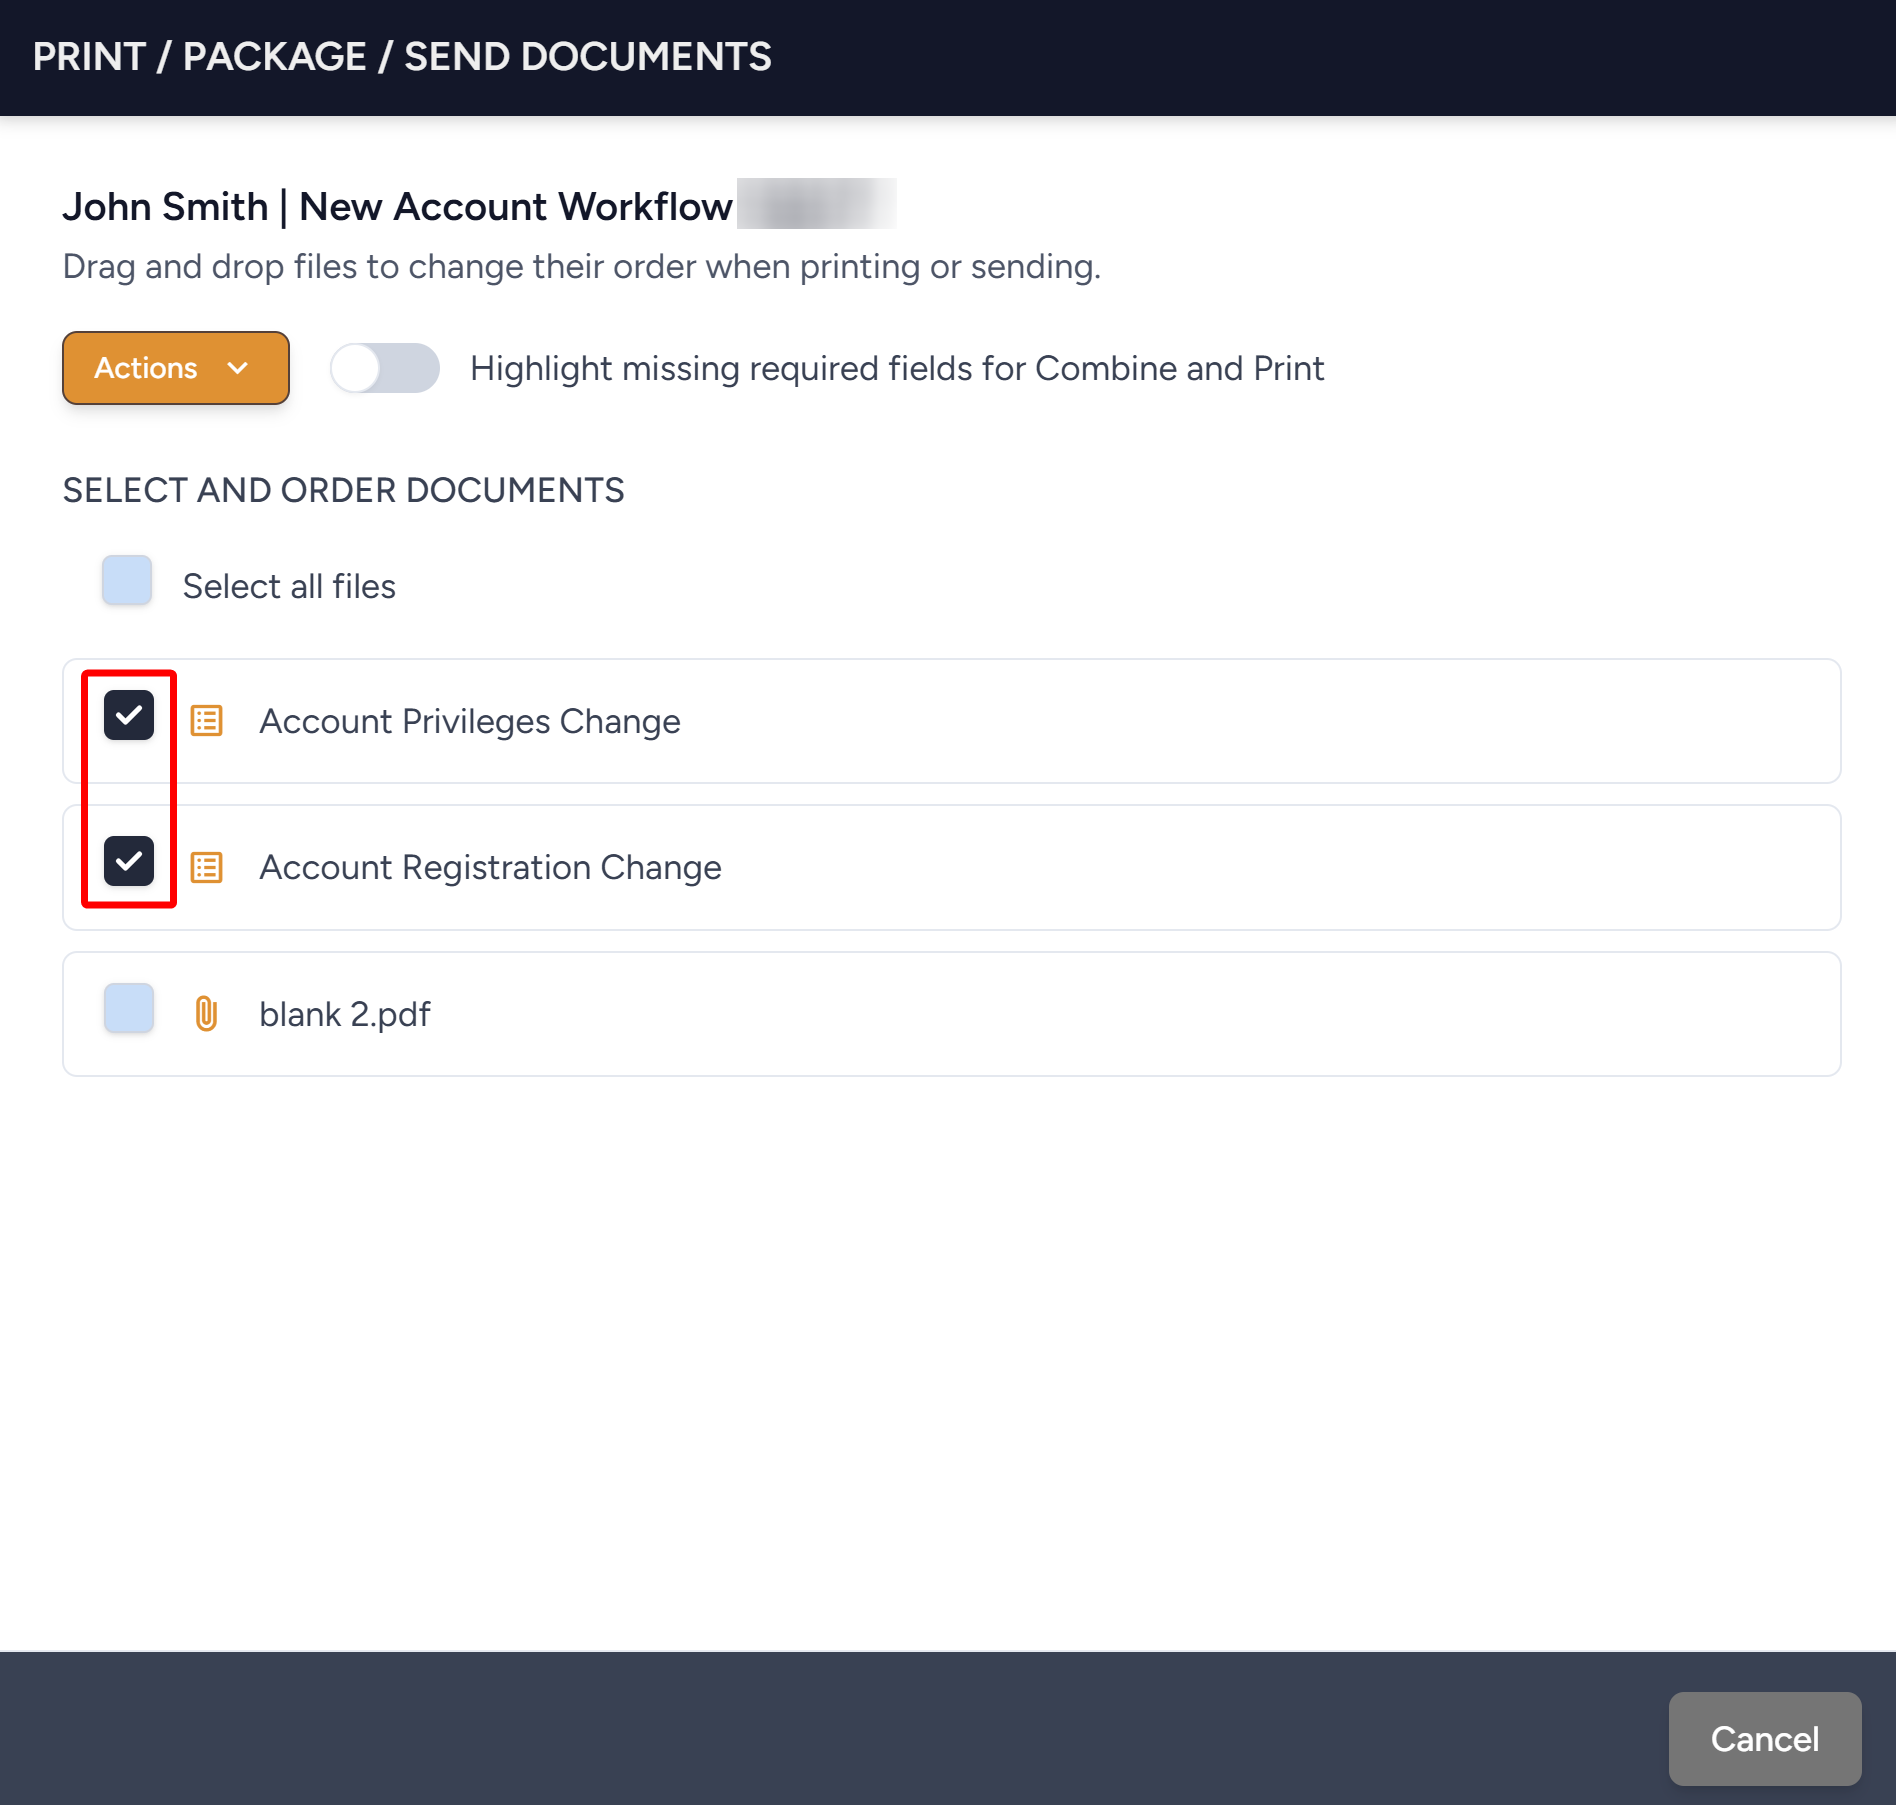
- The Print/Package/Send Documents drawer will open. Select the forms you wish to fax.
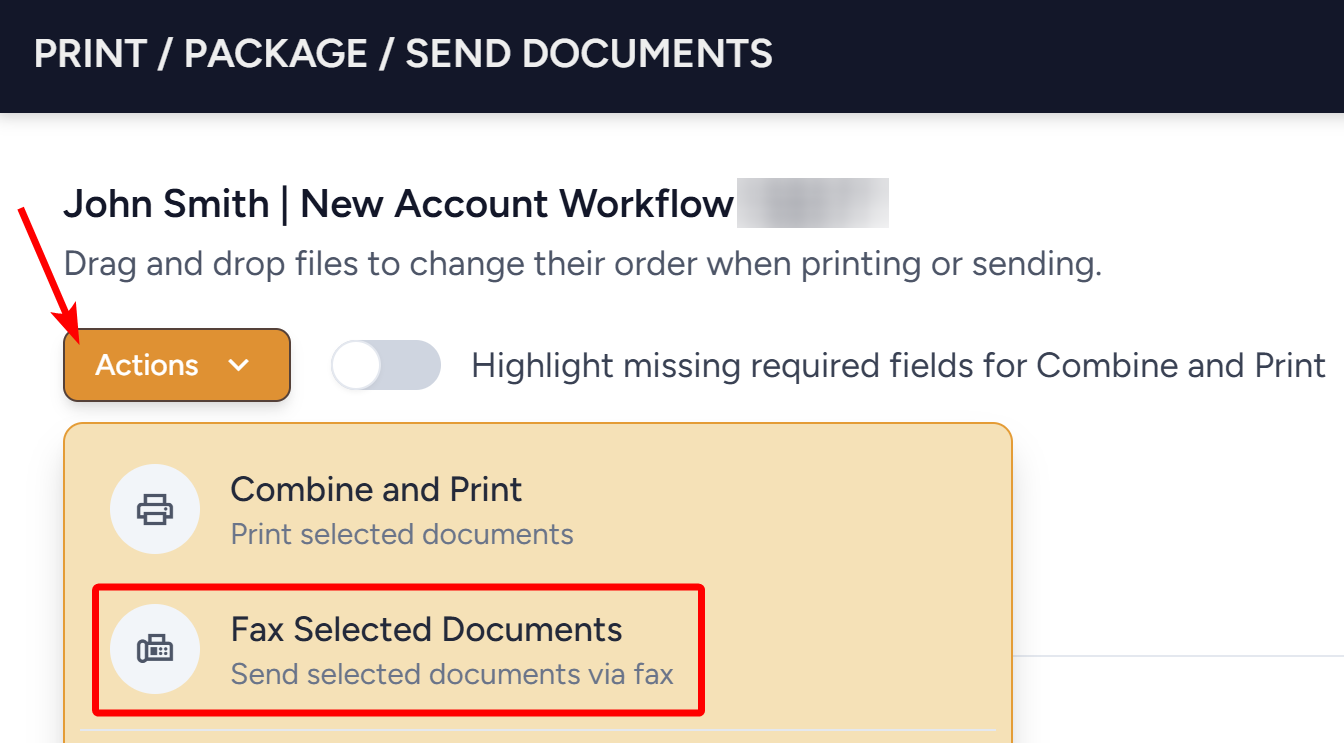
- Click on the Actions button and select Fax Selected Documents from the dropdown.
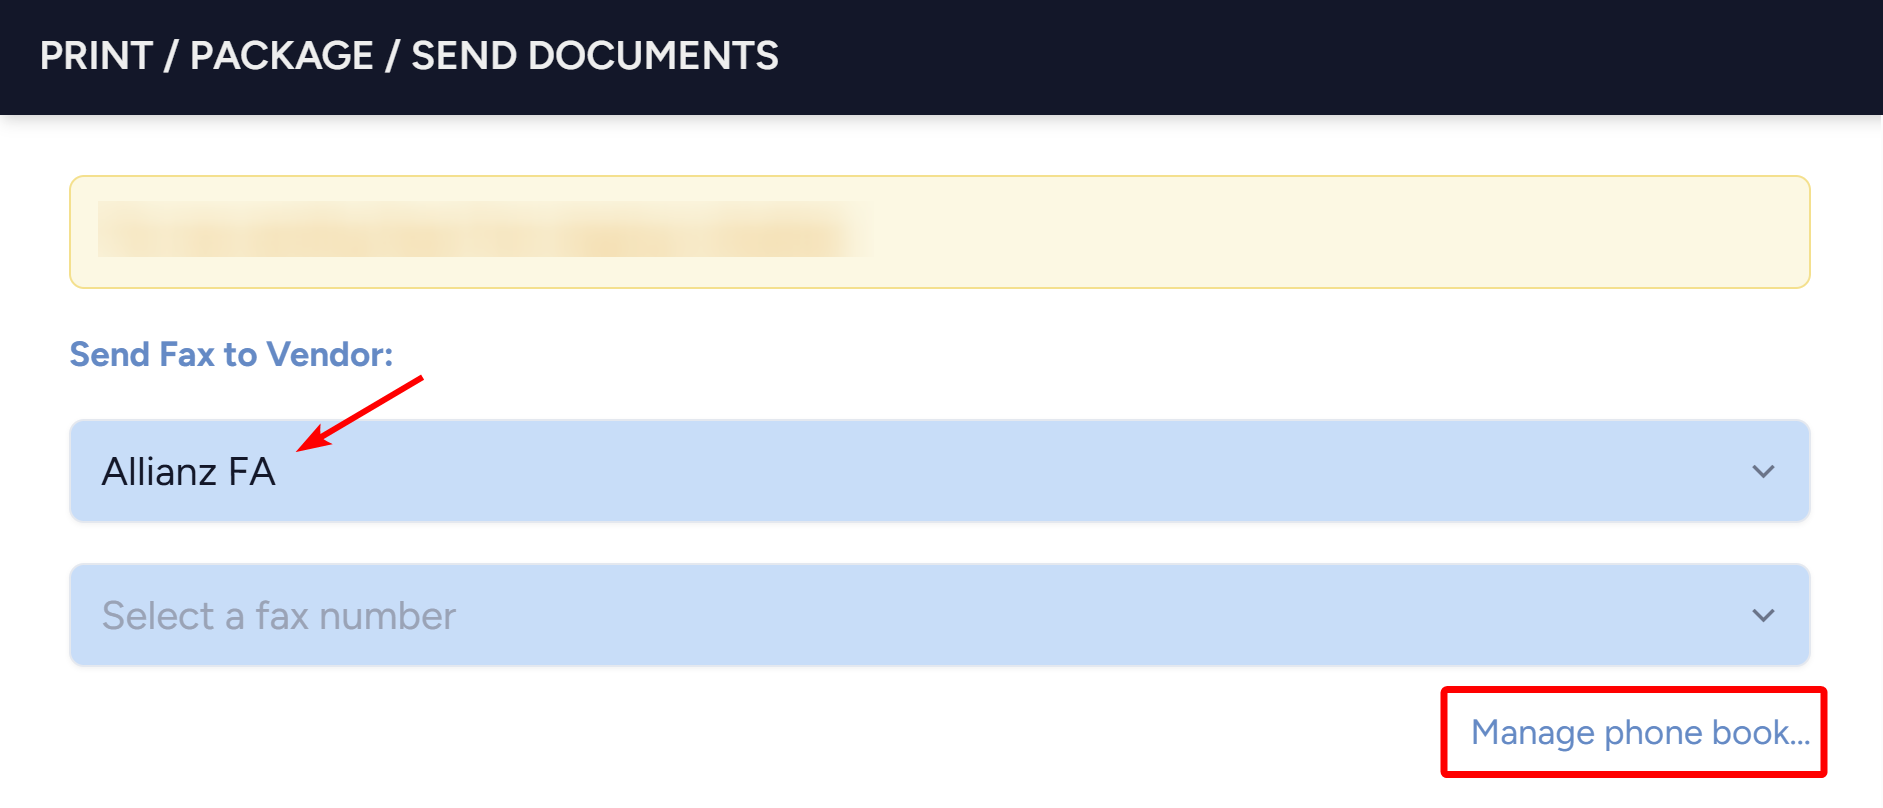
- When you go to select the vendor, if there is no fax machine icon next to the vendor name, there is no current number on file.
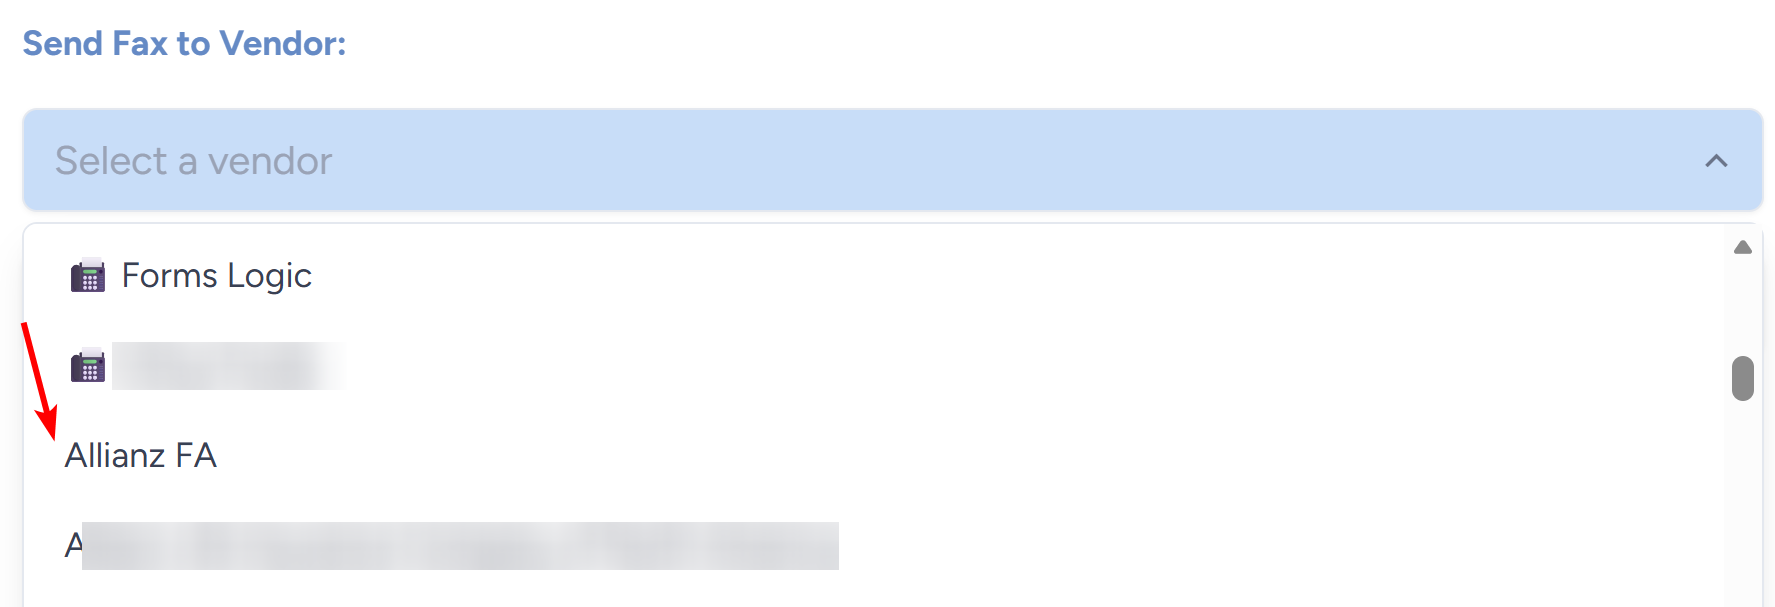
- To add a fax number for that vendor, choose the desired vendor and click Manage Phone Book.
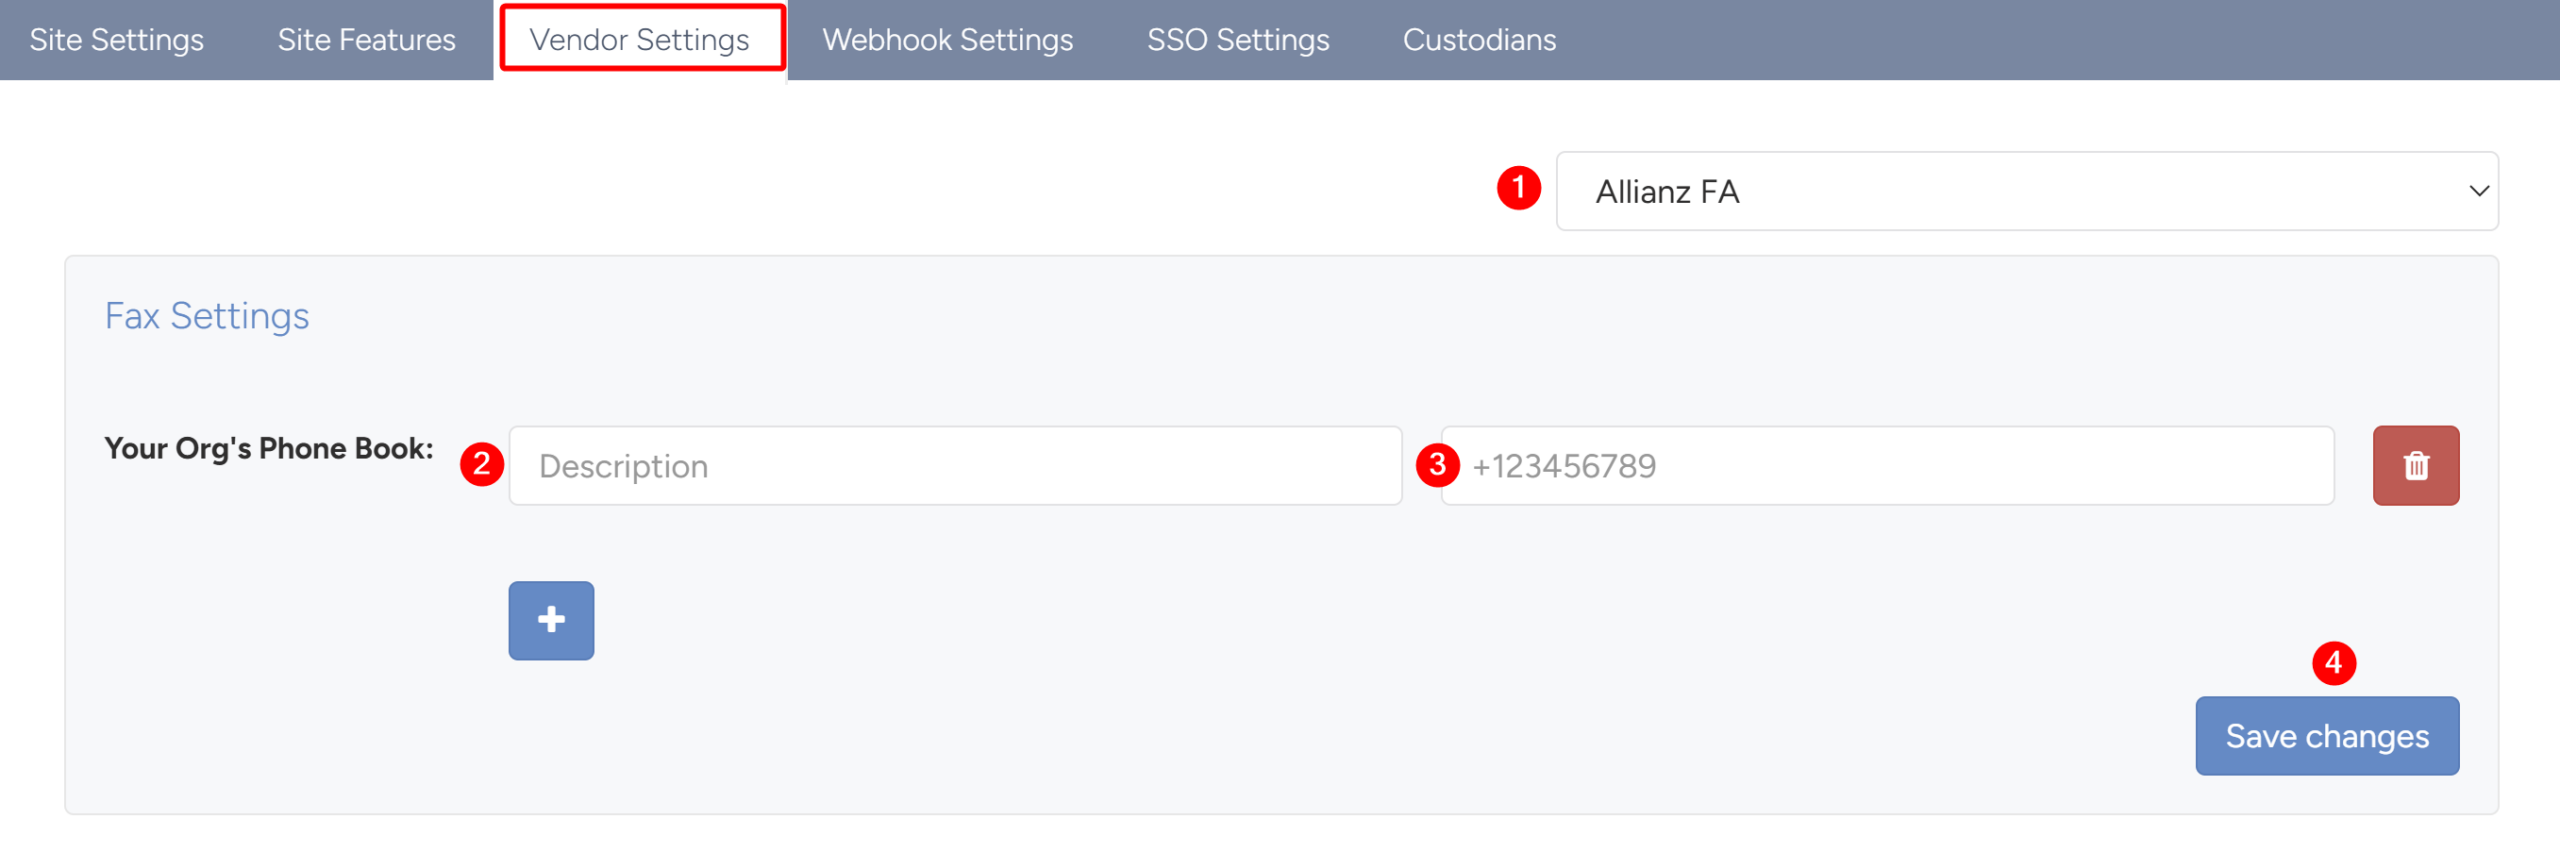
- The system will navigate to the Vendor Settings page — where you will do the following.
- Ensure the Vendor selected is accurate.
- Enter the Description in the entry for Your Org’s Phonebook.
- Enter the Fax Number in the entry for Your Org’s Phonebook.
- Click Save Changes.
- Return to the workflow and refresh the screen. When you navigate back into the faxing drawer, the vendor will now have the fax icon and an available fax number.
13.3 Checking the Fax Status
Once a fax has been sent, you can monitor its status directly from the Workflow List.
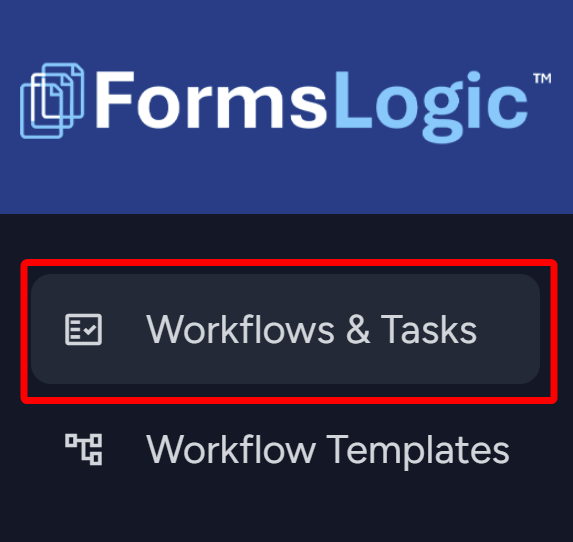
- From the side navigation menu, navigate to the Workflows & Tasks.
- In the Workflow List, locate the Fax column.
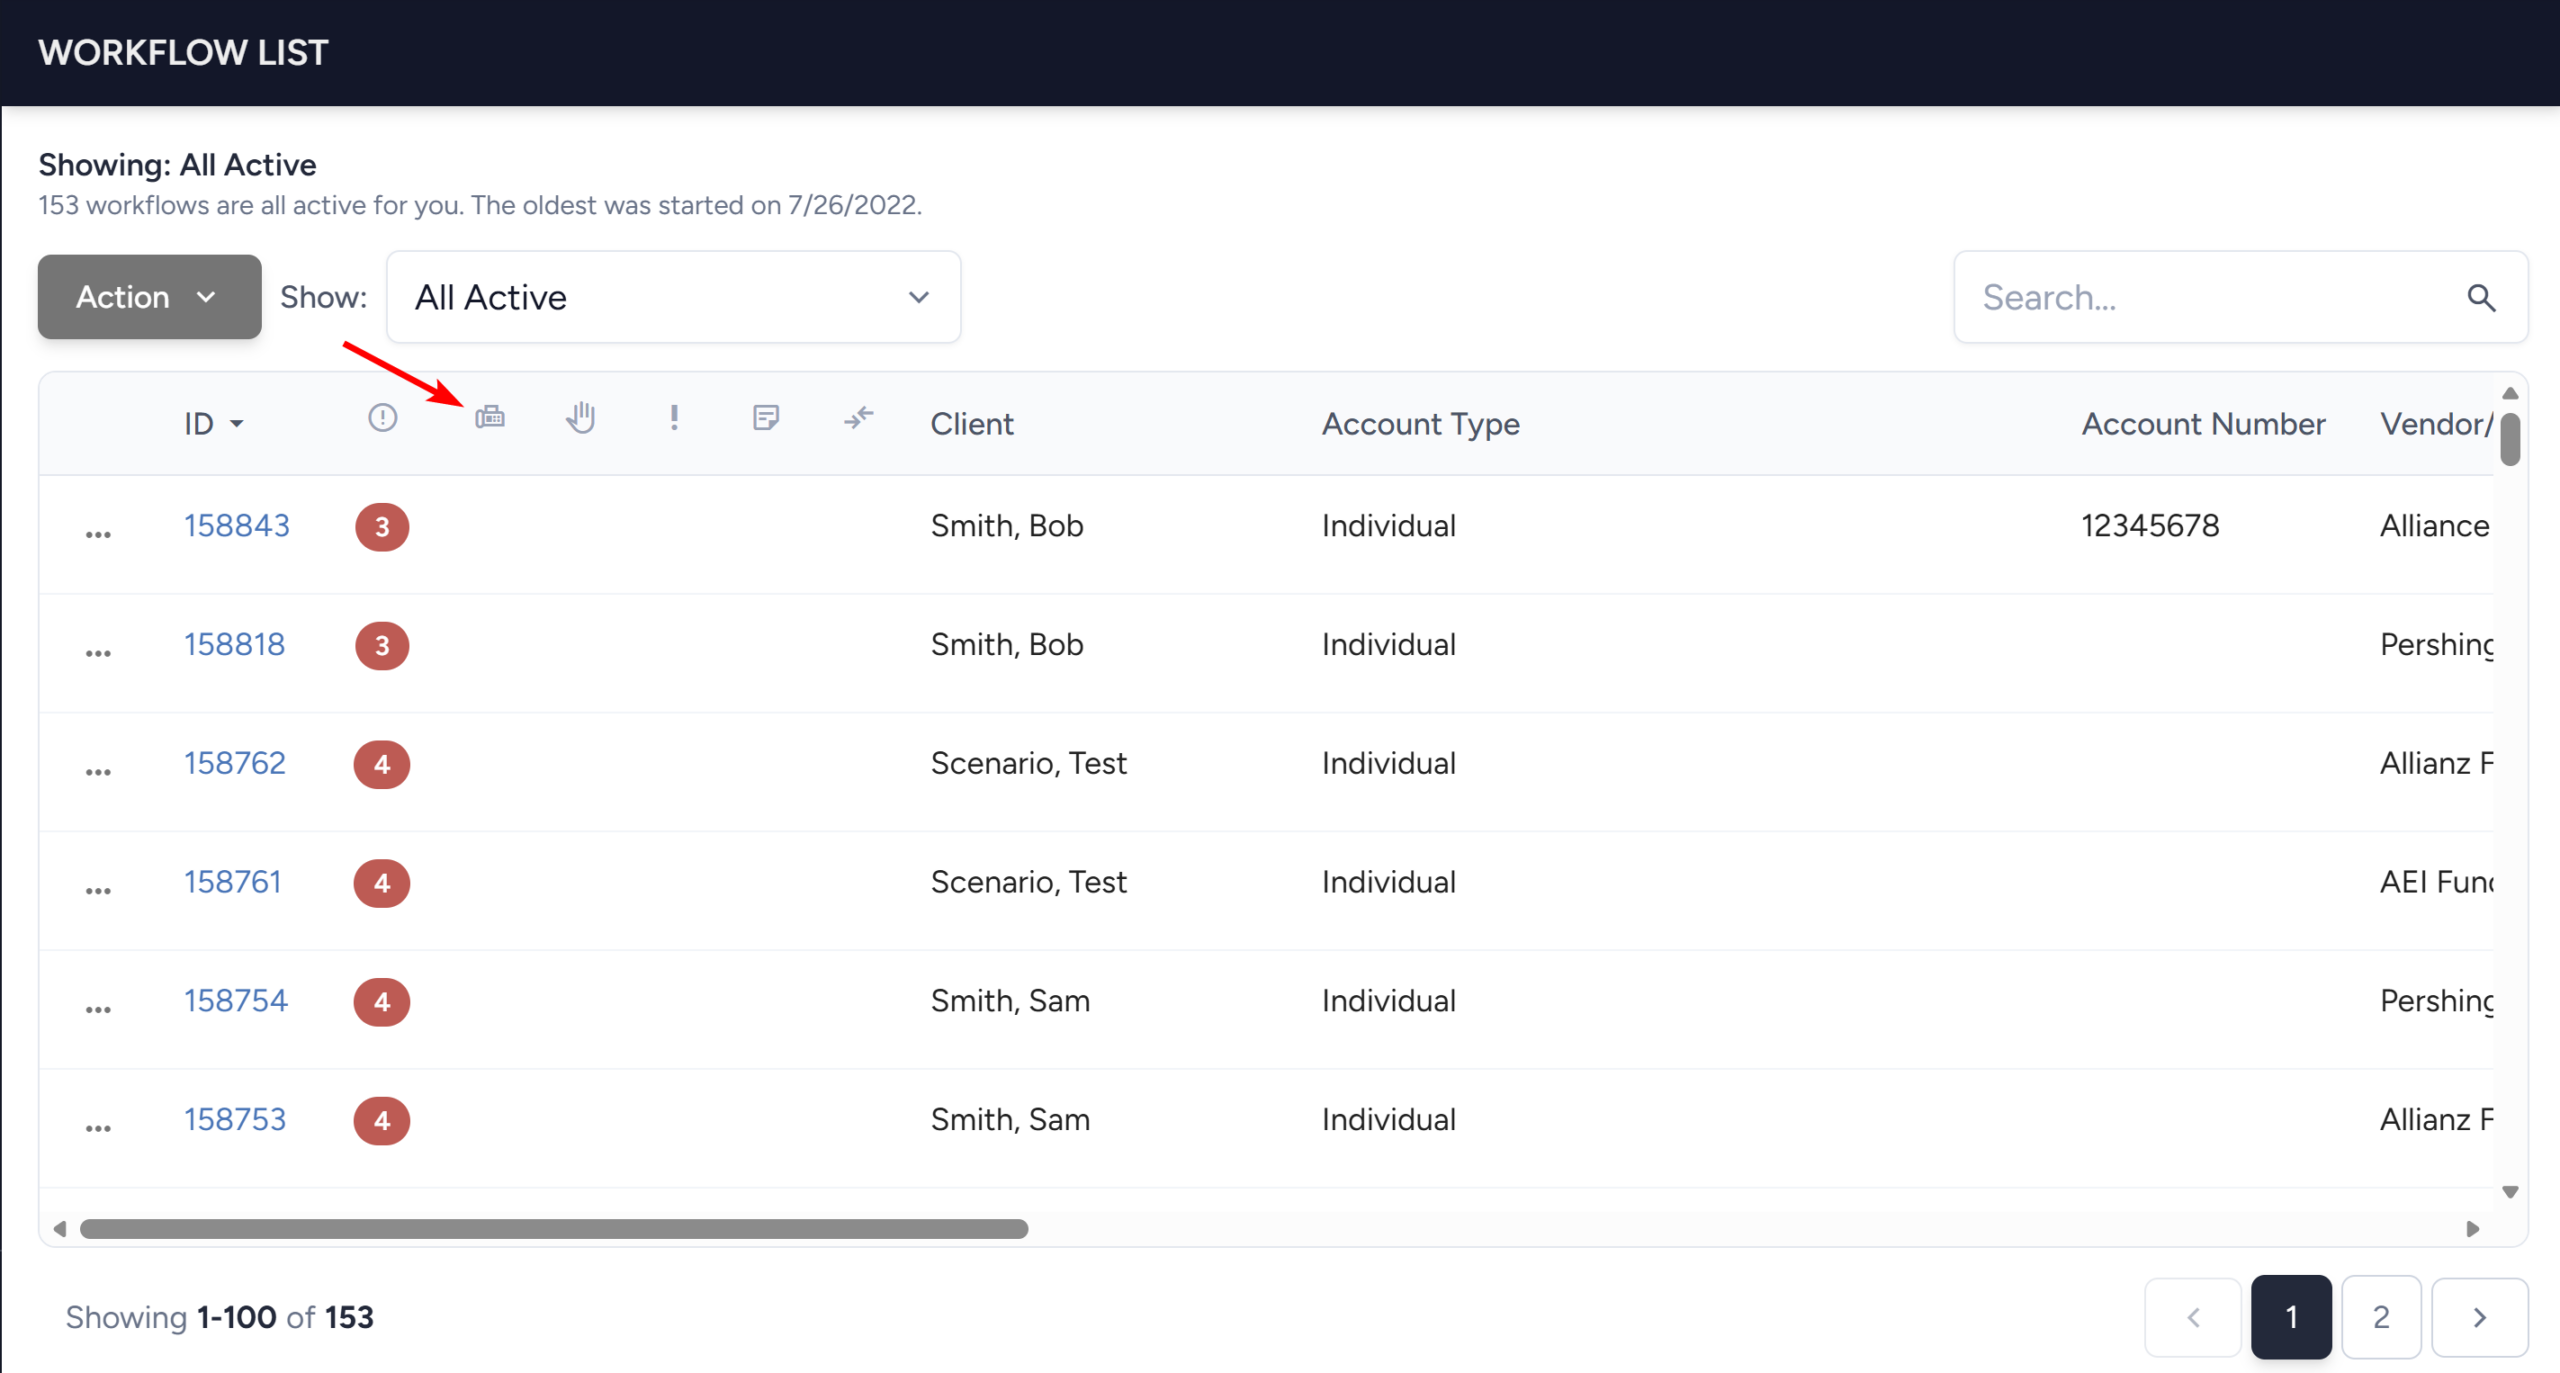
- Once a fax has been initiated for a workflow, a fax icon will appear in this column and hovering over the icon will reflect the current status of the fax transmission.