

CRM Configuration
Forms Logic supports integration with several CRM platforms, allowing you to search clients and create workflows directly from your CRM. Currently Redtail, Wealthbox, and Smart Office are supported. Before setting up a CRM integration, make sure your CRM credentials are available and that your account has the appropriate access.
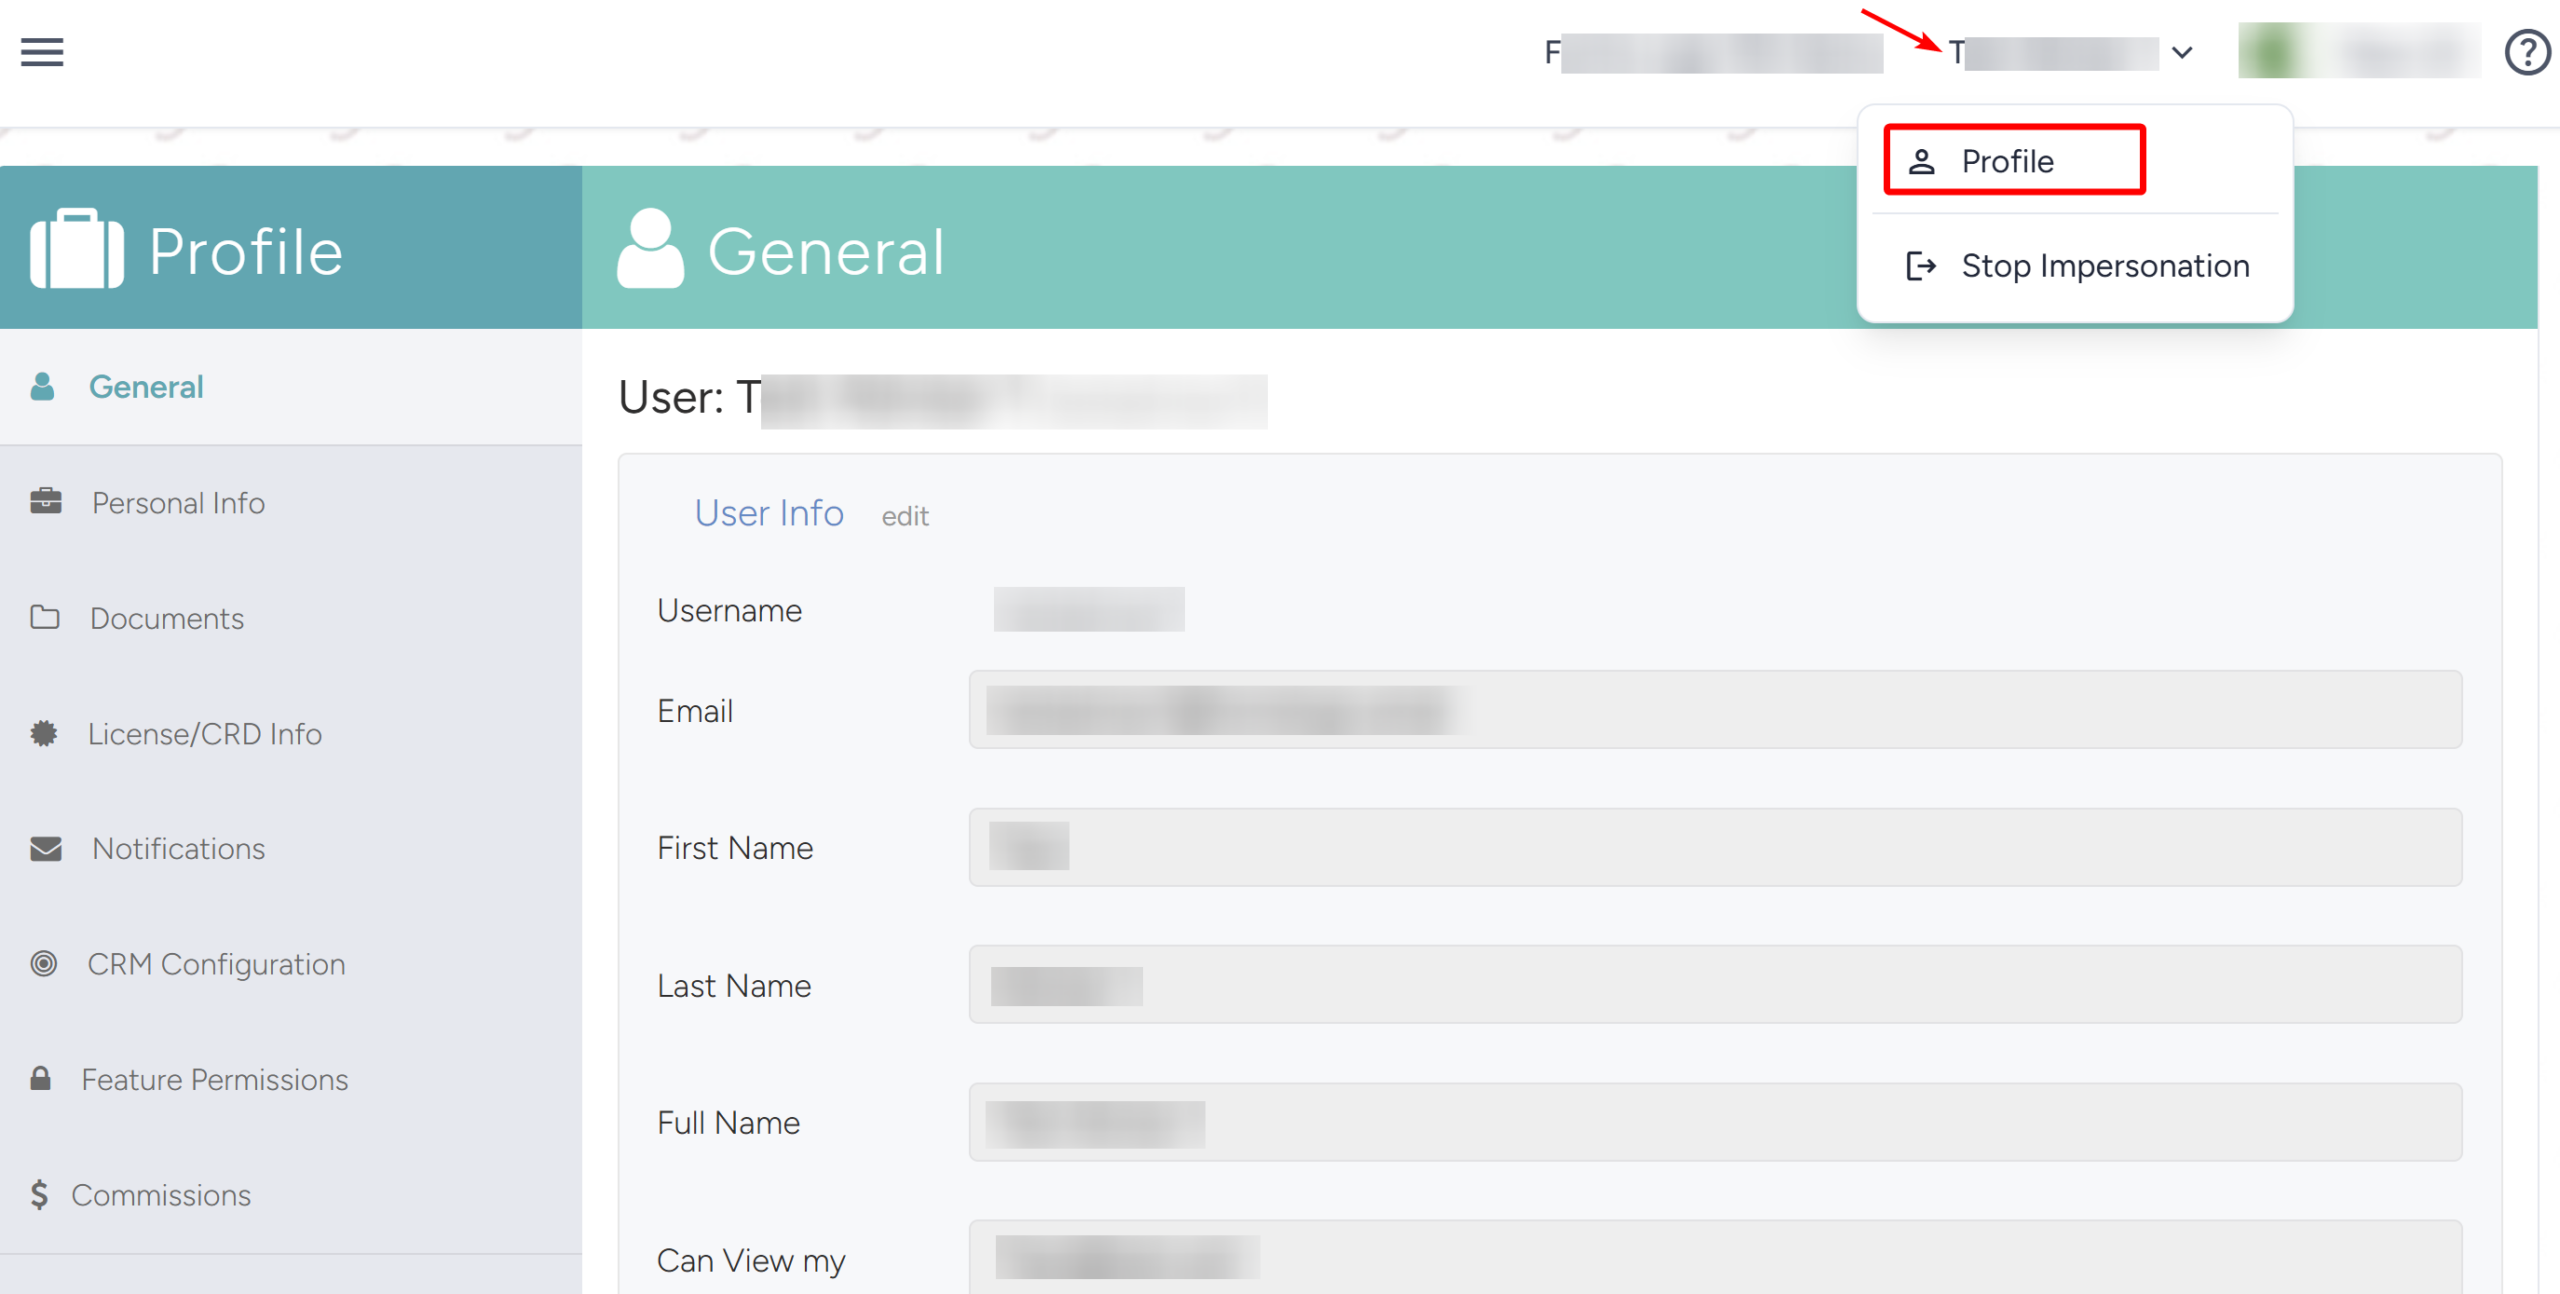
- To get started, click your user name in the upper right and click the Profile button from the dropdown. The Profile will load as shown below.
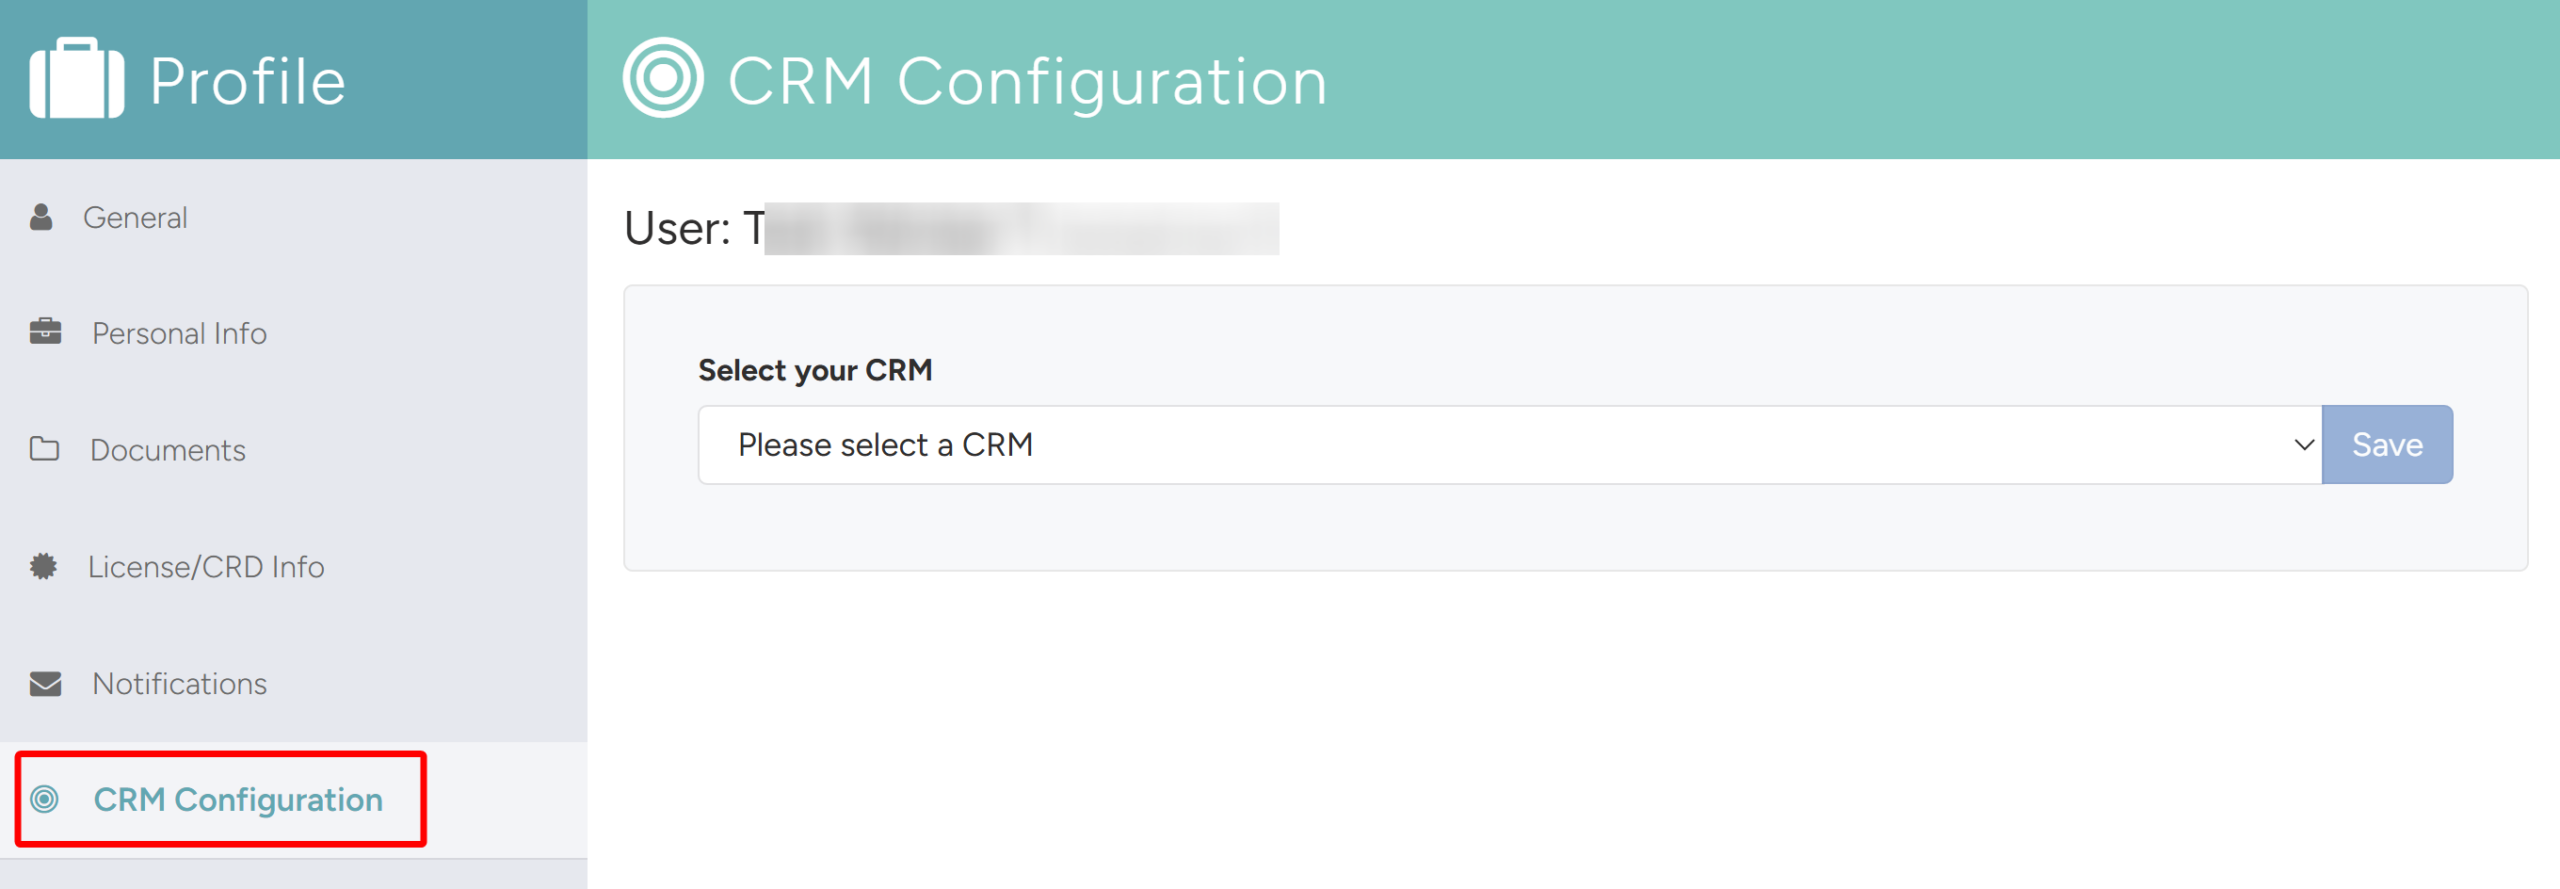
- Navigate into the CRM Configuration tab. Here you will select the specific CRM and click Save.
- See the sections below for detailed setup instructions for the specific CRMs.
Note
Once the CRM is configured, see Section 4 — New Business Workflow Using CRM for information on creating a client workflow using the CRM integration.
4.1 Configuring Redtail
- To Configure Redtail, follow these steps:
- Select Redtail as the CRM and click Save.
- Enter your Redtail Username.
- Enter your Redtail Password.
- Click Retrieve User Key from Redtail.

- Once the Userkey populates, click the Test Connection button to confirm a successful connection.

Note
For additional detail, refer to this guide:
4.2 Configuring Wealthbox
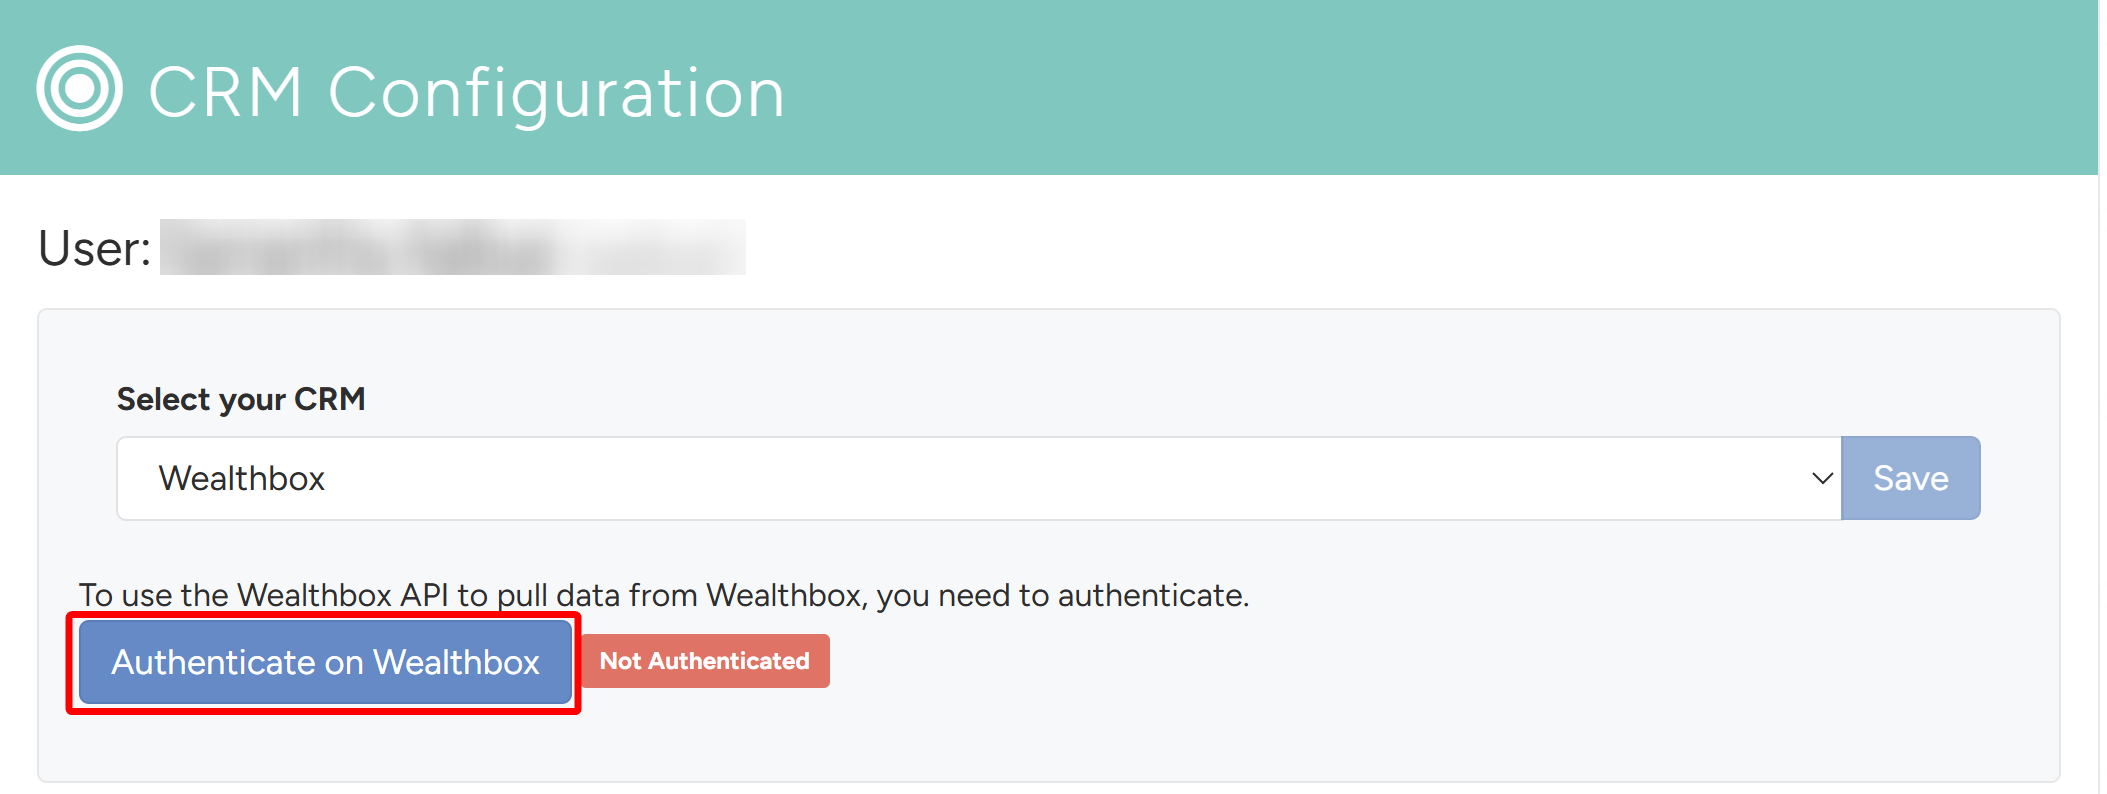
- To configure Wealthbox, select Wealthbox as the CRM and click Save. Click the Authenticate on Wealthbox button.
- The system will take you to the Wealthbox log in page. Enter your Wealthbox credentials and log in.

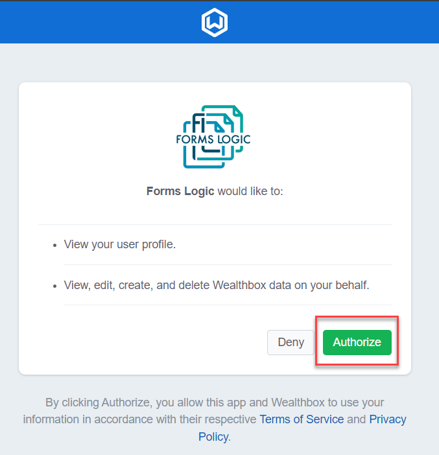
- You will be prompted to authorize the integration with Forms Logic. Approve the authorization.
- Once Authorized, the system will return to the CRM configuration screen where it will show Wealthbox has been authenticated. Click the Test Connection button to confirm a successful connection.
Note
For additional detail, refer to this guide:
4.3 Configuring SmartOffice
- Before you begin to set up Smart Office in Forms Logic, the Smart Office user or admin will need to enable the Forms Logic Integration within Smart Office for the user.
- Once that is done, follow these steps:
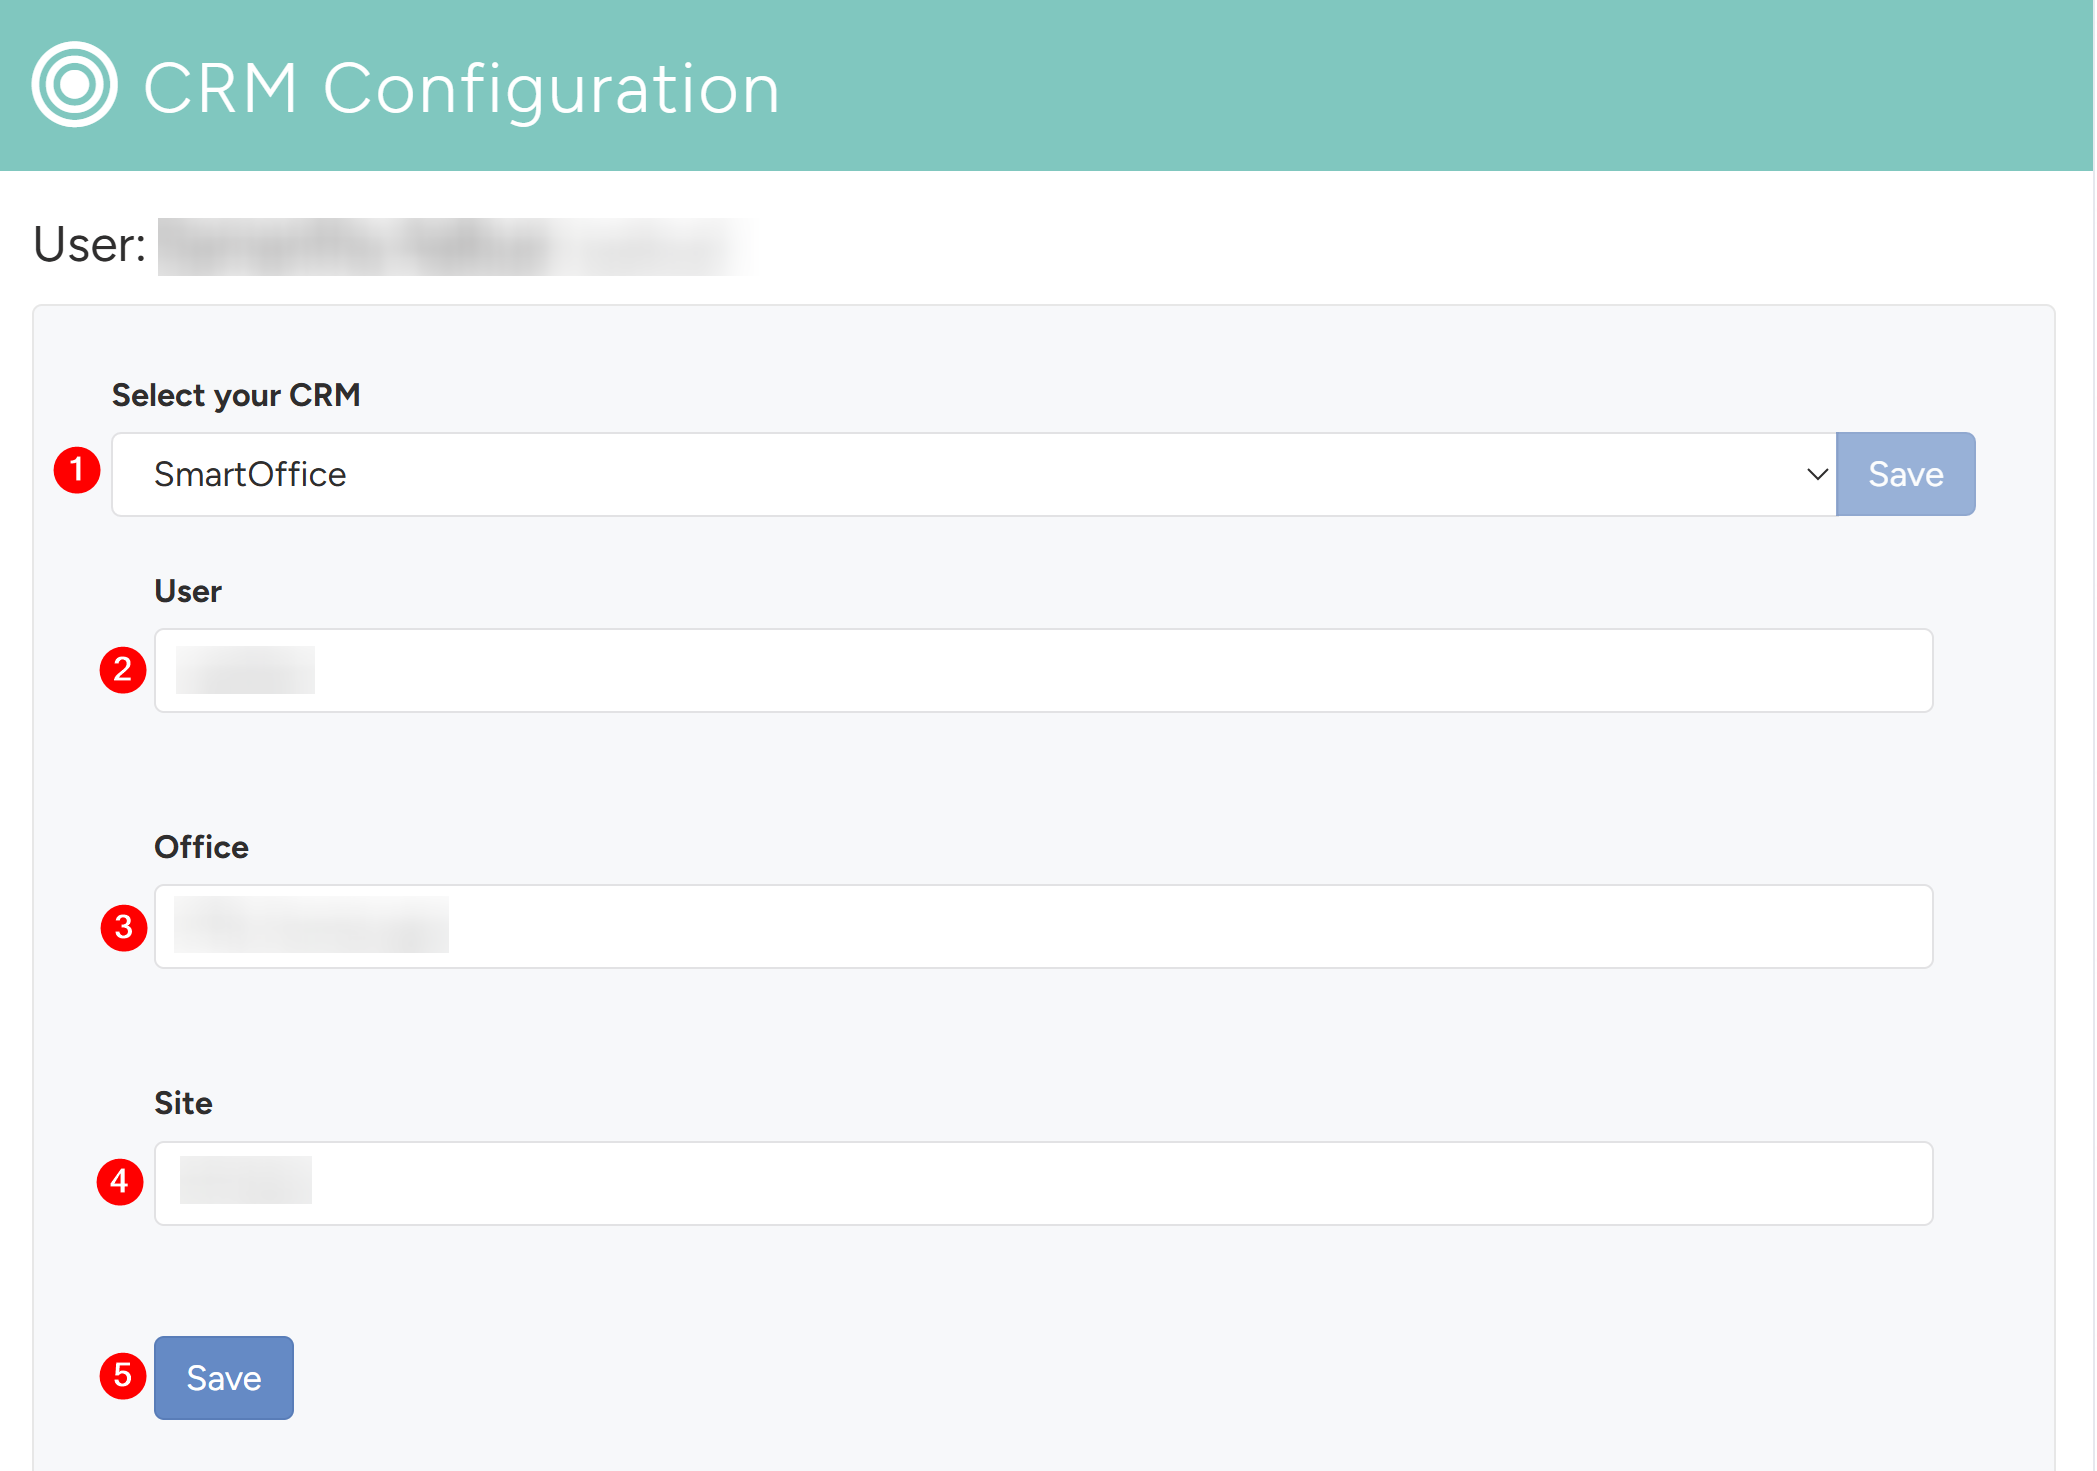
- Select SmartOffice as the CRM and click Save.
- Enter the Username from Smart Office.
- Enter the Office.
- Enter the Site configuration.
- Click Save.
Note
For additional detail, refer to this guide: